
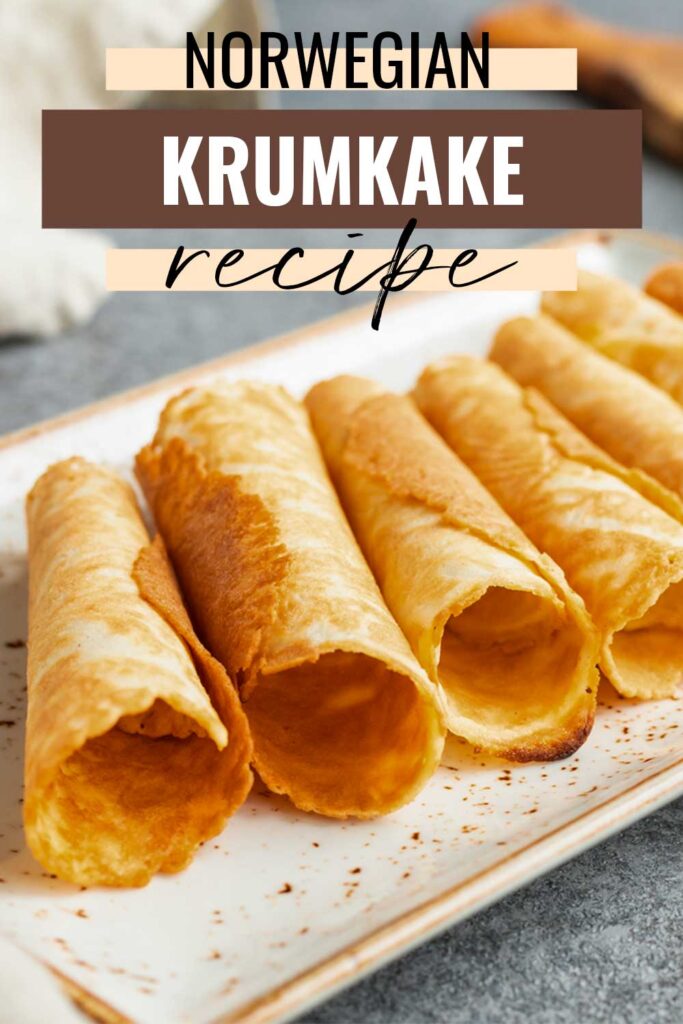

Any Christmas celebration for us is incomplete without the traditional Norwegian Krumkake recipe. These thin, crispy, and beautifully imprinted waffle cookies are a beloved Norwegian tradition, often enjoyed during the holiday season. Scandinavian dessert is a delicate waffle cookie that is crispy and oh-so delicious. Today, I will walk you through the process of making krumkake from scratch, providing step-by-step instructions, essential tips, and flavor variations to make this treat your own.
What is Krumkake?
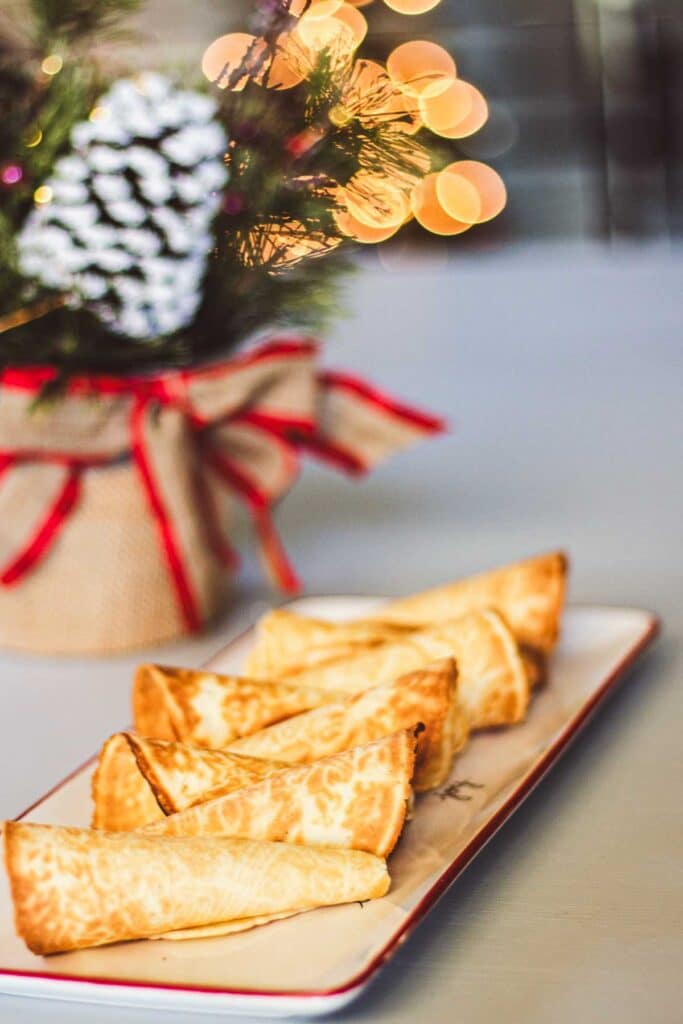
I have so many fond memories of enjoying krumkake (pronounced “krooom-cah-cah”). The name krumkake translates to “curved cake.” These cookies are known for their delicate texture, subtle sweetness, and intricate designs. Resembling a cross between a cookie and a waffle, krumkake is cooked using a special iron griddle that imprints beautiful patterns onto the thin batter. Once cooked, the warm krumkake is quickly rolled into a cone shape, creating a crisp and elegant treat.
Essential Equipment
Before we begin, let’s make sure you have the necessary equipment to make krumkake. Here’s what you’ll need:
1. Krumkake Iron
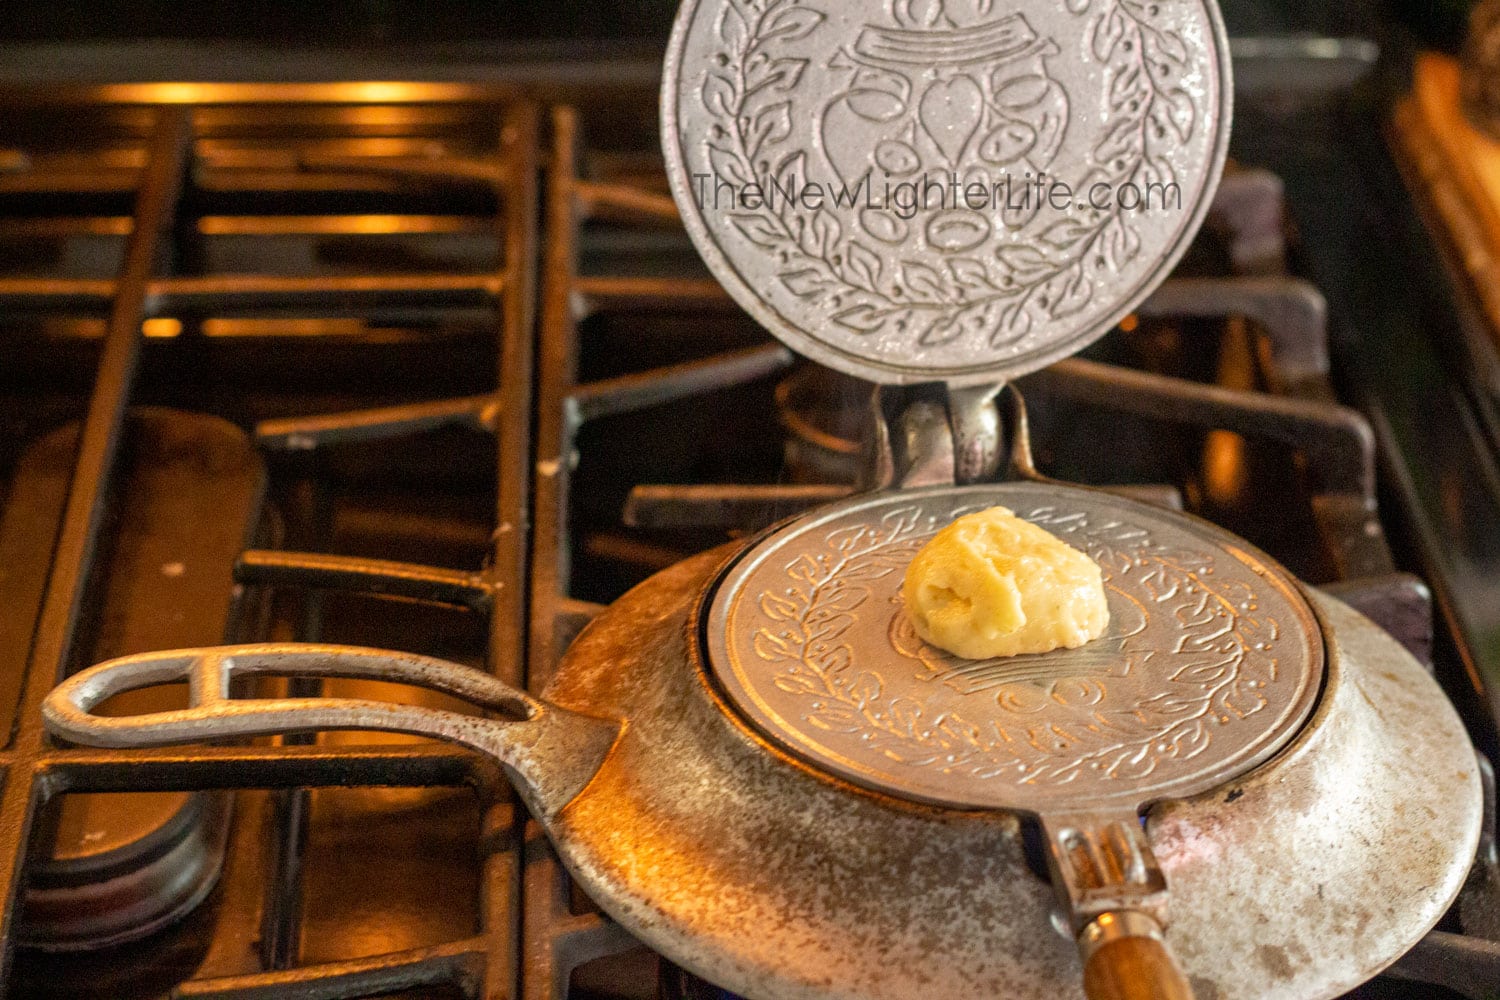
Krumkake Iron – The star of the show, a krumkake iron is a must-have for creating these gorgeous cookies. You may use either a stovetop or an electric iron, depending on your preference. The iron should have two sides imprinted with decorative designs.
- Electric Iron – The benefits of an electric iron are that you can cook 2 krumkaker at a time. However, in my experience with my mom’s electric iron, the cookie is not as thin as the stovetop iron.
- Stovetop Iron – You may use a stovetop krumkake iron on a flat-top, gas, or coil-top burner. This is the type of iron I use, and as you can see from the photo below, my iron is VERY old. My son dropped my iron last year so I decided to try out the Bethany House stovetop iron this year. (I LOVE Bethany House tools for making lefse)
2. Cone-Shaped Form
To shape the warm krumkake into a cone, you’ll need a cone-shaped form. This can be made of either wood or metal, providing a sturdy structure for the delicate cookie. Be aware that the metal cone can get very hot while shaping.
3. Mixing Bowl
You’ll need to have a medium mixing bowl on hand to combine the ingredients and ensure a smooth batter.
4. Whisk or Mixer
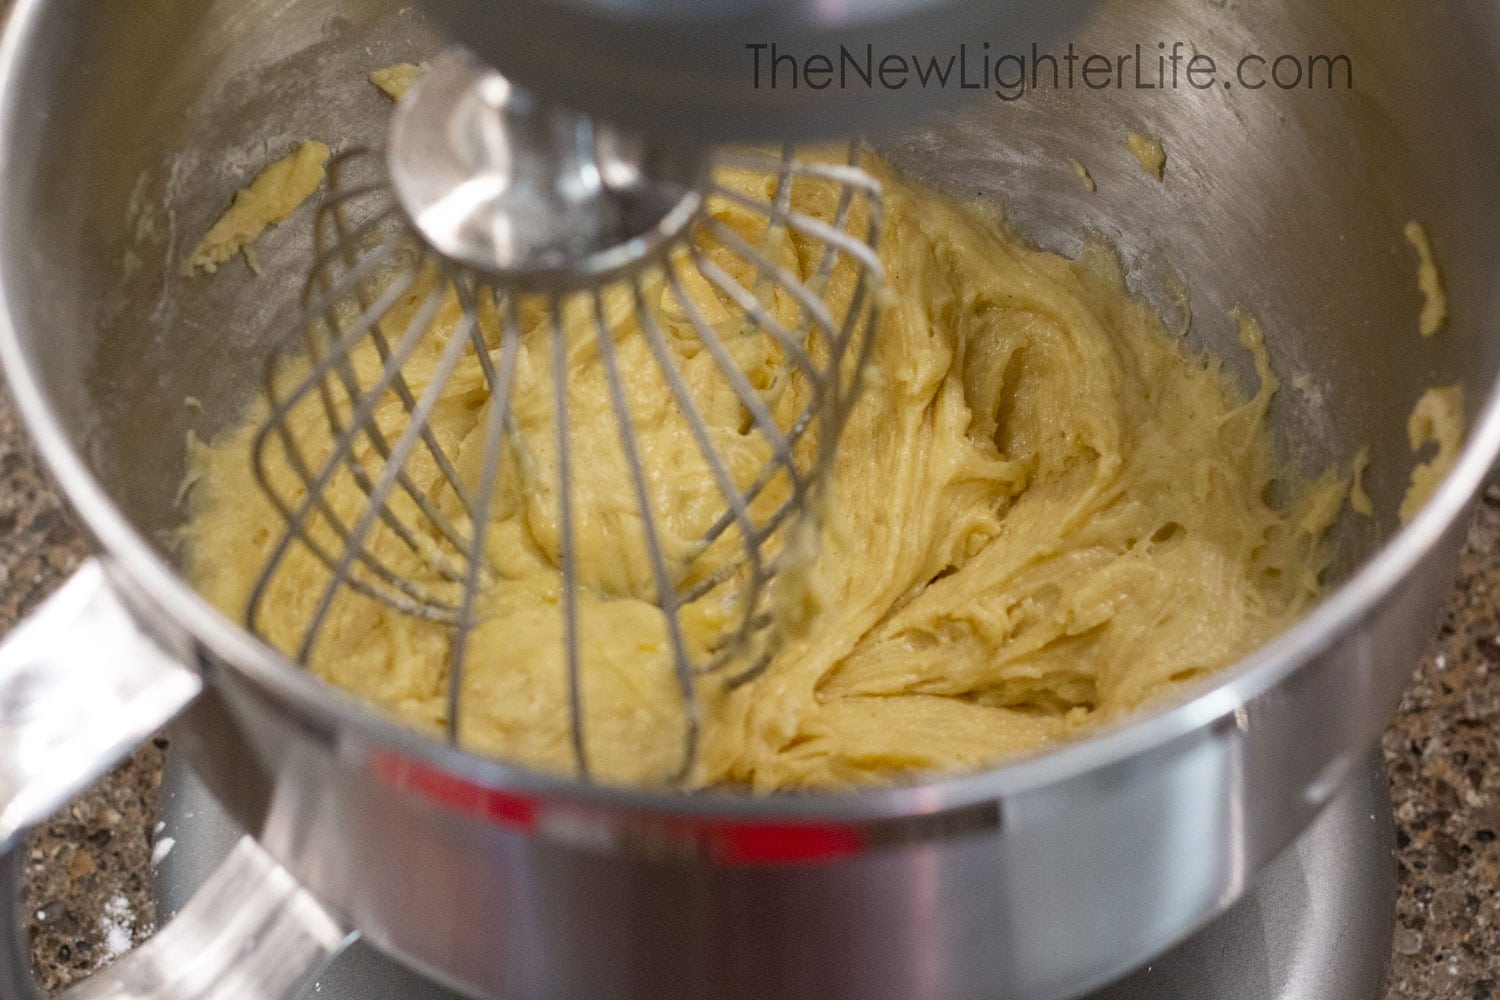
A whisk or electric mixer will help in thoroughly combining the ingredients and creating a smooth and creamy batter. If you use a mixer be careful not to overwork the batter.
5. Spatula
A small offset spatula is useful for gently lifting the krumkake off the iron and transferring it to a cooling rack.
6. Kitchen Towel
A clean kitchen towel is handy for rolling the warm krumkake around the cone-shaped form and protecting your fingers from the heat.

Ingredients for Norwegian Krumkake Recipe
Now that you have your equipment ready, let’s gather the ingredients needed to make krumkake. These ingredients are straightforward and likely already in your pantry:
- All-purpose flour
- Unsalted butter
- Eggs
- Granulated Sugar
- Cornstarch
- Vanilla extract
- Cardamom
Flavor Options
If you’d like to experiment outside of the traditional cardamom flavor you can try the following:
- Almond (omit cardamom and add 1 tsp of almond extract)
- Lemon (omit cardamom and add 1 tsp lemon extract & 1 tsp of lemon zest)
- Cinnamon (omit cardamom and add 1 tsp ground cinnamon)
Expert Tips for Making My Norwegian Krumkake Recipe
To help you achieve krumkake perfection, here are some expert tips and tricks:
- Preheating and greasing the iron: It’s crucial to preheat the krumkake iron properly (medium-high is a good starting point) to ensure even cooking. Additionally, lightly grease both sides of the iron before your first batter is placed. This will prevent the batter from sticking and ensure easy removal of the cookies. After the first krumkake, you should not have to regrease your iron due to the high butter content in the batter.
- Batter placement: The Batter is best placed slightly above the pattern’s center on the hot iron. This will allow the batter to spread forward as you close the iron.
- Iron pressure: As you close your iron, gently squeeze the handles together so the batter spreads and cooks more evenly. You will feel the batter bubble slightly at this stage. It may take a few attempts to achieve the right thickness and pressure needed. If the batter spills over the iron’s edge, take a butter knife and gently scrape the spilled batter off, so your end product will have a smooth edge.
- Practice makes perfect: Don’t be discouraged if your first few krumkaker don’t turn out perfectly. As you can see from the previous tips, it takes a bit of practice to find the right heat setting, timing, batter amount, and pressure for your specific iron. Adjust the cooking time and temperature as needed to achieve the desired golden brown color and crisp texture.
- Safety safety safety: By using a clean dishtowel to handle your piping hot cookie, you will save your hands from burns as you shape the dough around the cone.
Flavor Variations and Serving Suggestions
While traditional krumkake is delicious on its own, you can also explore various flavor variations and serving suggestions to make it your own. Here are some ideas to inspire your creativity:
- Citrus Zest: Add a burst of citrus flavor by incorporating 1/2 tsp of lemon or orange zest into the batter. This adds a refreshing twist to the classic krumkake.
- Spiced Krumkake: Experiment with different spices, such as cinnamon or nutmeg, to infuse warmth and depth of flavor into the cookies. Just a pinch of spice can transform the traditional krumkake into a festive delight.
- Filling Options: While whipped cream is a popular filling choice, you can explore other options. Try filling the krumkake with chocolate ganache, fruit preserves, or even a scoop of your favorite ice cream for a fancy and decadent treat.
- Garnishes: By garnishing with a dusting of powdered sugar or drizzles of melted chocolate, you can add some color and elegance to these simply beautiful cookies.
Frequently Asked Questions
1. Can I make krumkake without a special iron?
Unfortunately, the unique imprinted design and delicate texture of krumkake can only be achieved with a krumkake iron. However, if you’re feeling adventurous, you can experiment with a pizzelle iron, which produces a slightly thicker and crispy cookie.
2. How long does krumkake stay fresh?
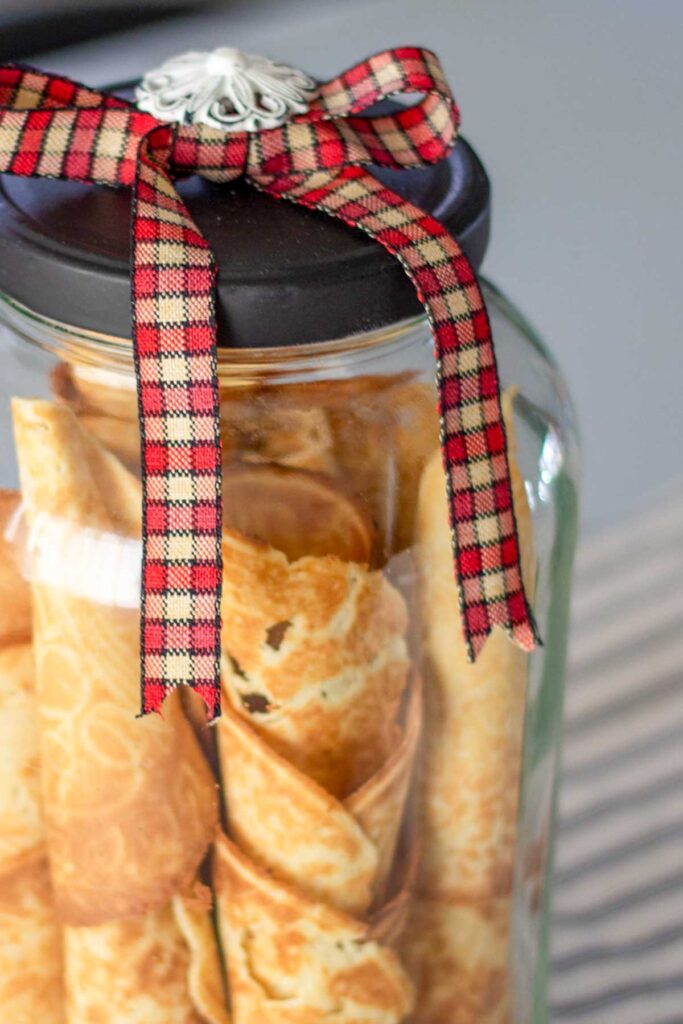
Krumkake can be stored in an airtight container at room temperature for up to a week. However, for the best texture and crispness, it is recommended to consume them within the first few days.
3. Can I freeze krumkake?
Yes, krumkake can be frozen for up to 3 months. Place them in a freezer-safe container or bag. I’ve successfully stacked the krumkake together with no issues of sticking.
4. Can I make krumkake gluten-free?
While this recipe calls for all-purpose flour, you can experiment with gluten-free flour blends for a gluten-free version. However, be aware that the texture and taste may differ slightly from the traditional krumkake.
My Norwegian Krumkake Recipe
The Very Best Norwegian Krumkake Recipe
Ingredients
- 4 eggs
- 1 cup sugar
- ½ cup salted butter melted and cooled
- ½ tsp. vanilla extract
- ½ tsp. ground cardamom
- 1 ½ cups all-purpose flour
- 2 tbsp. cornstarch
Instructions
- Whisk the eggs and sugar together, being careful to NOT over mix. Pour the melted and cooled butter, vanilla, and cardamom into the egg/sugar mixture and mix well.
- In a separate bowl, mix the flour and cornstarch together.
- Pour the flour mixture into the egg mixture and mix until the dough is thoroughly mixed. The dough will be thicker than pancake batter.
- Heat your iron over medium-high heat. Once heated, lightly spray with cooking spray or melted butter. You only need to grease your iron one time as the butter in the batter will keep your krumkake from sticking.
- Scoop out a scant tablespoon of batter and place it on the hot iron slightly above the center of the pattern. This will allow the batter to spread forward.
- Gently squeeze the iron together so the batter will spread. You will feel the batter bubble slightly at this stage.
- Leave the batter in the closed iron for 20 to 40 seconds and flip. You can open the iron intermittently to determine if the krumkake needs to cook longer. A fully cooked krumkake to be light to medium brown.
- Once fully cooked, remove the krumkake with an offset spatula and immediately wrap it around the shaping cone, using a clean kitchn towel to prevent burns.
- Let the krumkake cool the wooden cone while you cook your next krumkake. This time will allow the cooked sugar in the krumkake to harden and set.
- Store the finished krumkake in an airtight container at room temperature for up to 1 week or in the freezer for up to 3 months.
Notes
Nutrition
Conclusion
Congratulations! You’ve made it through this extremely long post! Ha!!! With your krumkake iron in hand, you’ll be able to make these crispy and beautifully imprinted waffle cookies. The combination of subtle sweetness, elegant designs, and the option to fill them with whipped cream or other delicious fillings makes krumkake a truly special treat. So gather your loved ones, indulge in the joy of baking, and savor every bite of these delightful Norwegian delicacies. Happy krumkake making!


I ended up with a dough that was “lacey” in the iron