
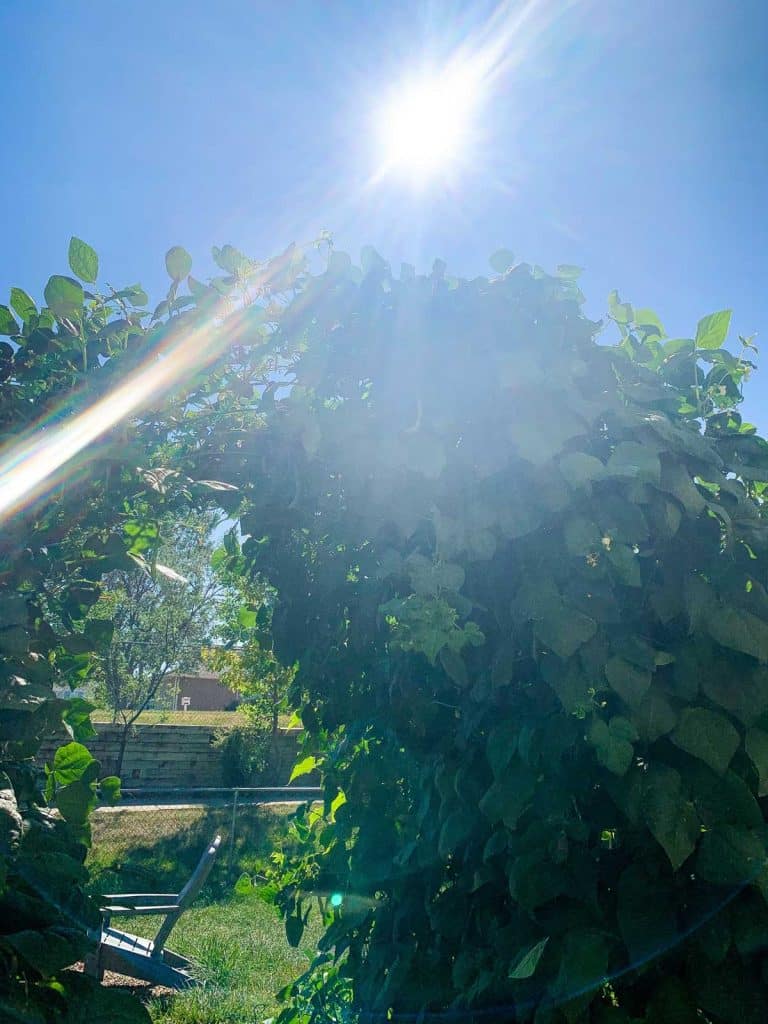
If you have a love for gardening, you know the value of vertical gardening, especially when space is limited. A cattle panel trellis arch is an excellent solution if you’re looking to maximize your gardening area while adding attractive architectural elements. Today, I’ll walk you through the process of building your own cattle panel trellis arch and provide helpful tips for planting and maintaining your vertical garden.
I’m super excited about my trellises! I first learned about these from one of my favorite YouTubers, Roots & Refuge Farm, if you’d like to see Jessica’s explanation, please click here.
Why Choose a Cattle Panel Trellis Arch for Your Vertical Garden
A cattle panel trellis arch offers several benefits for vertical gardening:
- Space-saving: Vertical gardening allows you to grow more plants in a smaller area, making it ideal for small gardens and urban spaces.
- Easy harvesting: With plants growing vertically, harvesting becomes more accessible and less labor-intensive.
- Improved air circulation: Vertical gardening promotes better air circulation around plants, reducing the likelihood of fungal diseases.
- Pest control: Raising plants off the ground helps protect them from soil-dwelling pests.
- Aesthetic appeal: A cattle panel trellis arch adds a beautiful visual element to your garden.
- Cost-effective: Materials for 1 arch costs about $30 but these trellises last for many many years.
Materials and Tools Needed for Building a Cattle Panel Trellis Arch
To build a cattle panel trellis arch, you will need the following materials:
- A cattle panel (16 feet long and 50 inches wide)
- Metal T-posts (four per arch; 7 or 8 feet in length)
- UV-resistant zip ties (at least 3-4 per T-post)
- Bolt cutters or wire cutters (optional, for cutting cattle panels)
- Angle grinder (optional, for smoothing cut edges)
- Post pounder
Step-by-Step Guide to Building a Cattle Panel Trellis Arch
Step 1: Select the Ideal Location for Your Trellis Arch
Choose a location in your garden that receives at least 8 hours of sunlight daily, as most climbing vegetables require plenty of sun. Try orienting the arch with its opening facing north/south to ensure equal sunlight exposure on both sides. If that’s not possible, choose a direction that works best for your garden’s layout.
Step 2: Prepare the Cattle Panel
If you need to, use bolt cutters or wire cutters to trim your cattle panel to the desired size. If cutting is necessary, smooth any sharp edges with an angle grinder.
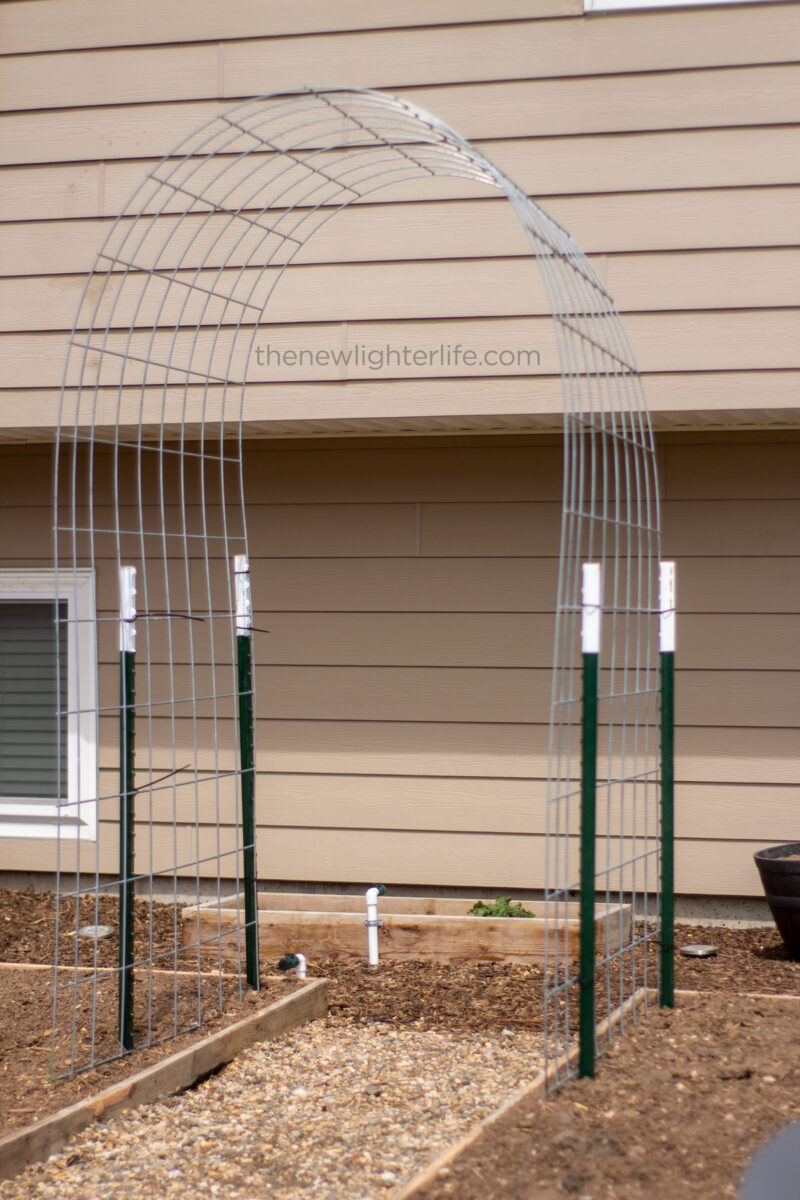
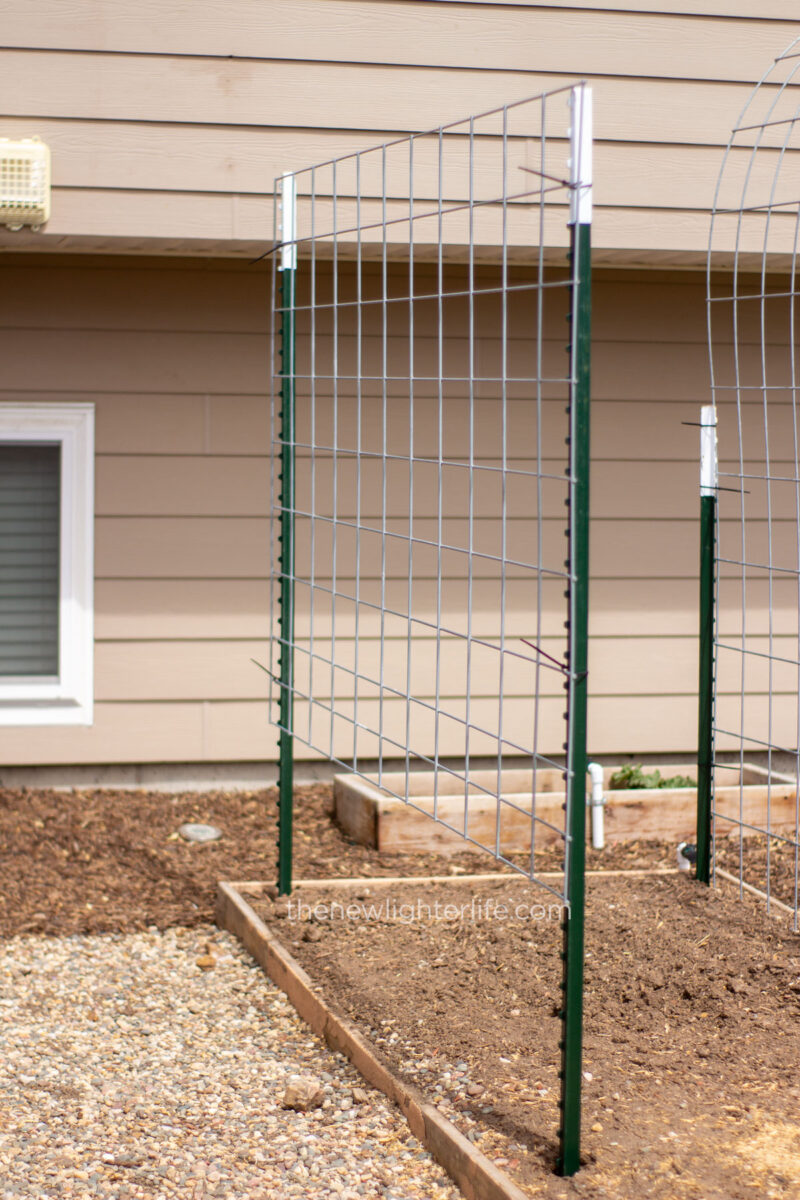
Step 3: Install the Metal T-Posts
Position the four T-posts in a rectangle, with two on each side of the arch’s base. The distance between the posts should be about 4 to 5 feet apart to prevent bowing. Use a post pounder to drive the T-posts into the ground, ensuring they are straight and at equal depths.
Step 4: Bend and Secure the Cattle Panel
With the help of a partner, bend the cattle panel into an arch shape by holding each end and walking towards one another. Once the desired arch shape is achieved, position the cattle panel is pushing against the inside of the T-posts. Use zip ties to fasten the panel to the T-posts. Secure the arch to the T-posts, using approximately 6-8 zip ties per post.
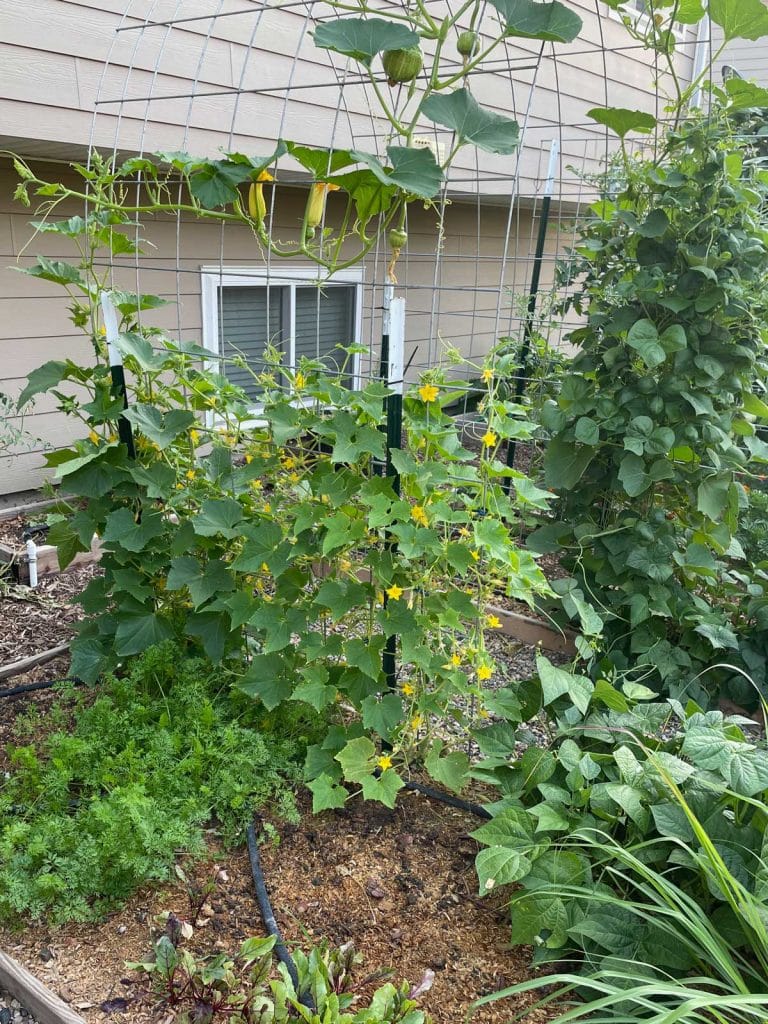
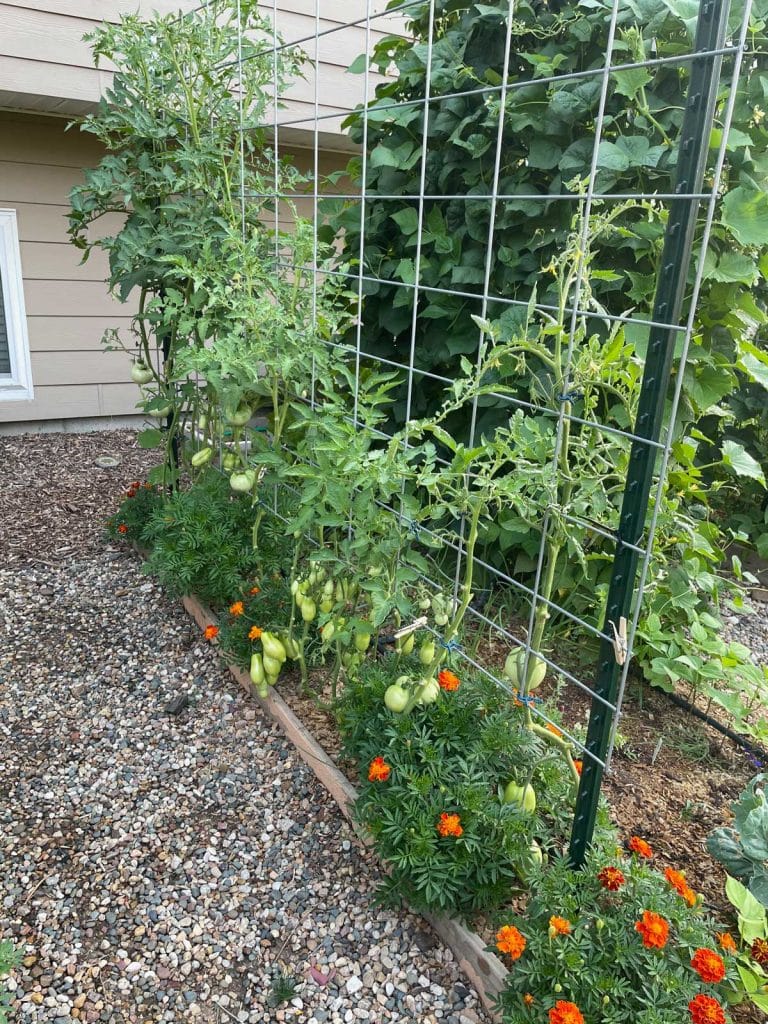
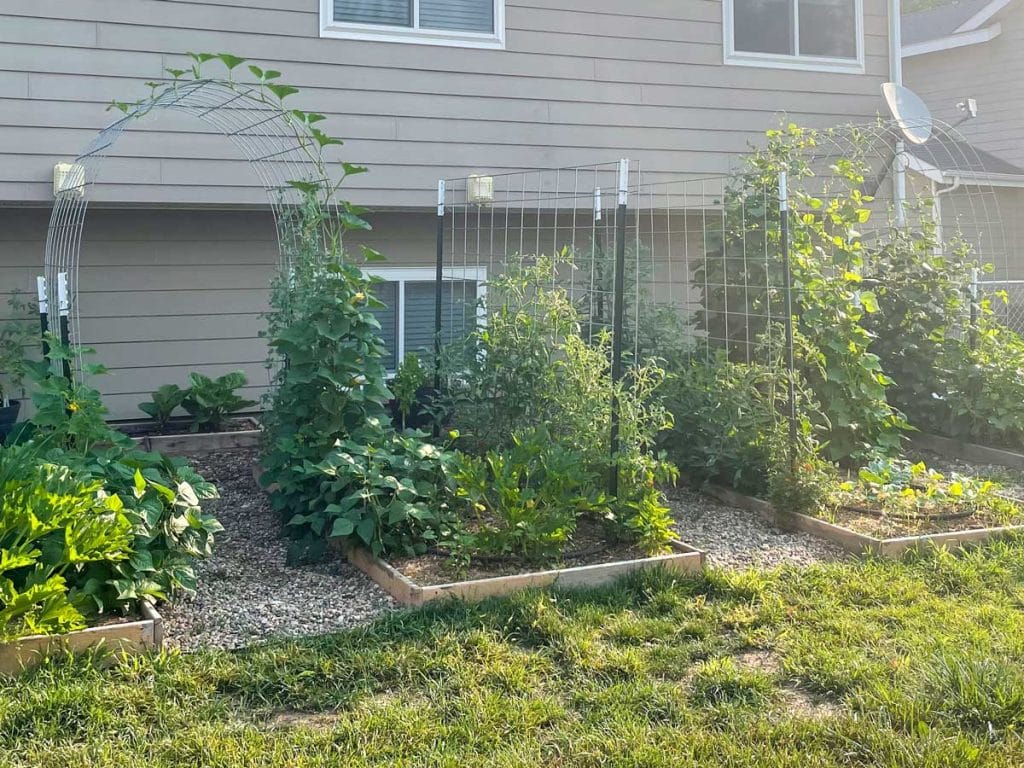
Step 5: Plant Your Vertical Garden
Now that your cattle panel trellis arch is assembled, it’s time to plant your climbing vegetables. Some excellent choices for your trellis arch include:
- Pole beans
- Cucumbers
- Squash
- Pie or mini pumpkins
- Cantaloupes
- Gourds
- Malabar spinach
- Peas
- Tomatoes
To support pollinators and add visual interest, consider planting climbing annual flowers such as morning glories, Spanish flag, climbing nasturtiums, or cypress vine alongside your vegetables.
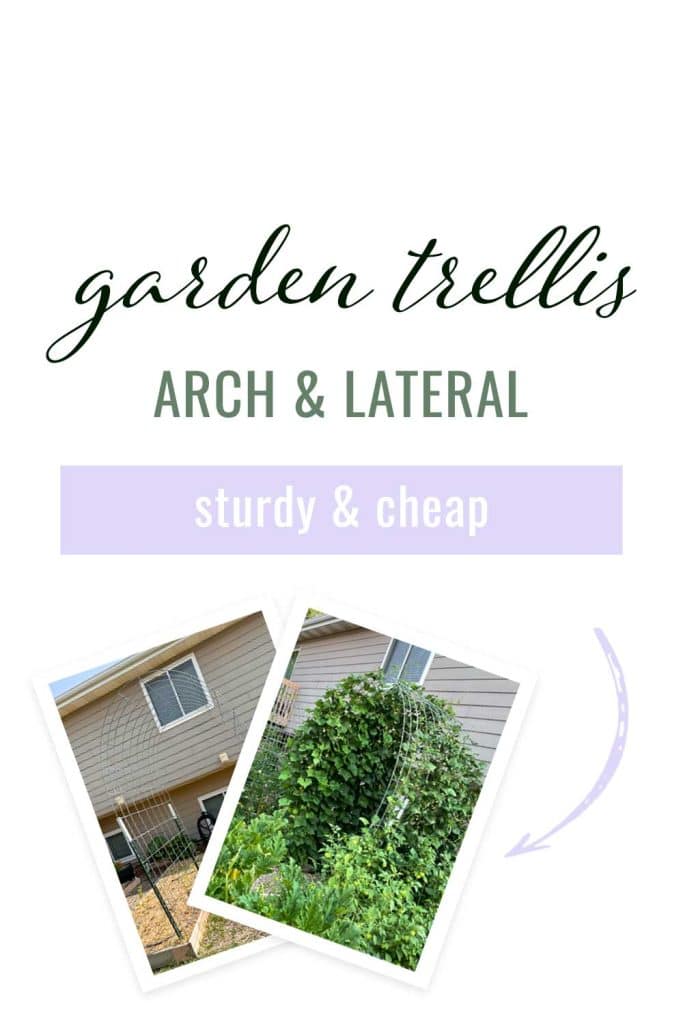
Two Configurations of Cattle Panel Trellises
You may choose to install your cattle panel trellis one of two ways; an arch or laterally:
Example of Cattle Panel Trellis Arch
Example of Lateral Cattle Panel Trellis
Tip for Transporting Cattle Panels
Cattle panels come in 16-foot or 8-foot lengths and are just over 4 feet tall (when horizontal). Depending on the size of your garden (or the vehicle you are hauling the panels with), you’ll want to choose accordingly. It is most economical to buy the 16-foot panels ($24/each) versus the 8-foot panels $17/each). If you can accommodate the 16-foot panels in your truck or trailer and have a wire cutter or bolt cutter and a grinder, you’d save quite a bit of money by cutting the 16-footers to the length you need.
BONUS: If you are wondering how you can haul your 16-foot panels in the bed of a truck, we followed this process to move 3 panels and it worked perfectly:
Maintaining Your Cattle Panel Trellis Arch
Caring for your cattle panel trellis arch is relatively straightforward:
- If you plan to practice plant rotation, you may consider moving your trellises. Relocate them in early spring with the ground is soft enough to work or before your young plants have grown too large or their roots are expanded.
- Replace zip ties at the start of each growing season to ensure they don’t fail mid-summer when the trellis is laden with crops. Alternatively, use wire instead of zip ties for a more permanent solution.
- Check the T-posts each spring and reinstall any that have shifted or become crooked during the off-season.
- If growing heavy fruits like winter squash or cantaloupes, use twine or nylon pantyhose to create slings for additional support.
Conclusion
I installed my cattle panel trellises 3 gardening seasons ago and it was probably one of the best gardening decisions I made.! This type of trellis is an excellent way to maximize your gardening space, simplify harvesting, and add beauty to your garden. With a few materials and some teamwork, you’ll have a functional and visually appealing vertical garden system ready for planting. Get started today and enjoy the benefits of vertical gardening with a cattle panel trellis arch!


4 thoughts on “How to Build a Cattle Panel Trellis Arch”