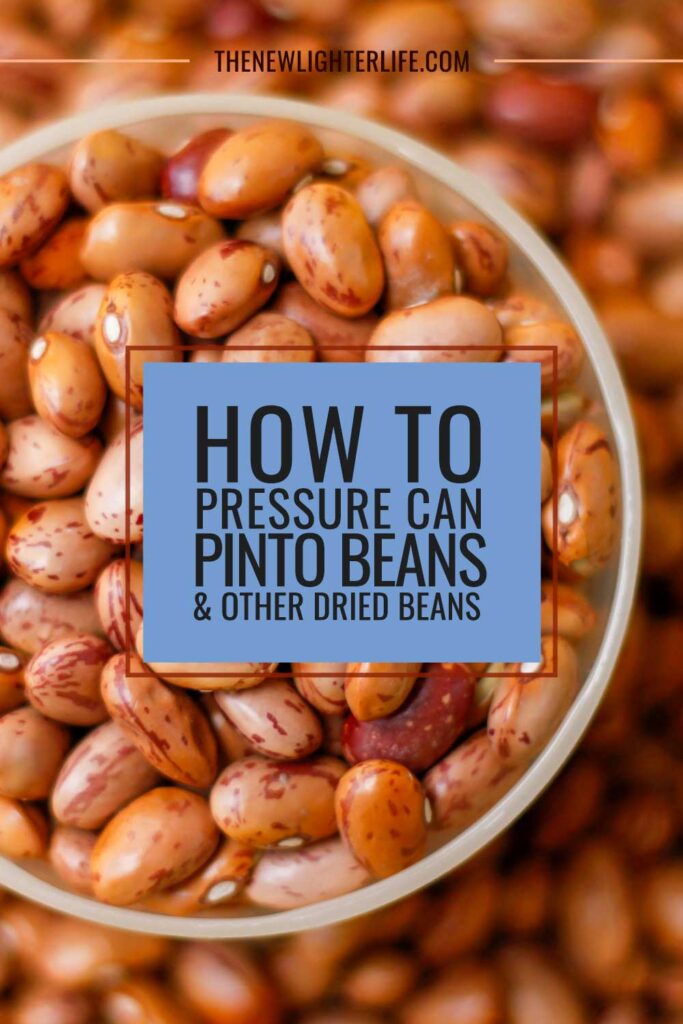
If you enjoy eating beans or legumes, you’re going to love today’s post. Winter is the PERFECT time to can dried beans. I’m sure you know that they are not only delicious but also a nutritious and affordable source of protein. Canning your own pinto beans (or other any other dried bean) allows you to have this pantry staple readily available, and it’s a cost-effective alternative to buying canned beans from the store. Today, I will take you through the process of canning pinto beans step-by-step. Whether you’re a seasoned canner or a beginner, this post will provide you with my absolute favorite method and a HUGE shortcut that will help you safely preserve your own pinto beans at home.
Why Choose Canning?
Canning pinto beans offers several advantages over buying canned beans from the store.
- You have complete control over the ingredients and can choose to can your beans without any added salt, unlike most commercially canned beans.
- Canning your own beans is more cost-effective than buying canned beans from the store. If you want to up your cost savings, buying dried beans in bulk and canning them can save you even more money compared to purchasing individual cans from the store.
- Having your own supply of canned beans means you won’t have to worry about running out or making last-minute trips to the grocery store.
Getting Started: Equipment and Ingredients
Before diving into the canning process, it’s important to gather the necessary equipment and ingredients. Here’s what you’ll need:
Equipment:
- Pressure canner (not a pressure cooker) I LOVE my CAREY Electric Pressure Canner – you can read my review on it here.
- Canning jars (pint or quart size)
- Lids and rings – I LOVE my Reusable Tatler Lids
- Canning tools (jar lifter, funnel, ladle)
- Pressure Cooker / Instant Pot or large stock pot (for pre-cooking the beans)
Ingredients:
- Pinto beans (or beans of your choice)
- Salt (optional, for flavoring)
- Water
Preparing the Beans for Canning
Sorting & Rinsing
The first step in preparing your pinto beans for canning is to sort through them and remove any rocks or debris. I also prefer to remove and discard any split or broken beans. Once sorted, rinse the beans thoroughly under cool water.
Rehydrating Your Beans- 3 Options
Now, you have three options for rehydrating the beans: long soaking & boiling, shortcut soaking & boiling, or pressure cooking them.
Long Soaking & Boiling (13+ Hours)
- Place your beans in a large stock pot and cover them with water.
- Soak them for 12 to 18 hours, or overnight.
- Drain water and cover beans with fresh water.
- Heat to boiling and boil for 30 minutes.
- Continue to pressure-canning your rehydrated beans.
Shortcut Soaking & Boiling (2+ Hours)
- Place your beans in a large stock pot and cover them with hot water.
- Bring the beans to a boil and boil for 2 minutes.
- Turn off the heat and let the beans continue to soak in the hot water for 1 hour.
- Drain the water and cover with fresh water
- Heat to boiling for 30 minutes more.
- Continue to pressure-canning your rehydrated beans.
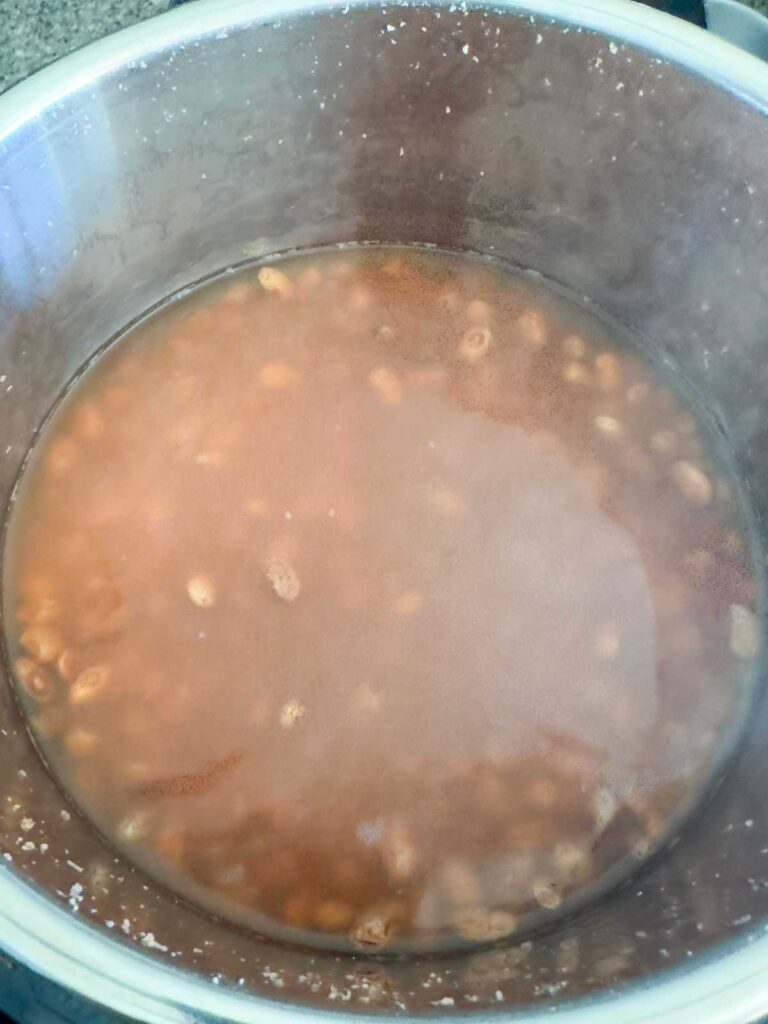
Pressure Cooking (< 1 Hour)
- Place your beans in your pressure cooker or instant pot and cover them with hot water (2:1 water to bean ratio).
- Close your pressure cooker lid and set the valve to sealing.
- Set the pressure cooker to Manual/High Pressure for 15 minutes.
- When the time is up, let the pressure cooker naturally release for 5 minutes, and then quick-release the remaining pressure.
- Continue to pressure-canning your rehydrated beans.
All three of these methods will partially rehydrate the beans, making them suitable for canning.
Preparing the Jars for Canning
When you are nearly done rehydrating your beans, it’s time to prepare your jars.
- Ensure that your jars are clean. If your jars are brand new – you do not need to wash them.
- NOTE: The jars do not need to be sterilized since they will be processed in a pressure canner.
- Heat the jars to avoid cracking from the hot beans. To heat, place a few jars into the hot water in the canner or a separate pot, making sure they are heated but not boiled.
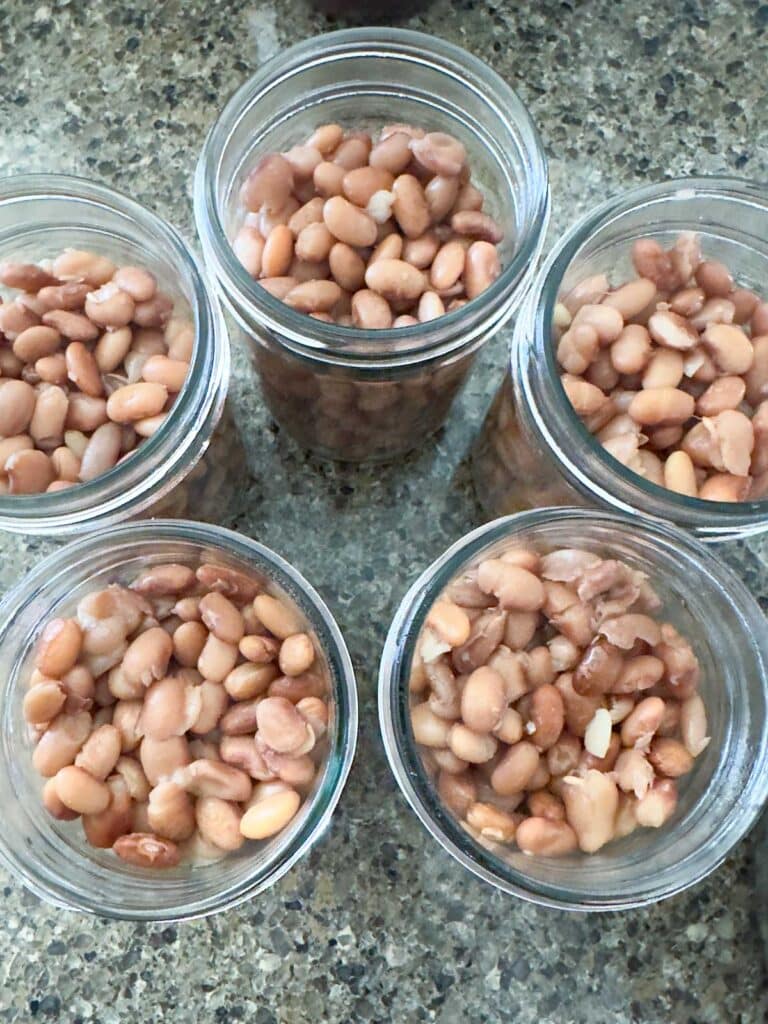
Filling the Jars for Processing
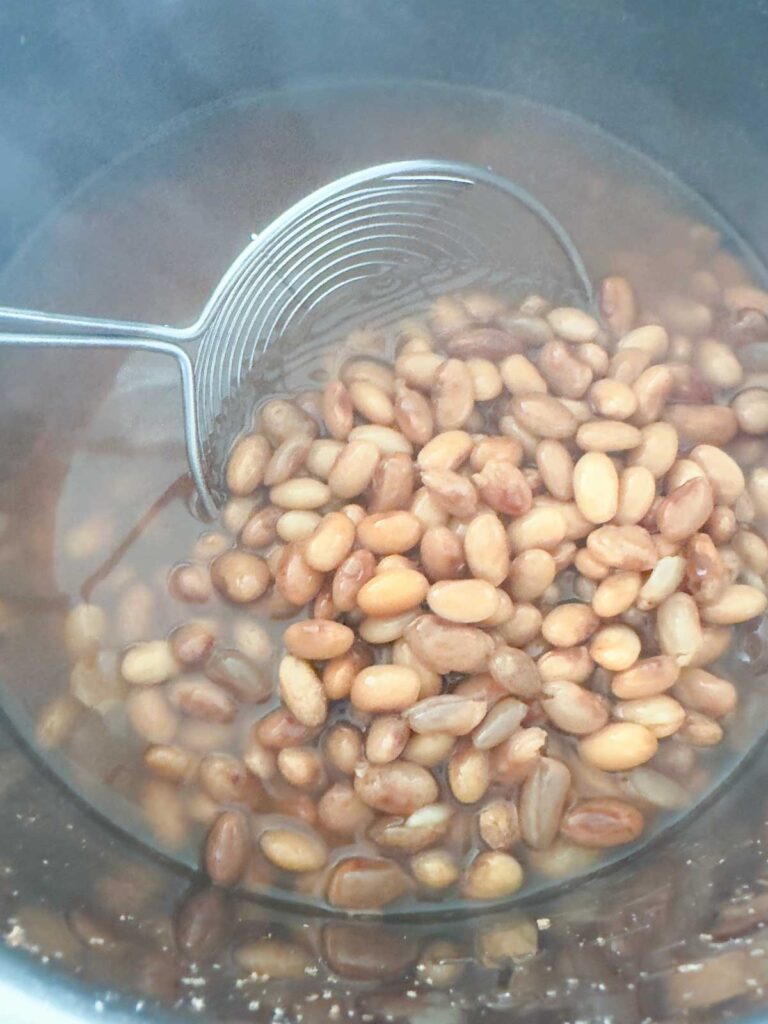
Once your beans are rehydrated DO NOT drain your cooking water. Now you will begin to fill your jars.
- Optional: Add 1/2 teaspoon of salt in each pint-size jar or 1 teaspoon of salt into each quart-size jar.
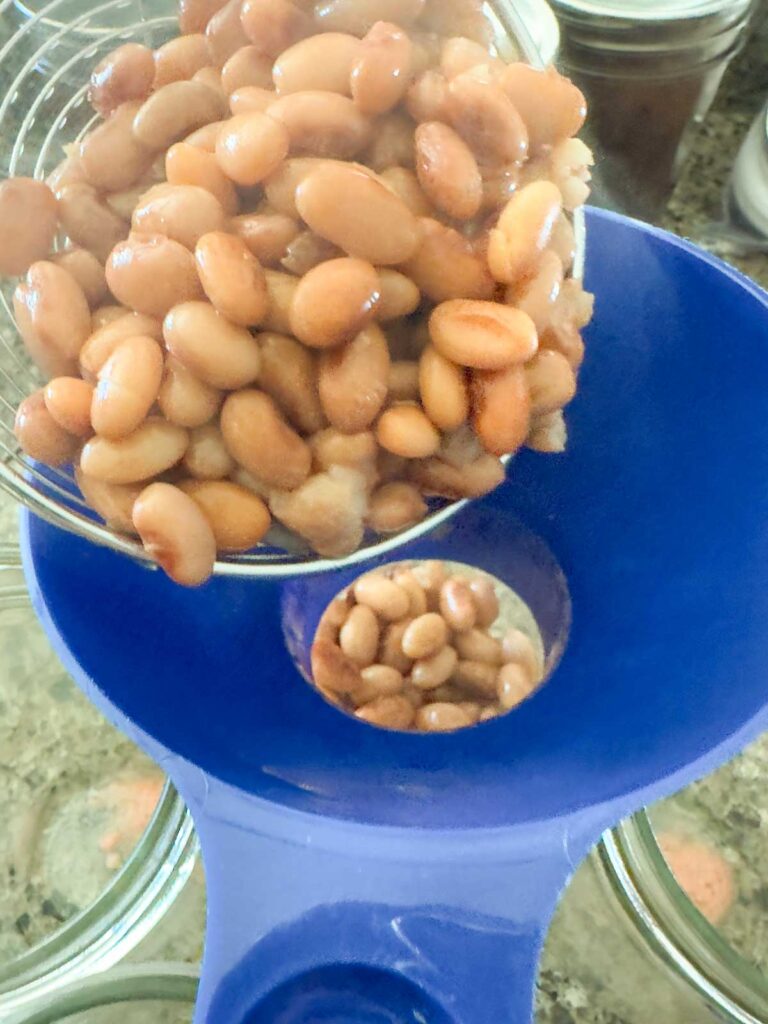
- Place your canning funnel on the top of your first jar for filling.
- With a slotted spoon, scoop out your rehydrated beans from the pressure cooker or stock pot. Fill to 3/4 full. Continue filling remaining the remaining jars with beans.
- Add enough of the cooking water to the bean-filled jar to 1-inch headspace. If more liquid is needed, add boiling water to the jars.
- Use a wooden skewer and run it along the inside walls of the jars to remove any trapped air bubbles.


Processing the Jars in a Standard Pressure Canner
Loading the Canner
With the jars filled and ready, it’s time to load the pressure canner.
- Pour at least 2 to 3 inches of hot water into the bottom of your canner. (check your canner’s owner manual for specific instructions if you are unsure of the amount of water needed)
- Place your canner on high heat as you move on to loading the canner.
- Insert your canner’s rack inside the canner and place your filled jars on the rack, evenly spacing them for consistent heating.
- Place the lid on the canner tightly to seal.
Building Pressure and Processing Time
I recommend you consult your canner-specific owner manual as it will include specific instructions on operating it. Below is a general overview of this portion of canning.
- Leave the weighted gauge or pressure regulator off your canner as it begins to build heat and pressure inside.
- As it does this, the canner will start venting from the vent pipe.
- Allow your canner to continue to vent steam for a full 10 minutes to ensure that any trapped air is released.
- Depending on the type of canner you have, may need to add your weighted gauge or pressure regulator. There are some intricacies to each type and canner specifics so please consult your canner’s owner manual for pressure canning.
- Process your pinto beans at the correct pressure for your altitude for 75 minutes for pints and 90 minutes for quarts. Adjust the processing time if you are at a higher altitude.
Depressurizing and Final Steps
- Once the processing time is complete, turn off the heat and allow the canner to depressurize naturally.
- DO NOT remove the weighted gauge or pressure regulator until your canner is completely depressurized naturally. Doing so may lead to broken jars, seepage of liquids or improper sealing.
- DO NOT attempt to open the canner before it depressurizes naturally. This is a big safety issue.
- After the canner has depressurized, I recommend you leave it resting for a couple of hours to avoid seepage.
- When your canner is cooled, open the lid away from your face and set it aside.
- Let the jars sit in the canner for a few minutes before using a jar lifter to carefully remove them. Place the jars on a towel on the counter and allow them to cool completely.
Processing the Jars in the Carey Smart Electric Canner
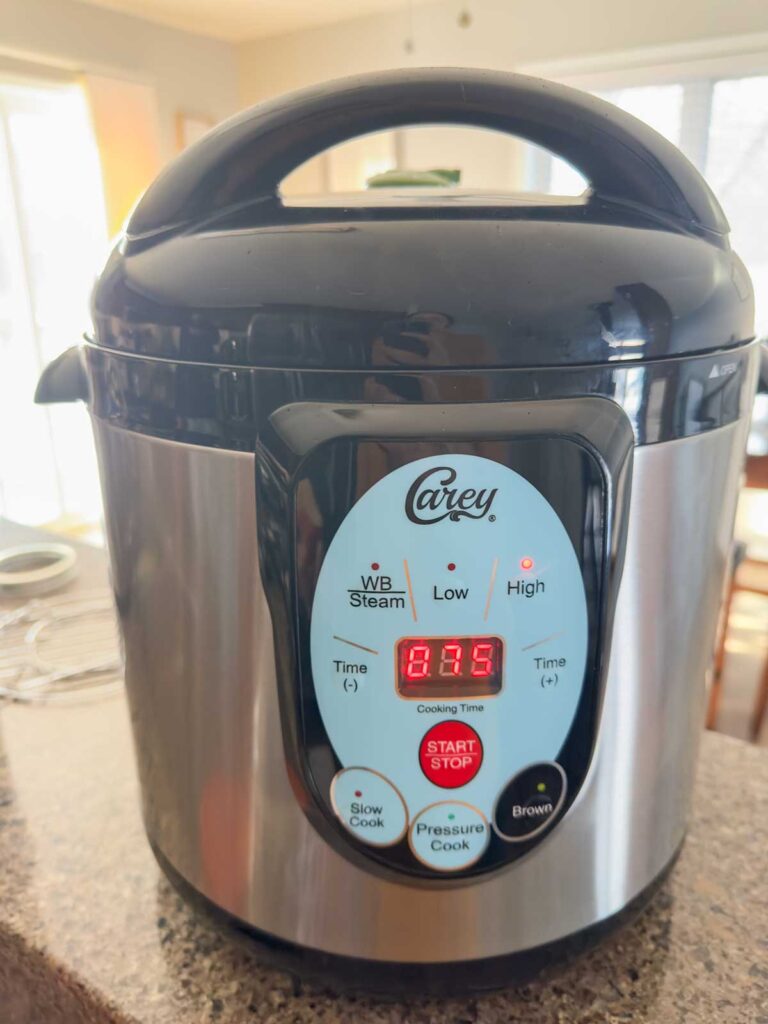
Using my Carey Smart Electric Canner is my favorite canner, hands down. If you’re nervous about using a pressure canner or you do not want to monitor your stovetop’s heat, I highly recommend you read through my post about this canner here.
Loading the Canner
- If you are at an altitude below 1,000 feet, use the black pressure limiting valve. Over 1,000 feet and you’ll need to change out to the green pressure limiting valve.
- Pour 4 cups of hot water into the bottom of your canner.
- Place your filled jars on the rack, evenly spacing them for consistent heating.
- Close and lock the lid to seal.
- Set the limiting valve to the “Exhaust” position.
Turning On the Canner & Processing Time
- Press the “High” button on the canner.
- Use the “+” or “-” buttons to set the correct processing time for your pinto beans, which is 75 minutes for pints and 90 minutes for quarts.
- Press “START”.
- The display frame lights will rotate around, which means it is starting to build to the proper temperature.
- The machine will start to produce a heavy stream of steam and will beep one time. Once it does this, turn your limiting valve to “Air Tight”.
- The canner will build pressure and begin counting down once the proper pressure is reached.
Depressurizing and Final Steps
- Once your canner is done processing, it will beep 3 times.
- Let the canner sit (you do not need to do anything to shut it off). Allow the canner to depressurize naturally.
- DO NOT change the limiting valve until your canner is completely depressurized naturally. Doing so may lead to broken jars, seepage of liquids, or improper sealing.
- DO NOT attempt to open the canner before it depressurizes naturally. This is a big safety issue. After the canner has depressurized, I recommend you leave it resting for a couple of hours more to avoid seepage.
- When your canner is cooled, open the lid and use a jar lifter to carefully remove your canned beans. Place the jars on a towel on the counter and allow them to cool completely.
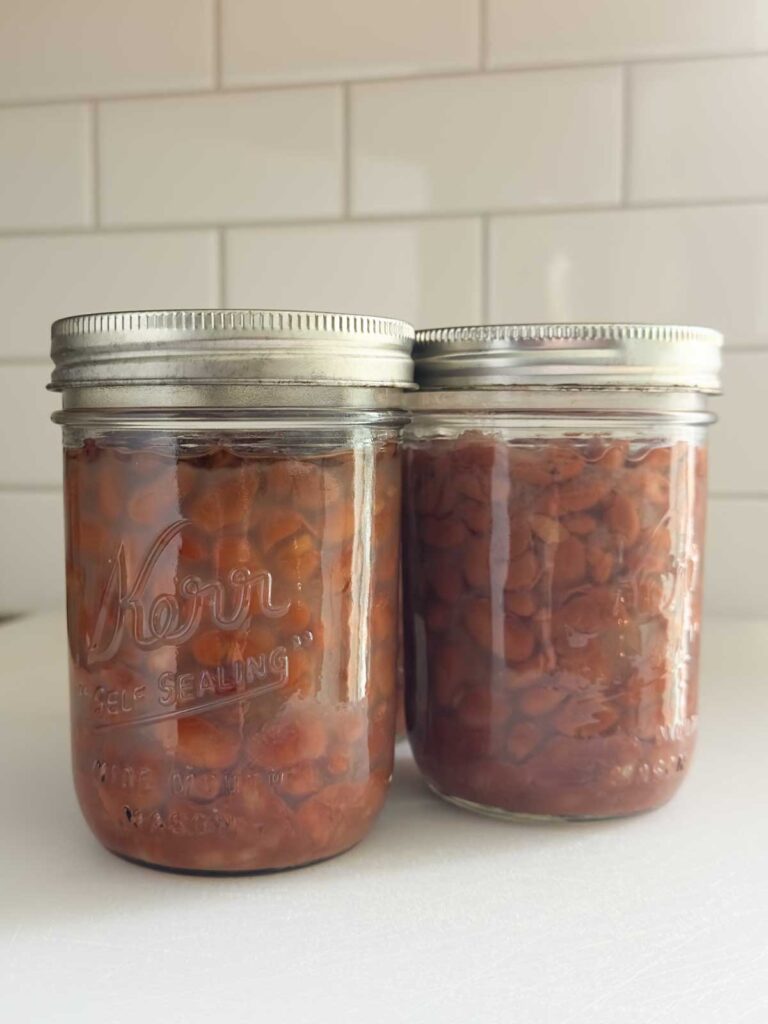
Storing and Enjoying Your Canned Pinto Beans
Checking the Seals and Labeling the Jars
After the jars have cooled completely, it’s time to prepare the jars for storage.
- Carefully unscrew the rings from the jars.
- To check the seals, carefully lift each jar one by one – lifting by the lid. Any unsealed jars should be stored in the refrigerator and consumed within a few days or frozen for several months.
- Wipe down all jars with hot soapy water and label them with the date and contents for easy reference later.
- Store the jars in a cool, dark place such as a pantry or cellar.
Using Your Canned Pinto Beans
Canned pinto beans are very versatile. Here are some of the ways we use our home-canned pinto beans:
- Salad Topping or as a Main Feature like in Kalyn’s Kitchen’s Pinto Bean Salad
- Soup Add-In
- Chili
- Ground Beef Tacos
- Burrito Add-In
- Bean Dip
- Refried Beans (just drain and refry them)
- Mixed in and cooked with Scrambled Eggs (don’t knock it till you try it)
The possibilities are endless! When using your canned beans, simply open the jar, drain and rinse the beans (if desired), and incorporate them into your favorite recipes.
If you have some favorite recipes that include pinto beans, I’d love to hear from you in the comments!
What About Other Dried Beans?
All these instructions above work for other varieties of beans. The only adjustment you may need to make is the time for rehydrating your beans in the Instant Pot or pressure cooker before canning.
Navy, Black, & Black Eyed Peas will need 12 minutes of high-pressure cooking prior to canning.
Cannellini, Red Kidney, Pinto, & Great Northern will need 15 minutes of high-pressure cooking prior to canning.
Many canners choose to just add dried beans to jars, pour boiling water over top, and can them. Just be aware that this is not recommended for safety reasons. Also, the water absorption during the rehydration will affect the final liquid level/amount and there is guesswork that goes into that if you do not rehydrate your beans first.
Conclusion
Canning pinto beans (and any other dried beans for that matter) is a rewarding and cost-effective way to ensure you always have a quick supply of nutritious and delicious beans on hand. By following the steps I’ve outlined above, you can safely prepare and can your own dried beans to enjoy in a variety of meals. Start canning pinto beans today and experience the convenience and satisfaction of having this versatile pantry staple readily available at any time. Happy canning!