

Continuing with the remodel posts, today’s post is all about the window treatment.
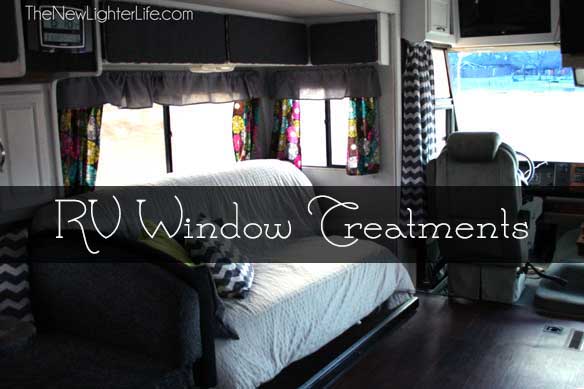
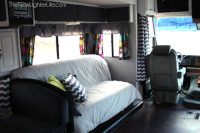
Main Living Area Windows
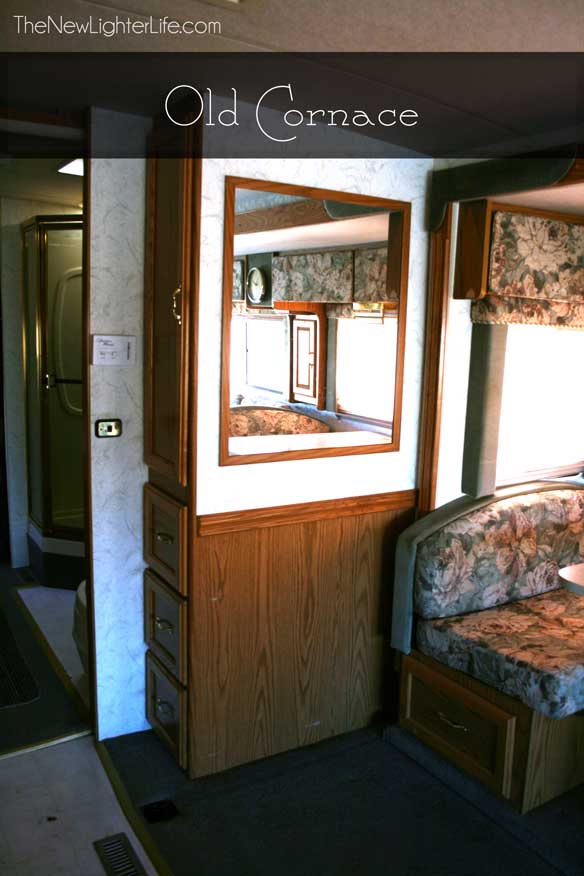
When Mark demo’d the camper, he threw out all the old cornice boxes. They were dated and we didn’t want to recover them. Instead, we decided that we’d reuse the privacy blinds and I’d sew new curtains throughout.
One of my best friends went with me to Hobby Lobby and helped me pick out the perfect fabric for the camper curtains. I wanted a fabric that would allow us different color options. I didn’t want it to be drab or boring. I also didn’t want it to be an eye-sore. We settled on this.
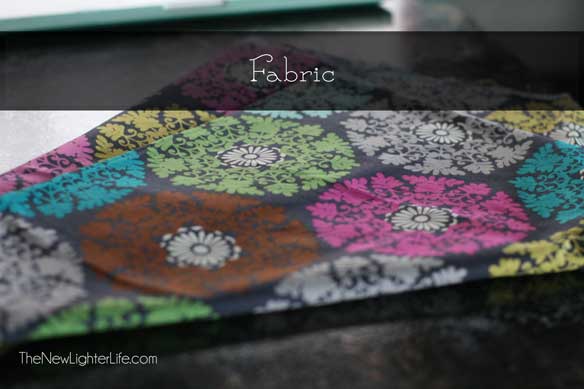
I love that it has an array of colors. Gray, brown, lime green, mustard yellow, seafoam green, fuschia.
I CANNOT say that Mark loves my choice. I think he used the word “girly” and accused me of trying to feminize him.
Oh well.
Since I love him, I wanted him to be happy with the camper. I made a few adjustments and added a gray panel to the top of the curtains. I hoped it would help.
Curtain Hardware
But before I go into the curtains, lets talk about the curtain hardware.
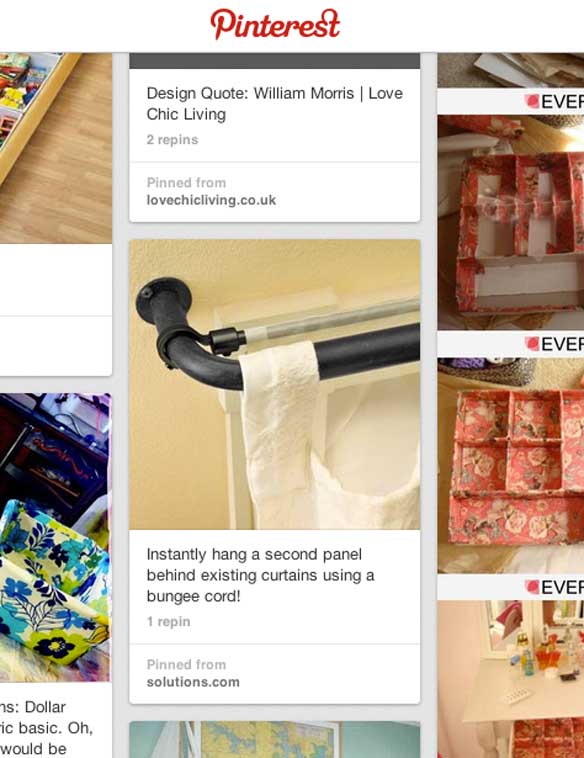
I saw this pin on Pinterest about how you can make cheap curtain rods.
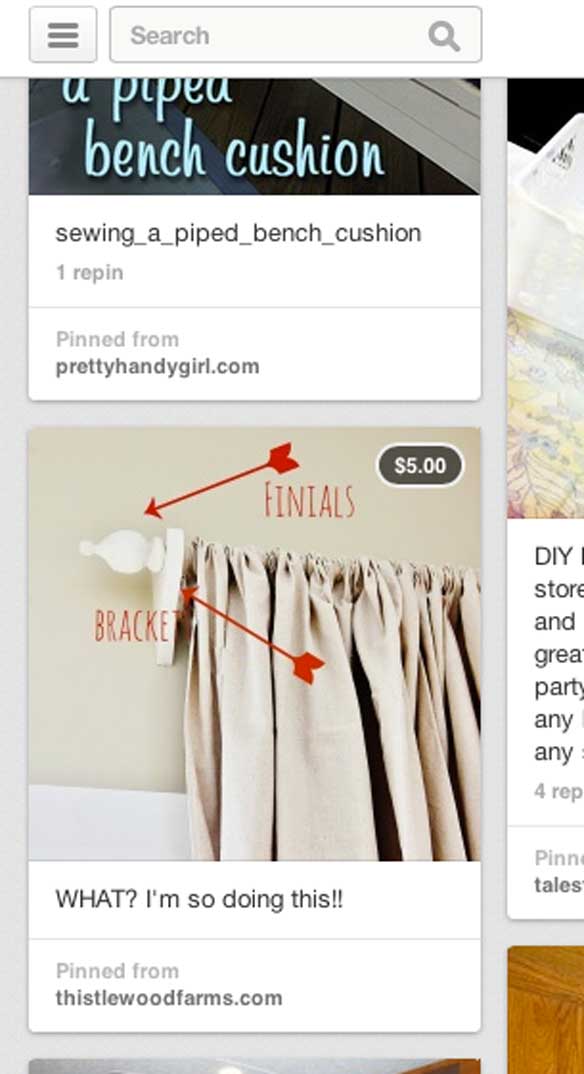
I went with it because I loved the look. Now in all fairness, I didn’t do it exactly as the website suggested. I bought some beautiful drawer pulls from Hobby Lobby for 50% off. Dowels would come from the hardware store but I found that I’d have to buy hardware to attach the curtain rod dowel to the wall. That pesky hardware drove my cost up per window and turned out to be the straw that broke the camel’s back.
For each window, the price broke down as follows:
$2 – for the Dowel (average)
$3 – for 2 Drawer Pulls
$3.80 for Hardware to Attach Curtain to Wall
$8.80 Total/Window
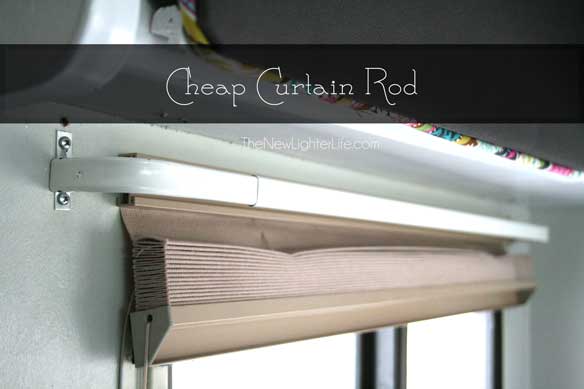
Now that may not seem like a lot but when you consider that we have 8 windows. It adds up to $70. I was even willing to pay that price because those drawer pulls were gorgeous. My MORE frugal husband put the brakes on and said that was not worth it. So I bought these cheap curtain rods for $3 to $4 a piece (depending on the length).
So it cost me just $28 for our (initial) curtain hardware. Initial means I’ll go into that later.
Curtain Design
First, let’s go back to the curtain design. I have to tell you about this VERY cool blog, Ana White. She has a tutorial up about how to make hidden tab top curtains. I loved the look of her curtains! So clean and a simple way to sew in hidden tabs. The design makes it so the fabric is not bunchy at the top. (I may sound slightly picky) I decided that was exactly how I wanted my curtains to be and I pressed ahead on making them according to her tutorial.
As I mentioned earlier, I tried to tame down some of the wild colors of my main fabric and appease Mark by adding a gray panel to the tops of the curtains. They were a little more work, but I was sure the results would be worth it.
The problem was, I hadn’t considered the fact that the privacy blinds would be visible when the curtains were open. Once we got the first curtain up, I realized it would not do.

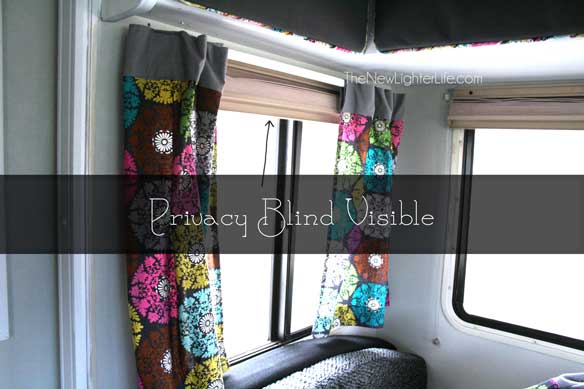
Bummer!! I really didn’t want to have to put a valance up and I wanted the benefits of the hidden tabs. I just couldn’t stomach seeing the privacy blinds all day long when the curtains were open.
Valances
So I made valances, not my first choice obviously but I’m happy with them today. I used the same gray color that was at the top of the fabric and my valance hangs down about 7 inches.
But now we had a problem with the cheaper curtain hardware we had bought.
The valance would need to go on the cheap curtain rod and we needed something for the curtain panels.
Hidden Bungee Rod
Hello Pinterest!
I found this pin that talks about using a bungee cord for making a curtain rod behind a regular curtain rod.
The pin actually links to some expensive curtain rod, but the description is all we needed.
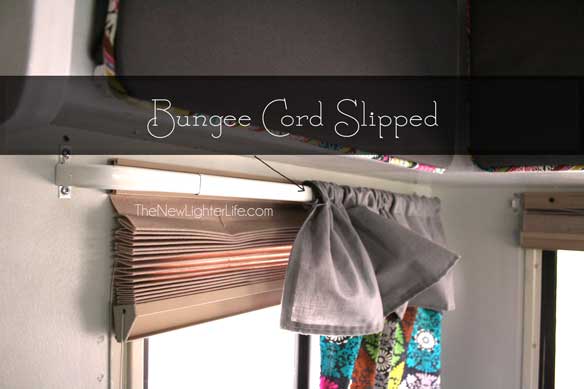
So Mark went out and got about $16 worth of bungee cords. We got them about 5 or 6 inches shorter than the curtain rod so there would be enough tension to hold the curtain up and snug.
But we found that the bungee cords did not stay on the ends, instead, they slid along the curtain rod like this…
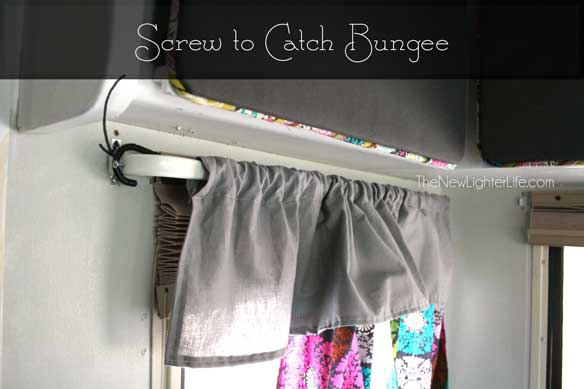
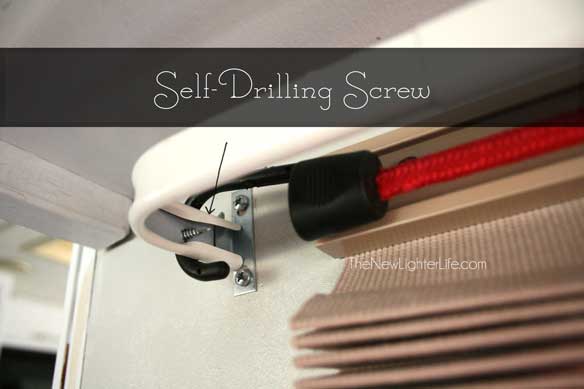
Our fix? Screw in a self-drilling screw to the end of the rod so the bungee cord can hook to the screw and not slip.
Here is another view of a self drilling screw tip for those of you who may be as unfamiliar as I was.
 Here is a snippet of the before…
 (Oh how I wish I had taken better before pictures but you can’t really undo a renovation) And after pictures are here…
I do like how the hidden tabs make the curtains lay underneath the valances due to the hidden tabs. In a regular stick built home, I do the same tutorial in a heartbeat.
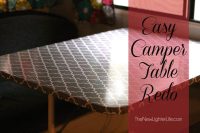
Front Window Curtains
So that covers our main window treatments but we still needed to update the front window curtains.
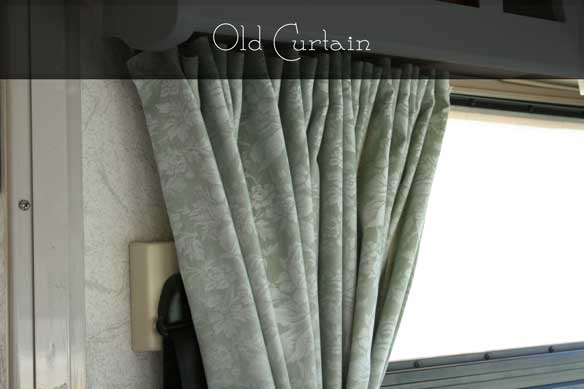
The original fabric before was like a seafoam/blueish embossed rose color.
I decided to layer a chevron fabric onto the existing curtains because I wanted the added insulation and didn’t want to have to reinvent the wheel in this area.
I’ll tell you that I laughed at the person who sewed the original RV curtains. Yep, I did. I thought maybe they had a rough night or they got trained on the particular curtains that went into our RV. Pride. You know what they say, pride comes before the fall, (which I’ll go into in a bit). The curtains were sewed so sloppy and they were a mess when it actually came to taking off the curtain hardware.
The hardware I’m talking about is the glide tape. I really couldn’t work with the existing glide tape because the plastic was cracked, brittle, and falling apart. I had actually hoped I could glue it and patch the glide tape but it quickly became apparent that it wasn’t possible so I got out my seam ripper and went to town to remove the tape and rig something up.
 Since it was so old and hard to remove, I wasn’t able to salvage it. I ended up ripping the glide tape off.
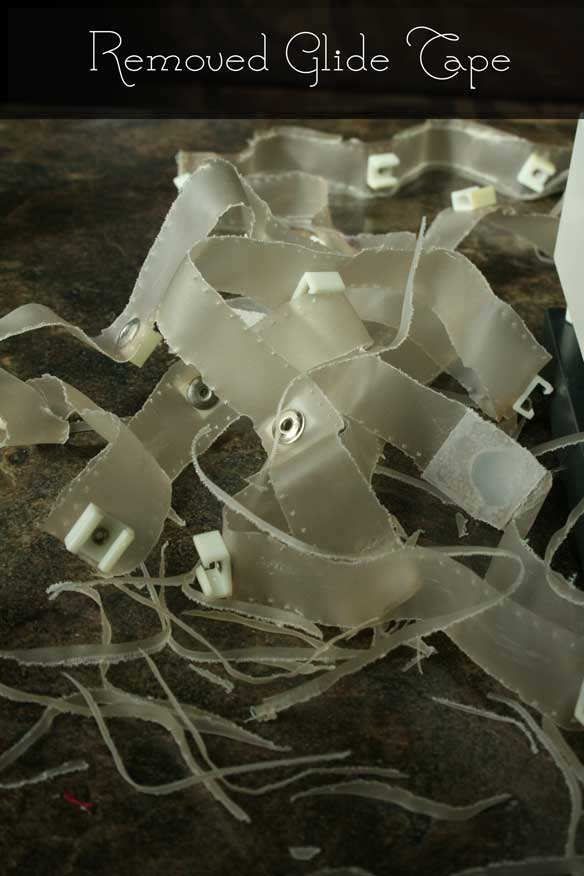
I ordered 3 packs of 72 inch glide tape from Amazon. The 2 curtain panels measure 86 inches each. So we needed to use part of a 3rd glide tape for each of the panels.
After I pieced my chevron fabric together to get it wide enough I sewed the panels to the top and sides of the existing curtains.
Next I sewed on the first 72″ strip of glide tape and then I started at the opposite end of the curtain top and sewed the other glide tape on (going towards the direction of the already attached tape). I did this to make sure the bracket was positioned near the edge of the curtain and it wouldn’t sag at the end.
So this is the part where I describe my fall after pride. Sewing on the glide tape was comical. For the life of me I couldn’t keep it straight. There is really no way to pin it to the curtain since the plastic on the tape is so thick. You just have to wing it. I tried 3 different feet for my sewing machine and finally settled on my zipper foot.
It was tricky and it wasn’t pretty, but the glide tape was attached. Once I hung the curtains, I pinned the bottom hem up, removed the curtain and sewed along the pinned hem.
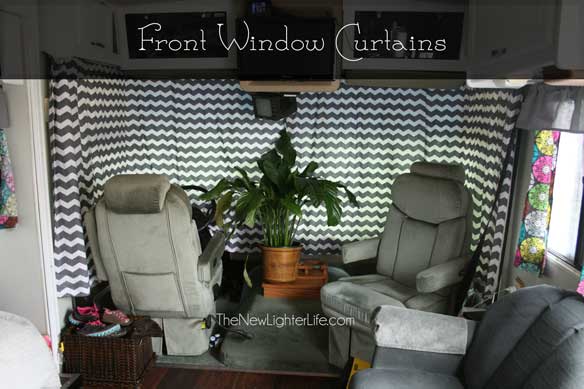
The front curtains are busy, crazy and make me twitch. I love chevron, but this was too much. I’m hoping someday I’ll muster the time to add a solid panel somewhere in there. I think that may help stop the motion sickness when the curtains are closed at night. But during the day, they don’t look half bad.
So here is the before and after of the front curtains.


Curtain tie backs were added later to keep the curtains contained.
Now I have one last thing to show you about window coverings.
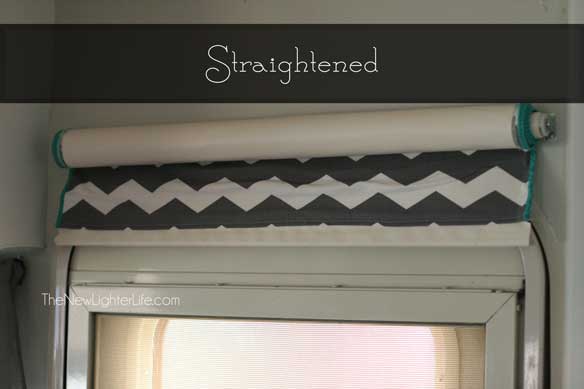
Fabric Covered Roller-Blind
We have a roller-blind at our door and it was just a plain white plastic. I know I sound slightly obsessed with Pinterest, but this time, it failed me.
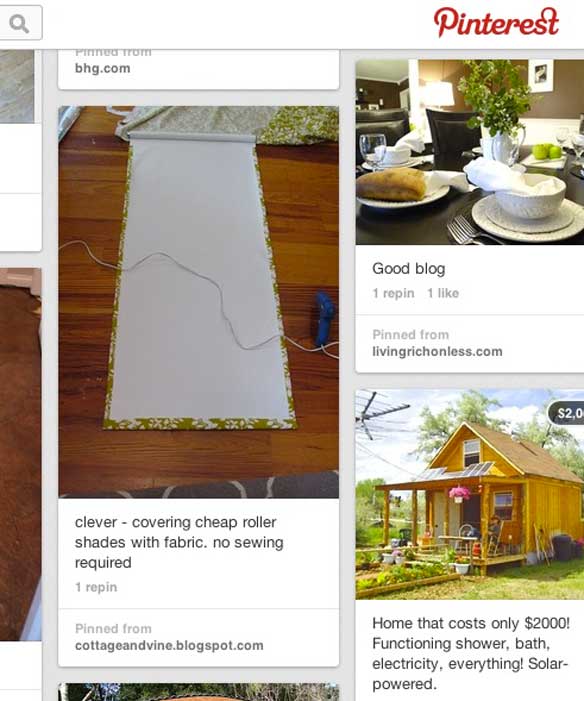
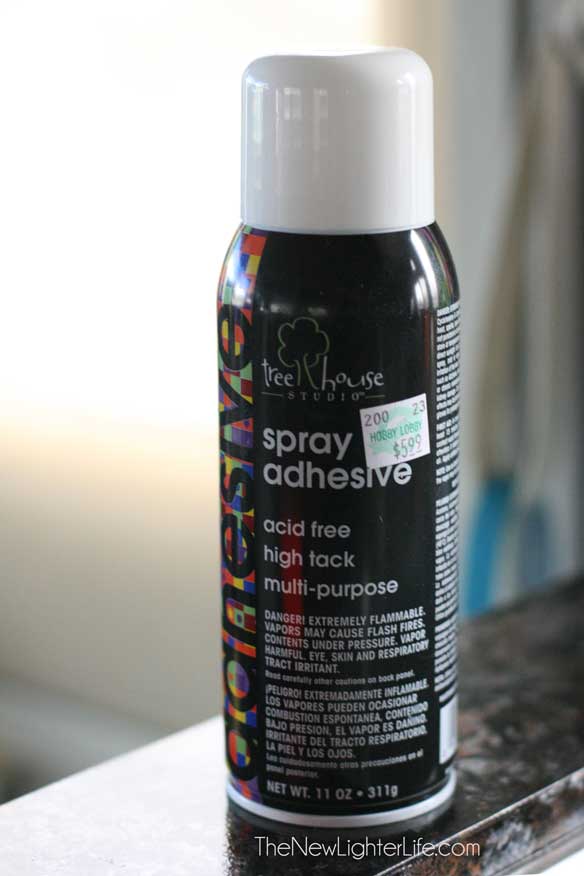
When I covered my roller-blind, I ruined it. The Pin above is for instructions on how you use hot glue to adhere the roller-blind to the fabric. Nope, that doesn’t work. The glue is too thick and it makes it so the blind will not actually retract due to the bulk
I had to take as much glue off as I could and remove the fabric. Since I put most of the hot glue on the edges, I actually had to trim the roller-blind edges away. The only way I could find to adhere the fabric effectively was by using this spray adhesive.
And here is the after of the roller-blind when it is down.
![]()
The reason why I have a green trim on my edges is because I was using fabric scraps. So I just sewed trim on both edges of my chevron piece to make it wide enough. I centered the blind over the fabric and voilà. A fabric covered roller-blind. The fabric is bunchy and I’m not happy with it. Basically this just so show you how this doesn’t work. Someday I’ll figure it out. But for now, it works fairly well.
When the blind is rolled up, it tends to get lopsided like this…
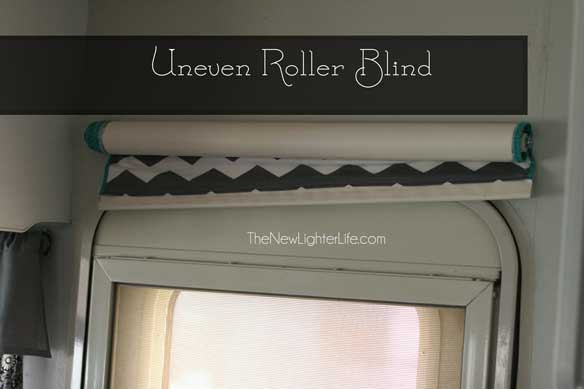
We have to readjust the blind by tugging it when it’s rolled up.
Kid’s Bunkroom Curtains
One area I haven’t addressed is the kid’s bunkroom. Honestly, I don’t like the curtains in there. I could go on an on about why I don’t like the curtains but just trust me, it’s not worth sharing.
I may redo the curtains in there, but for now they do the job and the room is fairly dark, (I did use blackout fabric). Since that was the goal, mission accomplished.
So that’s it on our window coverings. Our friends call us hippy or gypsy-ish. I have to agree, it has that feel.
If I ever get tired of the curtains, I’ll go with more neutral curtain fabric. I still love that it gives us decorating options with all the colors and you know, we are sorta gypsy-ish.
Blessings,


I enjoyed your post on making new window treatments for the RV. I’ve always wanted to just remove the blinds on a roller blind and replace it with fabric. Have you tried that? I also heard that camperworld.com has the slider tape quite inexpensive. In any case, your rv looks much more contemporary and creative with your updates. Hopefully, my experience will go as well.
Thank you! Your idea for making the roller all blind fabric is a great one! I think it would work too. 🙂 Best wishes to you as you remodel your RV!
I need to find “just the roller”
I’m not sure what you are looking for Carol. Do you mean the privacy blind or that exact term on the site?
I am getting ready to install the curtain rod and I am not sure what length screw to use, because the one provided seems too long.
Hi Lexi, we used 3/4″ self-drilling screws for our curtain rods.
I was wondering where you found your privacy blinds? Thanks, love the tutorial!!!
Thank you Rosie! They came with the camper. We just screwed them into the walls since we didn’t keep the valances. Best of luck to you!
We are currently creating our own curtain hardware in our 32′ TT. My husband cut 2 ” pieces of 1×1 wood and partially drilled holes in each one, so a dowel could be inserted [ala toilet paper holder]. He is also making holdbacks with a similar design, but with 1″ cubes on either end, they will stick out of the wall at a 90 degree angle. Hopefully that will work. I am hanging my curtains with Ring Clips, but ended up spending WAY too much money on them. Long story which I will share on my blog [http://teacherontheroad.weebly.com/] once we get them hung.
Great job thinking outside the box! Hope they work out for you and I’d love to see the end result!
Thanks so much for your awesome RV remodel tutorials. My husband just bought a 90’s RV and to tell the truth I was a pretty skeptical. I love the idea. I hate the tackyness. Your articles have really excited me on what I can do to make it more our style!
I loved doing the remodel Sara! Hope you guys enjoy the process and end result as well. I’m continually amazed at what people are doing to fix up older RVs. (Pinterest has been a huge inspiration)
I just send you a message about the curtains when I found this entry. Please ignore. 🙂 I know now you bought the fabric at Hobby Lobby.
My husband, bless him, is handy but not so handy he dares to replace our carpet in our 5th wheel. I have a dust mute allergy and with 2 dogs carpet is a no no. So we choose the luxury option and took her to the remodel guys who are now installing a new floor in her.
Just like you we wanted to go with sheet vinyl, but the guys talked us out of it. We have 3 slides and the showed us what happens if the slide pulls in gravel, a stone or a piece of a branch. Exactly the same as you showed us. So we opted for tiles, or the look like tiles but are according to them, much sturdier and easier to repair. Just take one up and replaced it. The are a kind of super vinyl thick stuff. If you are on Instagram I posted the pics there.
Since we had some nice tax return monies we decided to invest this in Sidonia, as we call her. She is only 2 years old but I wanted some changes from the start.
I hate those fake curtains that frame the shades with a passion. The hardware is very modern black metal with those curls at the end and I’m sure we can somehow sell them on eBay. We opted again fir the luxury option to have automatic day and night roller shades installed for all our windows except the 2 sliding doors.
The day shades are dark brown(I wanted white/cream) but interesting enough you can look through the dark curtains and not or way less through the lighter ones. The night shades sit in front of the day shades and both take up minimal space. I choose for the night shades a mocca suede with a beautiful sheen.
For our bedroom I already made black out curtains and I mean pitch black. 🙂 I had the same in our house. It is a kit with Velcro and a heavy duty black and white material the Velcro goes around the window and you cut the material to size. Put the Velcro on the inside and halfway on the ‘good side’ you place 2 strips of Velcro as well so in the morning you open up the bottom, roll or make folds and attach that to the Velcro on the good, the front side so it looks like French fold up curtains. Very easy, super cheap and pitch pitch black. The kit comes with a bottle that removes glue from you window sides without damaging it.
We have a folding down patio on our trailer. Plus a sliding door to get on the patio and a sliding door to the back room that us my husbands office and holds my wheelchair while traveling. It’s a really small toy hauler.
Those sliding doors have those horrible white plastic vertical blinds, the cheapest ever made. Luckily they gave a nice cherry wooden valance to hide the top. I am ready to make curtains for both doors and loved your colorful fabric.
As a rod I will use a tension rod just like they use for bathroom or shower curtains. It’s hidden so who cares. But if I want a nice one, ikea sells some great looking ones.
Funny thing is and this is really a cultural issue, I have been taught to sew curtains and tops a totally different way as is done in the USA.:-) We are original from the Netherlands. Those plastic sliders are not available there, only cotton ones. They have small holes that the hooks go through, completely hidden so you can make the folds as thick or as thin as you would like. It’s hard to explain, but they have 2 slide openings in the cotton ribbon, and a hook with 2 legs. You put knew of the legs into one slide and than skip 3 or 4 or more sides and put the other leg in and that makes your fold. Super easy. For thin fabric you might want to have more folds and thicker less.
But there are many ways to sew a curtain. I will take the easy lazy road with mine and use metal rings. I just sew them every few inches along the fabric, slide them on the curtain rod et voilá done. It’s hidden, but even if it wasn’t I think I prefer this over any other. I hate curtains that do not slide properly and smooth over the rod! Stems from the rods we have in the Netherlands. They are square with at the bottom a slit. In that slit are little metal rings on tiny wheels that you hang your curtains on like I described above with metal hooks. They slide smoothly open and close.:-) I love these cultural differences, makes it one big adventure for me.
One last thing before this turns into a novel. The bungee cord is something that we use in my previous home land for most of our, what you call cafe curtains, the lacey ones. It’s only way thinner and covered with white plastic. You buy it per meter. I think ikea has it as well. You screw 2 eyelets in the door or window and cut the cord to size and at the end you screw in either a small hook or a special designed screw with a little white knob. Hook one end in one eyelet, pull a bit and hook the other end. Done! Most lacey or cafe curtain come with an open hem where you thread the bungee cord through.
Sorry for the long post! Don’t know what came over me to write that much. 🙂
Hi Christine!
Your rig/ AKA Sidonia, sounds beautiful!! I love your ideas and they sound positively classic and stylish. The factory decor is never anything amazing and I love the fact that even owners of new RVs are remodeling, makes for a real home feel instead of a showroom feel! I spent some time in Germany and I don’t think my apartment had curtain rods at all. It was furnished. Hmmmm. I love and miss the rolladens that it had though. Why we don’t have those in America is beyond me. 🙂 Thank you for the lovely comment!
Forgot the link to the flooring and the curtain photos.
http://instagram.com/p/mJGPozRozI/
http://instagram.com/p/mJKvvYRo68/
Very nice!! I like those day and night shades!! And the tile is beautiful!
Love all your window treatments! I would love to see what you did by the kids beds. We have a window by each of the bunks for our boys. There is a metal/plastic blind there now, my 3 year old has each slat bent and in horrible shape. They. Are me nervous with the strings on them. I then took one apart and made a roman blind with black out fabric. But we live In Nova Scotia so with the camper sitting all winter the glue didn’t hold very well, lol. Would love to see how you made the treatments work! Thanks so much!
Hi Chataunna! I never did fix those back bunkhouse room curtains. The material I used was far too thick and they just hung awkward.
You can really use any kind of curtain hardware. I also thought about spray painting the privacy blinds black to allow for more of a black-out effect. Just never got around to it.
where can I find the privacy shade in the picture?
Here is a place to start Amy, http://www.campingworld.com/shopping/item/custom-made-day-night-shades/1869d These are fancier but they are really nice.