
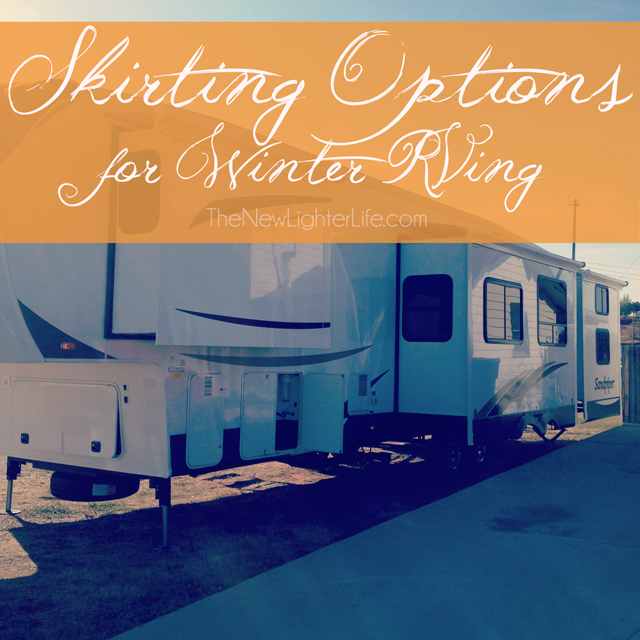
 This post may just be the most boring thing I’ve ever written. BUT, with the possibility that it might help someone as they decide how to skirt an RV, I’m posting it anyway. There are several options for skirting a camper, today I’m sharing our list.
South Dakota in the winter dictates that we need to skirt the RV. So does Hart Ranch (where we are staying). It really is a win win I suppose. We get to have warm floors and save on our electricity/propane costs. So we
Being a cheap thrifty gal, I don’t want to skirt the RV because of the cost and pain of figuring it all out.
Mark and I have measured the RV five times! We’ve calculated. We’ve asked tons of questions. In the end, we’ve balked at making a decision. BUT I think we just don’t want to bite the bullet on something that could be a flop and not work
Regardless, here are the options we’ve come up with:
- 2″ Foam Insulation Board
- Pros – More insulation, inexpensive (I don’t know how much but it’s pretty cheap)
- Cons – Not mobile, not durable unless reinforced with plywood
- Plywood
- Pros – sturdy & durable, inexpensive (about $200)
- Cons – not mobile
- EZ Snap Kit
- Pros – mobile, professionally done
- Cons – expensive (just under $1,000), not heavily insulated
- Hay Bales
- Pros – cheap (probably less than $100), heavily insulated
- Cons – mice, spiders, & fires OH MY!
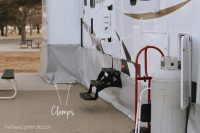
- DIY Vinyl
- Pros – mobile, moderate costs ($700)
- Cons – more labor from having to piece the vinyl, room for us to really jack this whole thing up.
- RV Skirting.com
- Pros – custom made to fit and relatively hassle-free, mobile
- Cons – more costly (over $2,000 for our rig)
There may be more options, but these seem to be the most common ones out there.
We’ve decided to do Option 5. It’s a hybrid of #3. EZ Snap Kit, but by purchasing the components from 2 different vendors, we’ll save some money this way over buying it all from EZ Snap Direct.
UPDATE: I WISH we would have gone with Option #1, the Foam Insulation Boards. The vinyl was pretty costly – even as a DIY and it ended up causing more frustration that what it was worth.
Since we have to spend money on skirting, we wanted an option that would be durable, mobile, and cost effective.
We didn’t want to go with RV Skirting.com because we’re doing this whole debt pay-off thing and that was the most expensive option (though the easiest we could find). Plus we figure we’re mildly intelligent people. We should be able to figure this out. Right?
We’ve ordered our supplies and will post another update when we actually install the skirting.
Any RVing experts have an option we didn’t cover?


We are full-timing in Wisconsin at a campground this winter – do you have a link you can share for the DIY Vinyl kit? We are trying to figure out what to use for skirting.
You bet Brent!
We’re going to post all the info, but in the meantime, I’ll give you the cheapest places we found for supplies. We are buying the 5th Wheel enclosure kit (and extra snaps) directly from EZ Snap, the vinyl, velcro, and vinyl cement came from SailRite.
We are piecing our own vinyl skirting as our RV sits about 34 inches off the ground and we can’t cut the 61″ inch vinyl in half (there has to be a flap to fold 2X4’s on the bottom to hold them in place).
Hope this helps you, we’re planning on putting a detailed post up within a week or 2.
Hello Julie, I know you’ve long since left your RV, but am hoping you can still help with this. We’ve just put up foam insulation boards AND straw bales. I see you mention ‘fire’ as one of the cons of straw bales. Could you please elaborate on that? (There are one or two spots where we have used only the straw bales pressed flush to the RV or tucked just under the edge to keep secure). It’s made a big difference to the interior temp and so far, with taps left running in temps down to 18, all is well. But Inwould like to know more about the fire danger. Also, this is a modified RV with some insulation that was already set in place and hooked up to water and electric. How would Inlocate the exhaust vent for the hot water heater? Wouldn’t it encourage more rodents to go underneath and increase wind circulation to have an opening? Thank you so much!
We just recently had our first forray into freezing RV’ing while visiting the ‘rents for Christmas. The pipes froze the moment the temp outside dropped below 30 degrees. We thought we had taken precautions by putting r-21 insulation inside the wet/utility bay doors on either side and cut an opening in the furnace piping to pipe hot air in there; not just the ancillary heat from the loss in the pipe wall. Didn’t work. LOL. So we got online, read some posts, and discovered the secret is in the SKIRT. We got up first light and headed to Lowe’s and got reflective bubble insulation. Three 25′ rolls wrapped up our entire camper. It was 4’ high, taped at one door trim, and just simply wrapped around, taped at seems at the end of the roll, along the insulation, not the camper (not sure how the gorilla tape will affect our finish), and then we put a ceramic heater under the RV, being sure to have it close to the back half (where the plumbing is) and away from the fuel tank direct. Withing two hours the pipes were thawed. Granted, it got up to 34 today, but it’s down around 20 again tonight and things are working well. CHEAP ($200 for tape, insulation and heater, and low temp 15 amp drop cord). And it works. You can reuse the insulation and it looks like a shiny present! We cut around the slide out, vents and any other area that had exhaust, etc., and it’s working. We are doing alot of praying, but I think this is the best solution, especially if you’re not staying put for extended periods – IT’S PORTABLE, LIGHTWEIGHT AND EFFECTIVE! : ) Happy camping!
I would love to see pictures of this set-up if you have any! We’ve been researching how to skirt the RV and make it more winter-friendly! Thanks!
I’d love to share our setup with you, but we are no longer RVing. Sorry I can’t be anymore help but I hope you find a solution that works. Skirting an RV is no joke and really does make or break the winter months.
Sounds
Great for amateurs not and not so scary as the big projects
This is a great versitile, portable, and cost effective solution. I was amazed at how much warmer my floors were and how much easier it was to heat my place.
I’m heading into my third winter in an old travel trailer in Colorado. I’m slowly working on refurbishing, but found the same reflective bubble wrap. I used the two foot wide and just wrapped the bottom to the ground as the park manager wasn’t fond of the appearance of four feet of shiny stuff. I tried a few tapes and Gorilla was definitely the best to attach it to the trailer. It does leave marks, but on old aluminum siding, I’m able to get it off with GooGone or denatured alcohol fairly easily. I also use the reflective tape they make to go with it when I am attaching the wrap to more wrap. It feels kind of fragile, but has adhered fabulously on areas where I had to do odd cuts and such. The two biggest keys I’ve found are to clean the surfaces before taping and make sure all openings are sealed. I use a shop light with an old fashioned 60w bulb under the trailer. I’ve had to redo the taping each year, but that’s a couple of hours to clean and retape and about $8 for another roll of tape. (If I miss getting it up before temps drop, a blow drier heats the surface and the adhesive well for a sturdy hold.) My neighbor just used the shiny tape for her entire install. I may switch if hers holds up well.
Since I couldn’t do the four foot wrap, I’ve had a few problems when it got really cold, but they have been minor freezing with no breaking of water lines. I’ve found two more helps that took care of it.
I had leftover Reflectex, so I stapled it to the interior of my cabinets on the exterior wall since my waterlines run about four inches from that wall through the cabinets. I had a surprise advantage in that the material reflects light and it is now much easier to see what I’m reaching for in those cabinets.
I took my floor level cabinet doors off and replaced them with light weight curtains made from a $4 walmart twin sheet so the heat could get into the cabinets. Since they are floor level, I’m not concerned about anything falling out when I move. I’ve had no problems since.
Can you give me a link to what vinyl you are using at SailRite? So many choices…
There ARE a ton of choices! We bought the Shelter Rite Vinyl. Mark found it recommended in some forum about RVing and skirting and it’s also the same vinyl that EZ Snap Direct uses for their skirting kits.
Thank you! May be the most boring ever, BUT VERY VERY helpful!
So glad it was helpful Gerri! I need to do another update about the skirting, but I have to tell you that we took all our skirting down. We were pretty disappointed in the results of the vinyl. To do it again, I wish we would have just put up insulation board. I do think that vinyl skirting is an excellent choice if you are not in a high winds area. South Dakota has some serious winds and it was just too much for our skirting to handle. We had some more snaps bust off recently because of a storm. Best of luck to you!
I’ve experienced one episode of temps that froze my tank drain hose (i had an arctic insulated camper). I used the styrofoam 2″to keep heat trapped under trailer (where drain hose was routed). I think overlapping a double 1″ would have been more effective and not much more labor.
Styrofoam is certainly cheap enough for one use and easy to install.
Yes it is Randy! I think the styrofoam would be the best option. A few modifications would make it stable and effective with very little hassle.
Perhaps laminate it to corrugated fiberglass roofing panels cut down to the correct height. Spray foam would probably stick them together.
I just bought a 36′ 5th wheel with 3 slides. I am interested in doing the foam option. Tips on how to fasten/stabilize and connect the sections would be a great help. Thanks so much for any input!!!
A friend of ours went with this option Michael. The basic structure would be to build a frame to hold the foam board, (simply screwed in and I’d use bigger washers). Then you’d want to put some rubber foam around the top portion so it wouldn’t squeak when it rubs against the camper. The reason for this as all campers move when you walk around in them (as I’m sure you know). Of course, make sure you leave access doors or cutouts so you can get to your drains and such. The 5th wheel part does not necessarily need to be enclosed since heat rises and the 5th wheel section is usually warmer. You can frame out sections and to make it easily storable. You may want to put a hardy plank or plywood over the foam to protect it. Good luck!!
Do you have any photos of the foam option your friends used? I’m getting ready to move into a 5th wheel long-term and want to be ready in the fall. I’m in Estes Park, CO and the winds can get VERY high, especially in the winter time. Do you think the foam will hold?
Forgot to ask, what do you think about wrapping water pipes with heat tape? Would it be better to do this, or cover them with those foam pipe wrap pieces?
So we did both. Wrapped with heat tape and covered with foam tubing. Thing to really watch out of is where the water connects to the RV…that was where all our freezing happened.
Sorry…I don’t have a picture of what they did and they are no longer RVing.
Hi Julie! Are you still at Hart Ranch?? We are doing our first winter at Hart Ranch and can’t figure out how to attach the top of the skirting to the camper without wrecking the camper.
We are not out there anymore Lynda (but we LOVED it). What kind of skirting are you attaching?
Wondering if some sort of fence material, chicken wire/rabbit fencing etc, could be wrapped around the Styrofoam to hold in place?
You sure could try it! I’d just be extra careful to not scratch up your camper. (camper movement and wind play a part in moving things around) 🙂
We will be using wood skirting! It’s that time to get it put on so we’ll be building it some time in the next couple weeks. Cross your fingers for us!! Are you still RVing and just relocated?
Thanks for this post! We’re already prepping for winter up here in North Dakota and I appreciated this rundown on options!
You are welcome and it is cold early up there this year! Best wishes!!
What do you use to hold up the plywood and foam or attach it to a Motorhome?
Hi Charmaine. It isn’t actually attached to the motorhome. It should be tight fit around the bottom of the RV, and there should be foam to protect the camper if there is any shifting. The plywood is heavy so it just sits on the ground.