We’re still around friends! I’ve so wanted to update the blog, but we had a terrible bout with the flu. Our little guy was hospitalized but is all better, thank you Jesus!

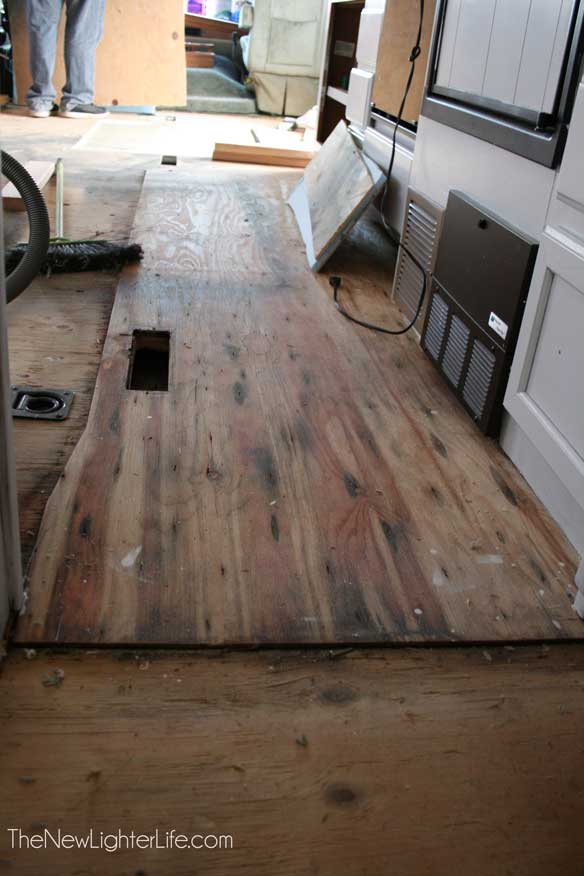
After we got over that hurdle, we got busy on the RV remodel. It looks AMAZING and I can’t wait to share the pictures and more details about what we did. Above is a teaser.
I’m happy to share that it doesn’t look like this anymore!
But in the meantime, a wordy update will have to suffice.
I’ve been busy painting cabinets, sewing curtains, and reupholstering the booth dinette cushions.
Mark took some time off work and demo’d the camper. He had to do some work to the subfloor and is finishing up painting all the walls and cabinets.
Let me just confirm that perspective changes radically based on what you’re doing. When you’re trying to fit everything in a small space, it seems like there are just not enough cabinets.
Painting cabinets?
There are far too many of those babies. Oh but it looks so NICE now and I think it’s well worth the time spent on them.
So here’s where we stand on what’s left to update.
Our Running To Do List:
- Build Bunk Beds – Mark has a pretty cool design planned that will allow for the bunks to be lifted for more playroom during the day.
- Mattresses for Bunk Beds
- Flooring
- Cabinetry Hardware Update
- Outlet Update
- Replace Toilet
- Trip to Ikea for Sofa Bed – After over 6 years of waiting, I’m planning on making my very first trip to Ikea this coming weekend.
- Update Light Fixtures to LED – This is somewhat costly, so we’ll do that as we go.
I’m still not giving up on my tankless water heater, resurfacing the outside of the rig, or the vac system kick plate. But with all we have going on, those are not at the top of the list. I also would love to sew quilts for the kid’s custom bunk beds, but the curtains are taking me longer than I expected so I may just make duvets for their beds.
I’m not sure why these kids keep expecting to be fed all the time! But I’m proud to report that Eliana and Eli managed to make chocolate chip cookies yesterday so they aren’t totally deprived.
So that’s it for a not so quick update.
As an Amazon Associate, I earn from qualifying purchases at no extra cost to you. Thank you for your support!

Just wanted to say how much we are enjoying your posts and pictures. We are in the middle of an update to a 1986 Winnebago Chieftain 22, and have done or are doing many of the same steps you have done. We purchased the van 2 years ago so we could try our hand at camping, and have yet to use the RV. It had good bones, but was so old with cabinets, curtains, and upholstery that I had to clean and replace them prior to taking our first trip. Now we have spent almost 3 mos. painting cabinets, replacing hardware, wallpapering, etc. Your idea to update the kitchen table with a covering was brilliant! Yesterday my daughter and I went to JoAnns and bought fabric to do the same to our table, as well as fabric to make new cushions. Will let you know how ours turns out, we will include the cup holders in the design, tho they are too small to be of much value, but some of the grown kids want them included… I had to paint all the old and new plywood we retained, I was surprised previous owners left it ‘raw’. So we added new plywood for the master bed, painted the ’empty’ dinette seats and underneath the dinette table as well as the interior of all the cabinets. Today our son cut out the carpeting and are glad to say the plywood sub-flooring we found looks pretty good. How did you get out all the little pieces of carpeting underneath the cabinets and other built-ins (Bed, cabinets, etc)? Short of removing and gutting everything, do you have any suggestions on that? We cannot do that, it is impractical in our case. Our RV is parked in our home driveway while we work on it… and last week we discovered that the transmission has failed, so after we are done with our interior update, we will have to have it towed someplace for more work. It is after 3 am and I am typing without my glasses, so forgive me for rambling. The point is I wanted to let you know again that we are finding encouragement in seeing the ground you have covered, and we admire your handiwork. Thank you!! Julia.
Thank you so much Julia! It is such a big job and I’d love to hear how yours turns out. We were short on steam and time so we didn’t paint the interior of our cabinets (though I wish we would have at least painted the inside of the doors. To get the leftover carpeting, we took a razor blade and a needle nose pliers. Tedious but it got the rest of the carpet out. We also could not have removed cabinets so we had to cut away as best we could. Best wishes to you and thank you again for your generous comments! 🙂