By sprouting grains, you significantly up the nutritional value of bread. The process is time-consuming but very easy easy and rewarding. For many years now, sprouted bread (aka Ezekiel bread) has been a hot commodity for the health-conscious. If you’re looking for a healthier alternative to regular bread, sprouted bread is it for so many reasons, which I’ll cover. I’ll also go over how to sprout grains, dry them, and some sprouted bread recipe ideas.
[ez-toc]
What are Sprouted Grains?
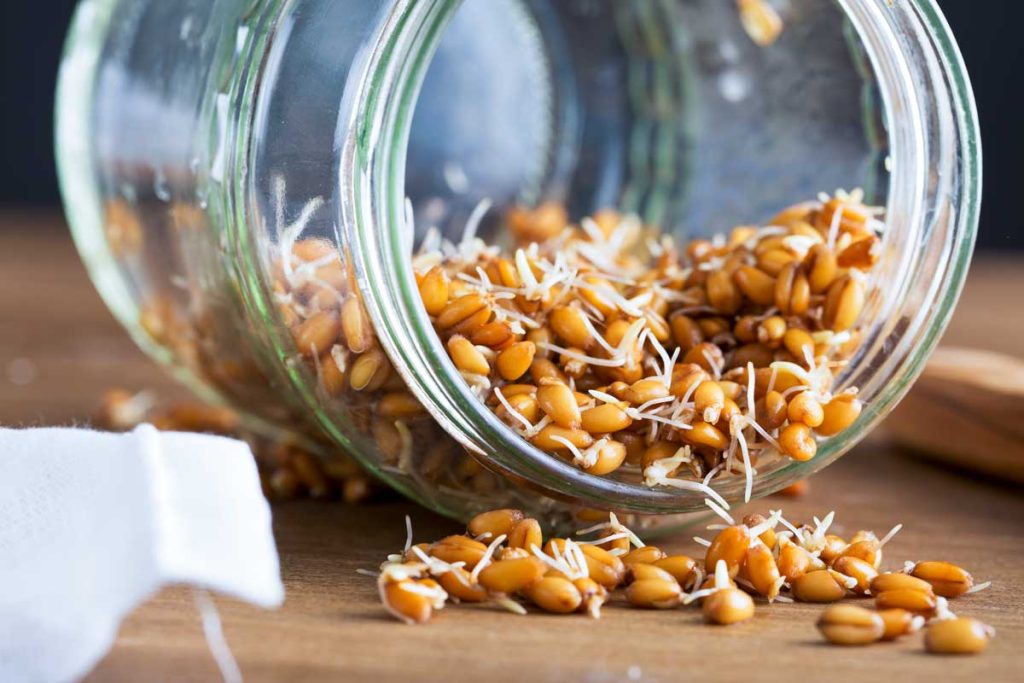
Sprouted grains are whole grains that have been soaked in water, allowing them to germinate and sprout. I learned about sprouting grain close to 20 years ago when I read Nourishing Traditions and my mind was blown. Sprouting is a process that breaks down some of the difficult-to-digest proteins and sugars found in regular grains, making them easier for our bodies to absorb and utilize. Examples of grains that can be sprouted include wheat, barley, rye, millet, rice, and oats. In addition to being more digestible, sprouted grains also offer increased nutritional value, including higher levels of fiber, amino acids, antioxidants, and mineral bioavailability.
Why are Sprouted Grains Healthier?
Years ago, my dive into Nourishing Traditions opened my eyes to just how much healthier sprouted grain is for you. I recall Sally Fallon stating something about how modern farming practices and efficiencies prevent grain from sprouting like it would have more naturally hundreds of years ago. So why is it healthier than traditional bread?
Easier Digestion
One of the main reasons why sprouted grains are considered better than their non-sprouted counterparts is that they are easier to digest. The sprouting process breaks down complex carbohydrates and proteins into simpler forms, making them easier for our bodies to process and absorb. This is particularly beneficial for individuals with gluten sensitivities or digestive issues, as sprouted grains may cause fewer adverse reactions.
Increased Nutrient Availability
Sprouted grains also boast higher levels of nutrients compared to non-sprouted grains. The germination process increases the availability of vitamins, minerals, and antioxidants, providing our bodies with more essential nutrients. Studies have shown that sprouted grains can have up to 300% more vitamin A and over 500% more vitamin C than their non-sprouted counterparts. That is an incredible difference in nutrient value!
Nutrient Absorption
The sprouting process makes the nutrients in grains more bioavailable, allowing our bodies to absorb and utilize them more efficiently. The list of nutrients that you absorb more of is folate, iron, vitamin C, zinc, magnesium, and protein. All of these support overall health and well-being and turn that slice into a healthy choice rather than something to avoid.
Improved Digestive Health
Sprouted grains are easier on the digestive system, as the sprouting process breaks down complex carbohydrates and proteins into simpler forms. This can be particularly beneficial for individuals with gluten sensitivities or digestive issues, as sprouted grains may cause fewer adverse reactions.
Lower Glycemic Index
Sprouted grains have a lower glycemic index than traditional grains, meaning they cause a slower, more gradual rise in blood sugar levels. This can be particularly beneficial for individuals with diabetes or those looking to manage their blood sugar levels more effectively. If you want more information on the glycemic index of grains you can look up your flour/grain/seed type and the GI. Here are a few comparisons of different types of flours:
Sprouted Grain
15
Kamut
45
Wheat
85
Rice
95
Improved Taste and Texture
Everyone has different tastes and preferences but many people find that sprouted grain bread has a more appealing taste and texture compared to regular white or whole wheat bread. The sprouting process often results in a slightly sweeter, nuttier flavor, and a softer, more tender texture.
Shocking right?!? Hopefully, I’ve convinced you to take the plunge with sprouting grain. So let’s cover how to sprout grains and some recipes.
How to Sprout Grains at Home
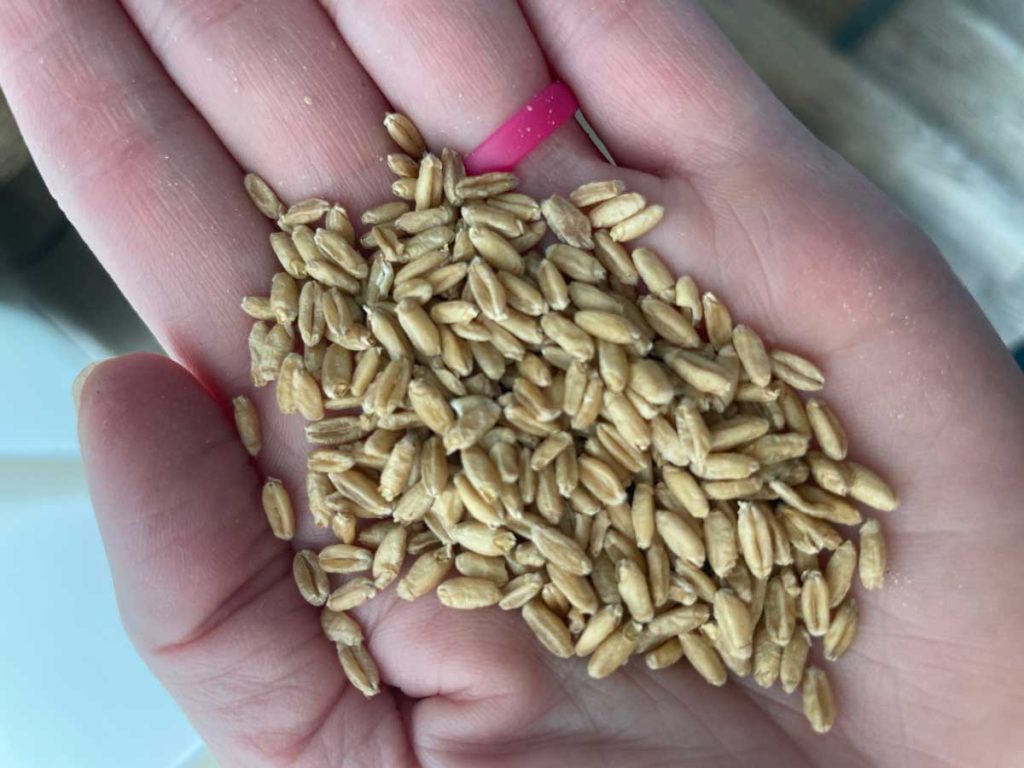
I began sprouting my wheat many years ago and it is an incredibly simple and rewarding process. If you’ve ever priced the cost difference, it’s shocking honestly. Already sprouted organic wheat berries cost $3.79/lb as of today’s post through Azure Standard (love them!). If you choose to buy organic wheat berries (and sprout them yourself) they cost $1.28/lb.
I promise you, sprouting grain at home is so easy and you’ll save so much money. Simply follow these easy steps to start sprouting your grains:
Equipment for Sprouting
- Colander
- Bowl
- Tea towel
Sprouting Instructions
- Measure out your desired amount of whole grains (e.g., wheat berries, oat groats, rye berries, etc.).
- Place the grains in a colander and place that colander inside a large bowl. The bowl and colander should be large enough to allow for the expansion of the grain.
- Rinse off the grains and let the colander/bowl fill with enough water so there are at least a couple of inches of water above the grain.
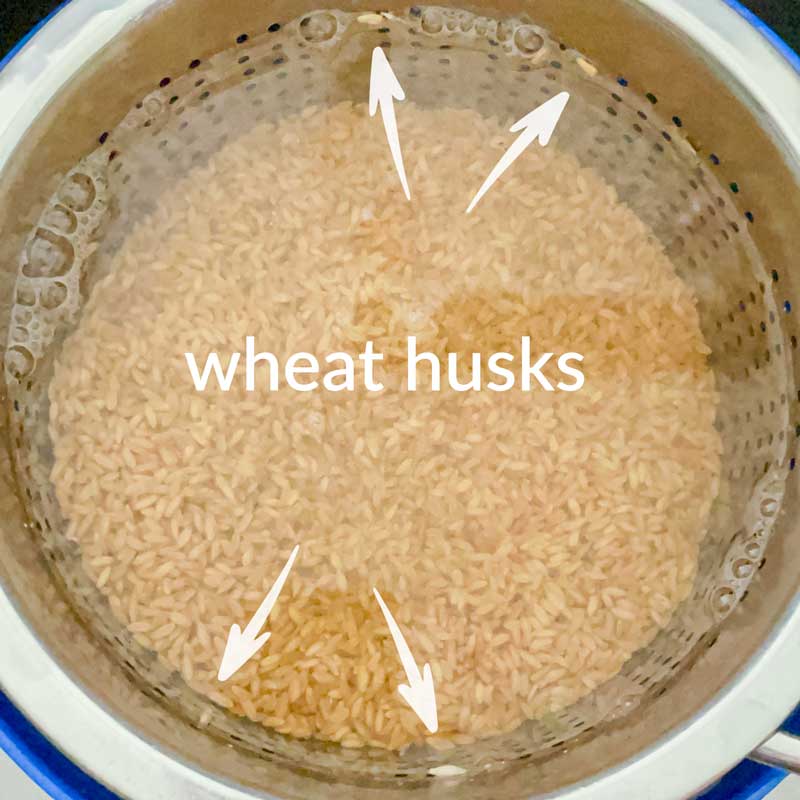
- Remove any floating husks from the water. Stir the grain and continue removing husks until no more rise to the surface.
- Drain your water from the bowl and colander.
- Set the grain-filled colander inside the bowl again and run enough fresh cool water to cover the grain 1 to 2 inches above the top of the grain.
- Cover the bowl with a tea towel and let the grain soak for 6-12 hours.
- After the soaking period, drain the water and rinse the grains thoroughly in the colander.
- Place your colander back in the bowl but do NOT fill it with water. Cover the colander with your tea towel again.
- Rinse and drain the grains every 8-12 hours until tiny sprouts appear. This process should take approximately 24 hours from the start of the soak.
- Once the sprouts have reached your desired length, rinse them thoroughly and let them drain. If you are milling your dried sprouts, I find the best length for the sprouts is to have them just barely poking out of the grain head but no longer than 1/8 inch.
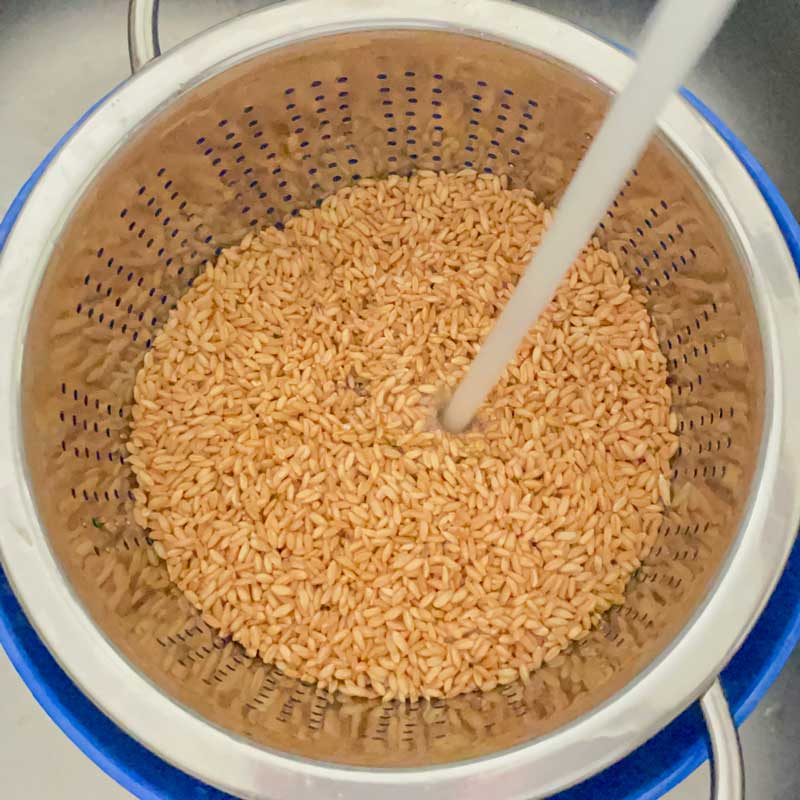
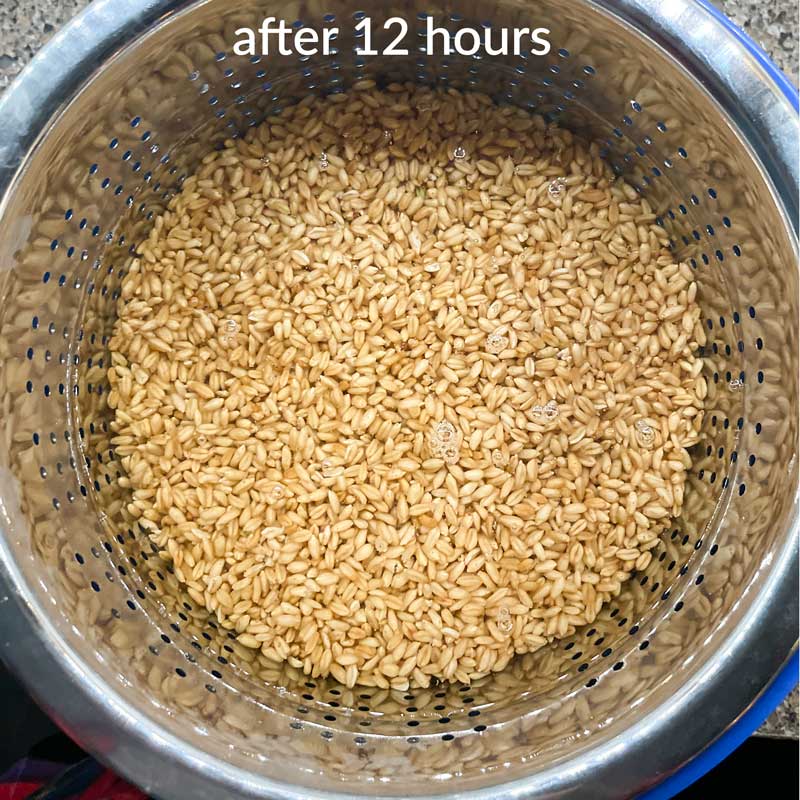
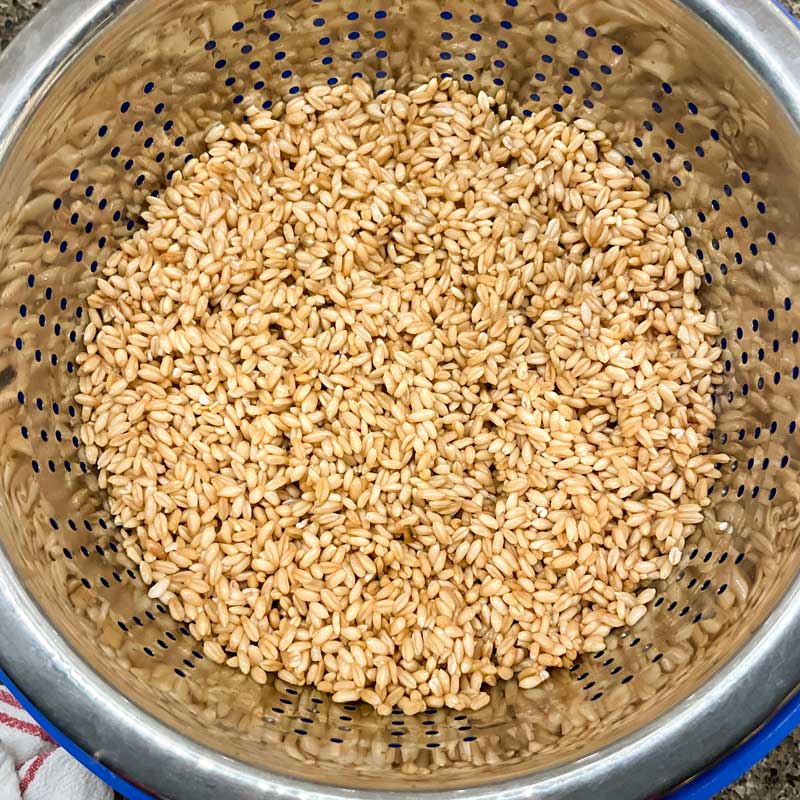
If you let your sprouts get too long, your grain mill may struggle with grinding the grain into flour. This has been the case in my experience.
You can barely see the sprouts in this dried grain and this length is ideal for home milling. You may notice some of my other photos have longer sprouts on them. At that longer length, I was still able to grind the wheat but my mill seemed to get a little bogged down.
Dehydrating Your Sprouted Grain
You have options for dehydrating your sprouted grain that you can read more details about at Cultures for Health. One thing you’ll want to keep in mind is that heat on the grain sprout stops enzyme activity when the temperature reaches 113°F. If that is a concern for you, you’ll want to choose a method that allows you to stay under that temperature threshold. Some ways to dehydrate sprouted grain are :
- Oven Dry
- Dehydrator
- Air Dry
- Air Fryer w/ Dehydrator Racks and Sheets
In the past, I used my friend’s Excaliber Dehydrator for years and it works wonderfully for dehydrating grains.
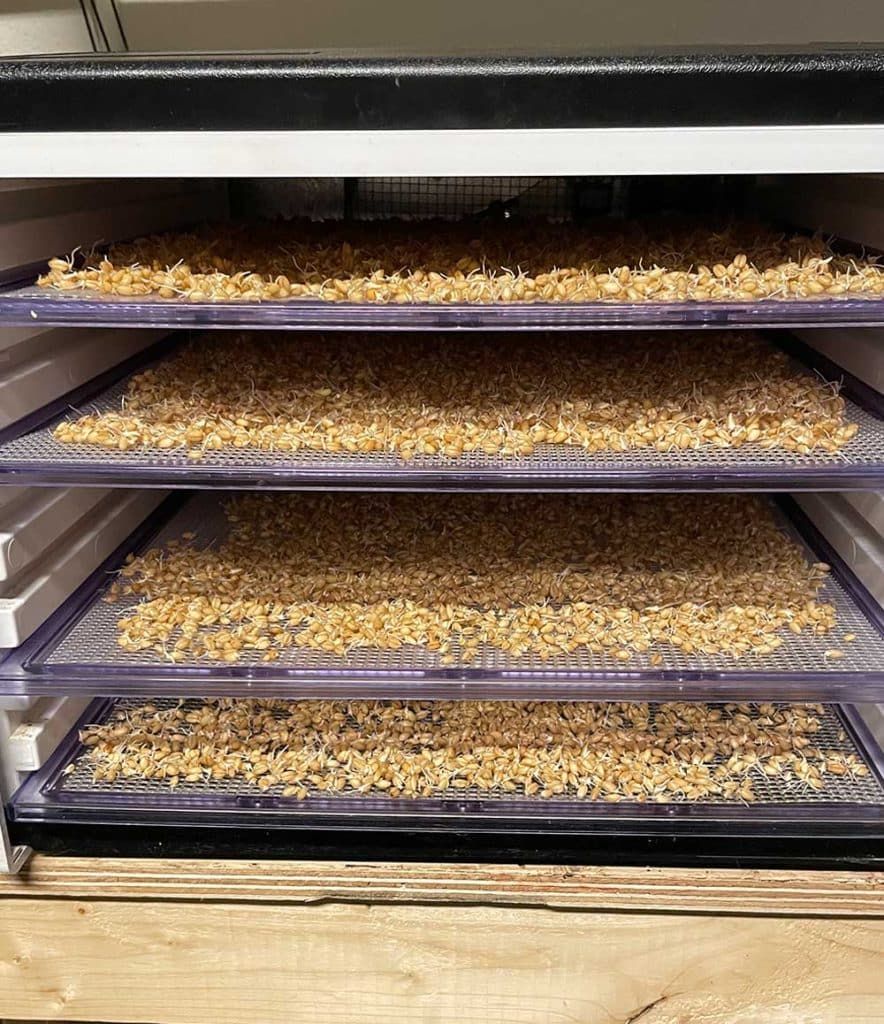
However, as I was preparing to restock my own sprouted grain stash, she tipped me off that she uses her oven for dehydrating sprouted grains now!
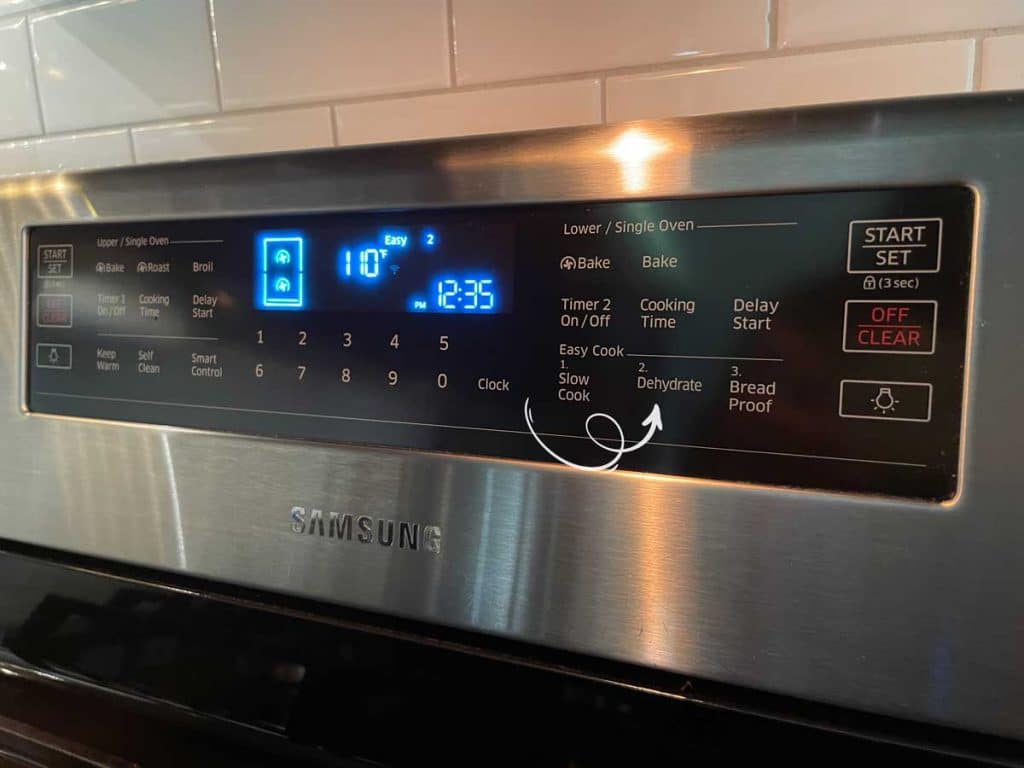
Lo and behold, my oven ALSO has a dehydrate function on it (I’ve had this oven for over 2 years and never notice it) and I can set the temperature to 110°F which is PERFECT for dehydrating. So check your oven and see if you have that function as well! No more borrowing her dehydrator or need for me to buy yet another appliance.
Grinding Your Dehydrated Sprouted Grain
What about grinding your dehydrated grain? There are many different options for grain mills out there on the market. I firmly believe that a grain mill is an investment that will reward you over and over again. I’ve had several grain mills over the years and will give you my take on different options.
- Wondermill – This was my very first grain mill. I recall it working great. The only complaint I have about it was the little gray tunnel that the fresh flour passes through to get to the canister. I found it a little cumbersome to set up and clean. The only reason I got rid of this grain mill was because we were embarking on full-time RVing and I didn’t have room for it.
- Kitchenaid Grain Mill Attachment – When I needed to replace my grain mill, I seriously considered getting the grain mill attachment for my stand mixer. Now in the spirit of full disclosure, I haven’t owned the grain mill attachment but I read so many reviews of people who said it produced too coarse of flour so I decided to pass on it.
- Hand Crank Grain Mill – I still have this little puppy for emergencies. If you’d like a workout and are concerned about the electricity going out, this is the mill for you. I only used this mill a handful of times. The flour it produces is very coarse compared to my electric grain mills.
- NutriMill Classic – This is my current grain mill. It produces fine flour and has a smaller footprint than my old Wondermill. One thing I noticed about it though, it has a tendency to overheat and I need to give it a rest and push the reset button. I don’t keep this mill out so I tend to run big batches of my sprouted wheat through it at a time. Once I grind my flour, it goes straight into a freezer-safe bag to help preserve as many nutrients as possible.

- NutriMill Harvest Stone Grain Mill – I don’t own this mill, but it’s on my wishlist if my Nutrimill Classic ever dies out. This mill is beautiful and has a larger texture range (from cracked cereal to ultra-fine). I’d leave this mill out on my counter and process as much grain as I need for recipes as I go. This would be better for nutrient retention as well since some nutrients are lost on milled flour (even if it’s stored in the freezer).
Is Sprouted Grain Bread Gluten Free?
Unfortunately, no, sprouting grain does not make it gluten-free. But the process results in flour that has lower levels of gluten than traditional flour. This is because the sprouting process breaks down some of the gluten proteins, making it easier for individuals with gluten sensitivities to digest. Note, if you have celiac disease or a severe gluten allergy, sprouted grain bread is something you will likely need to avoid.
Sprouted Grain Bread Recipes

Sprouted grains can be incorporated into many regular bread recipes. You can dive right in and substitute 100% of regular flour for your sprouted grain flour. OR you can start out by replacing half of the bread flour with your sprouted flour. Even taking this small step, will give you a boost of nutrients and give you some level of those benefits I mentioned earlier. Here are some of my favorite bread recipes that work beautifully with sprouted grain flour:
As you experiment with different recipes, just remember that sprouted flour will need a little more liquid. For one loaf, you’ll probably need about 2 to 3 tablespoons more of water.
Since sprouted flour has less gluten, it may not be as delicate of a structure. It still tastes amazing but if you want to correct this, you may need to knead your dough longer or add a little bread flour to the mix to give it a little gluten.
Final Thoughts
I recall years ago when all we ate was my homemade sprouted bread. With three children under 6 years old, it was no small feat to keep up with baking. I realize this may seem like a daunting task. But I promise you that sprouting, dehydrating, grinding, and baking a loaf of homemade bread is really not that complicated. Each sprouted loaf equates to better digestion, increased nutrient availability, and a lower glycemic load. Sprouting your own grain is a fantastic option if you’re looking to make the healthiest loaf of bread possible.
Happy sprouting!
As an Amazon Associate, I earn from qualifying purchases at no extra cost to you. Thank you for your support!
