These old-fashioned cinnamon rolls are truly irresistible, with their soft, buttery dough, gooey cinnamon-sugar filling, and melt-in-your-mouth cream cheese frosting. Whether you’re a seasoned baker or a beginner looking to try your hand at homemade pastries, this recipe is simple to follow and yields perfect results every time.
[ez-toc]
My Introduction to Cinnamon Rolls
Growing up in North Dakota, I was surrounded by the comforting smell of baked goods, though caramel rolls often stole the spotlight. Oddly enough, cinnamon rolls weren’t part of my childhood baking memories. It wasn’t until I encountered a Cinnabon at an airport as a teen that I fell in love with the iconic creamy iced cinnamon-sugar goodness of a cinnamon roll.
Inspired by those early experiences—and wanting to create a homemade version that could rival the best bakery rolls—I began experimenting in my own kitchen as a young adult. Over the years, I’ve fine-tuned every element of this recipe, from the tender dough to the creamy frosting. Today, I’m excited to share the perfected recipe with you.

Watch the Step-by-Step Process on YouTube
If you prefer a visual guide, I’ve created a step-by-step video on my YouTube channel. The video walks you through everything from proofing the yeast to spreading the filling and frosting the warm rolls. I hope that by seeing the process, you’ll be well on your way to making old-fashioned cinnamon rolls too!
Steps-by-Step for Old-Fashioned Cinnamon Rolls
Before you get started, remember to take out all the butter you will need along with your egg to make these old-fashioned cinnamon rolls.
1. Proof the Yeast
Start by adding 2 ¼ teaspoons of yeast to your mixing bowl. Pour 1 ½ cups of warm water over the yeast. If you’re using active dry yeast, let it sit for 5–10 minutes until it’s bubbly. For instant yeast, you can skip this step and proceed directly to mixing your dough.
2. Mix the Dough
Add melted butter, sugar, salt, and the beaten egg to the yeast mixture and stir. Gradually add flour one cup at a time, starting with 3 ½ cups. Stir to bring the dough together.
3. Knead and Let Rise
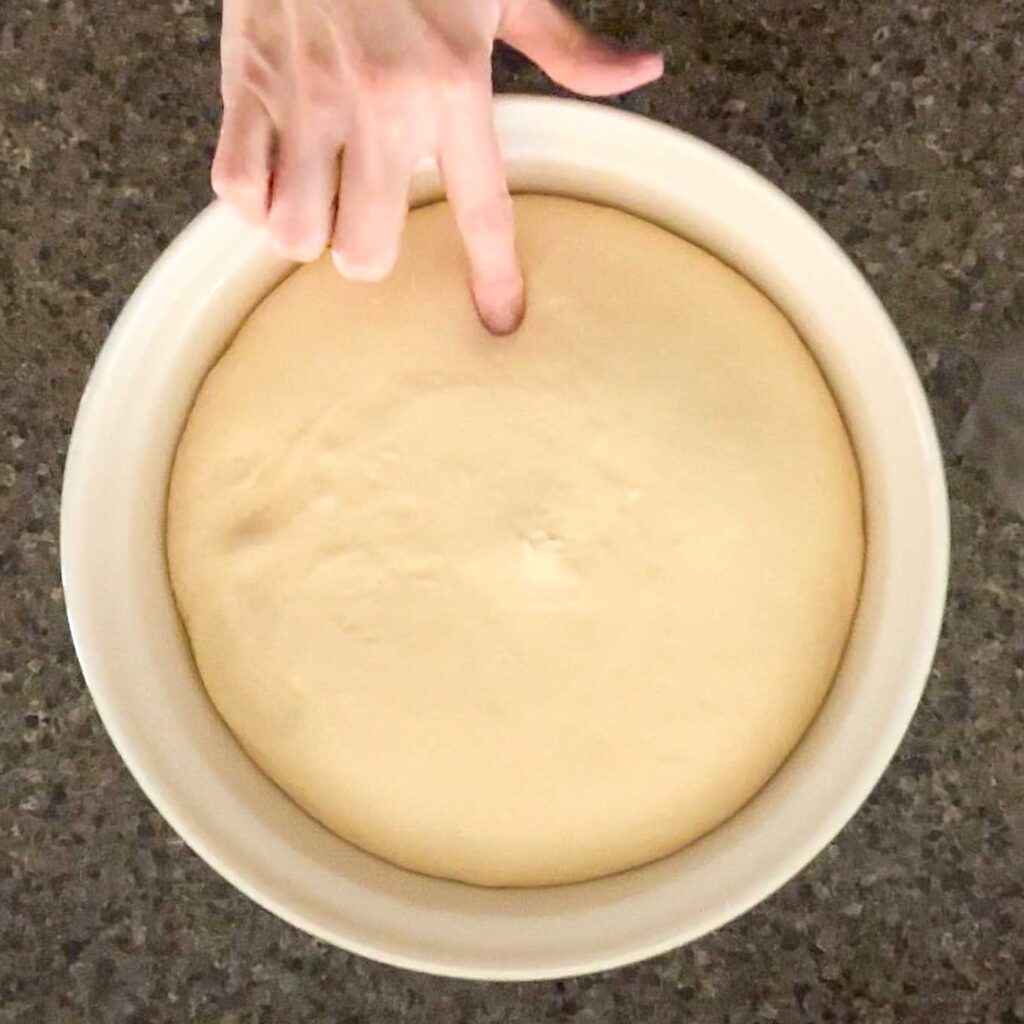
Knead the dough by hand (for 8 to 10 minutes) or use a stand mixer (4 or 5 minutes) with a dough hook. Add more flour as needed until the dough is smooth, slightly tacky, but does not stick to your hands or the bowl. Shape it into a ball, place it in a greased bowl, and cover it. Let it rise in a warm spot for about 1 hour, or until it doubles in size.
4. Make the Filling
While the dough rises, mix the butter, sugar, and cinnamon into a smooth paste for the filling.
5. Roll and Fill
Once your dough has risen, poke it lightly with your finger. If the dough does not spring back, it ready to roll.
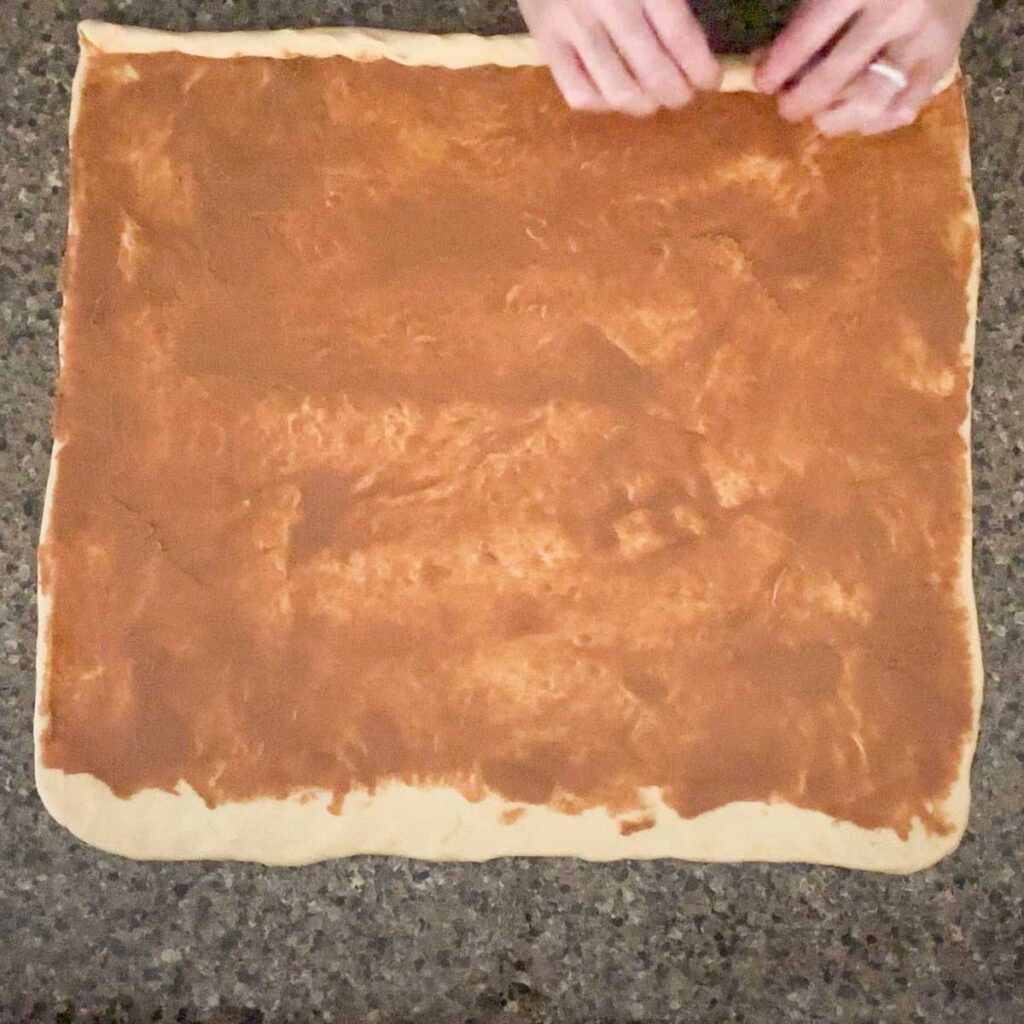
Roll the dough into an 18-inch square on a clean surface. Spread the filling evenly over the dough, leaving a small strip along one edge uncoated to seal the rolls. After you’ve rolled your dough, you can also lift and pull your dough with your hands to get it to the correct shape.
6. Roll and Cut
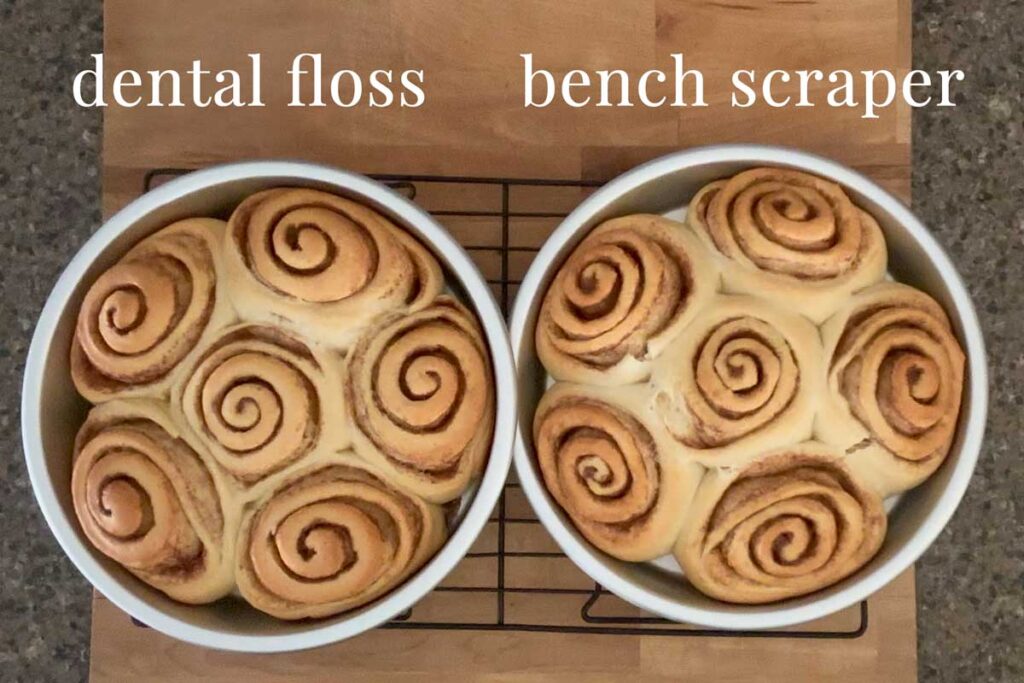
Roll the dough tightly, starting from one edge and working across. Pinch the seam to seal. Use unflavored dental floss to cut the dough into 12 equal rolls for clean, even cuts that preserve the swirl.
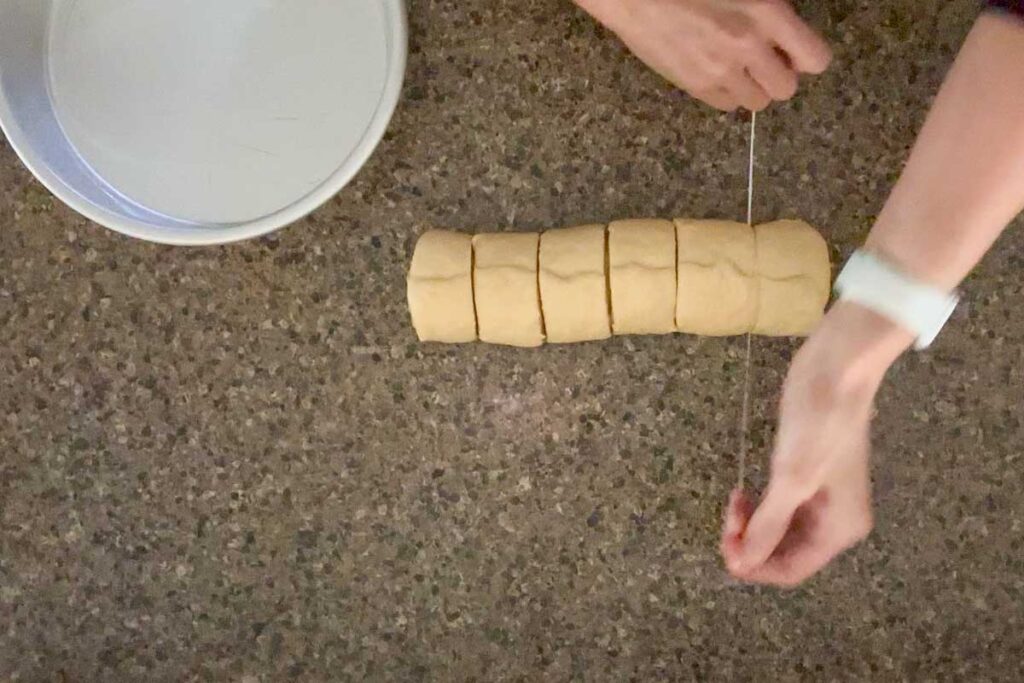
You may also use a knife or bench scraper to cut your rolls, but the dental floss cuts have much neater swirls.
7. Second Rise
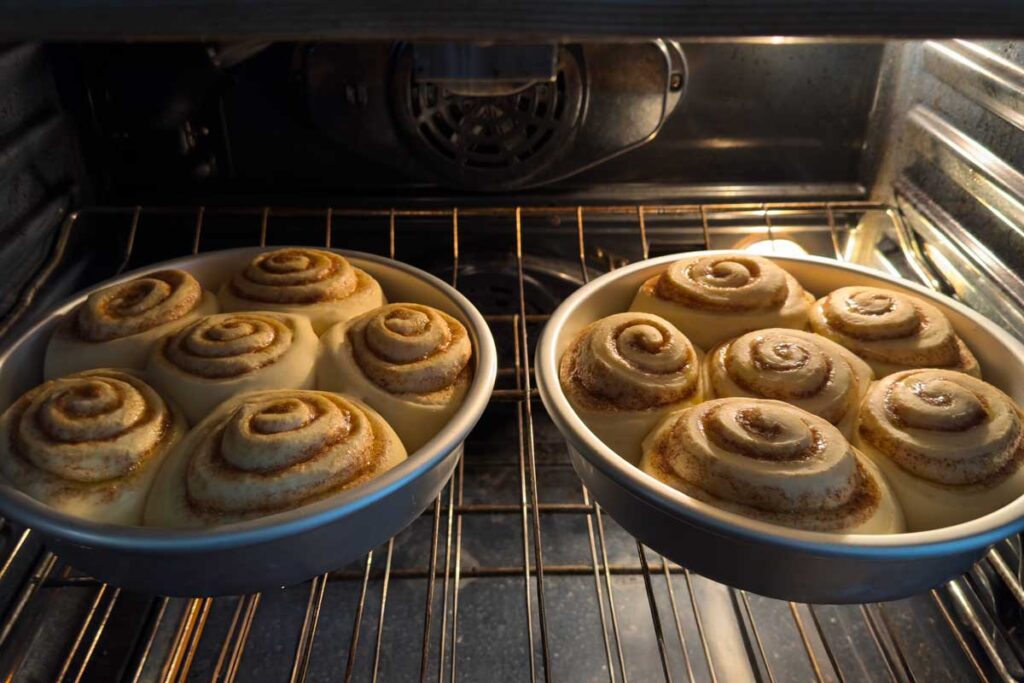
Arrange the rolls in greased pans (two 9-inch pans or cake pans OR a lasagna pan). Cover and let them rise for another hour. Use your oven’s proofing function if you’d like to speed things up.

8. Bake
Preheat your oven to 350°F. Bake the rolls for 25–30 minutes, or until golden brown.
9. Make the Frosting
While the rolls bake, prepare the frosting. Cream the softened butter and cream cheese together. Add vanilla, salt, and milk, then mix in the sifted powdered sugar until smooth and fluffy.
10. Frost and Enjoy
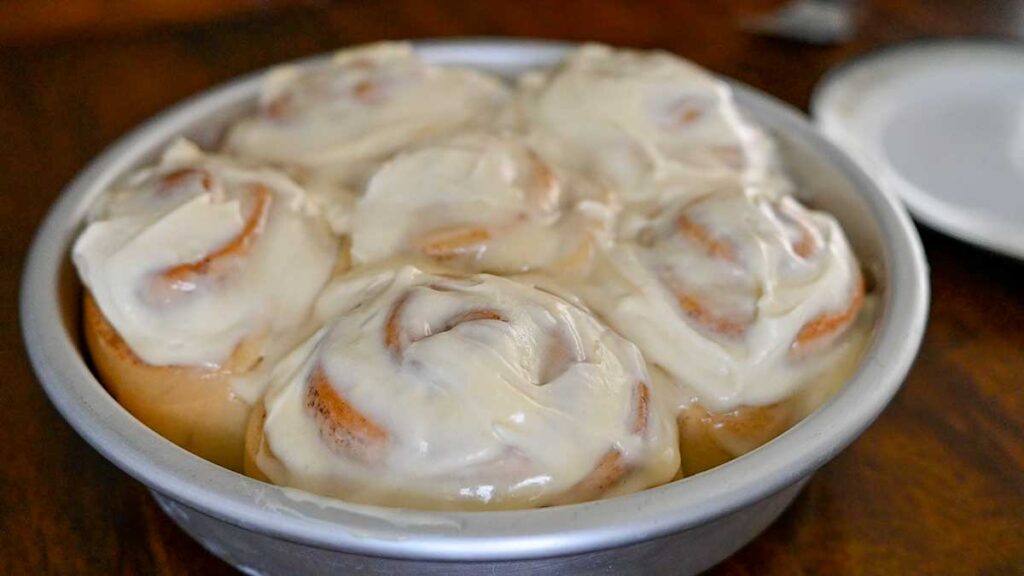
Spread the frosting over the warm rolls, allowing it to melt into every crevice. Serve immediately and enjoy the soft, gooey perfection of your homemade cinnamon rolls!
Tips to Make Old-Fashioned Cinnamon Rolls
- Know your yeast: There are two main types of yeast most commonly available: 1) Rapid-Rise, Quick-Rise, or Instant Yeast or 2) Active Dry Yeast. These two types have vastly different requirements for your water (see next tip).
- Proper water temperature for yeast: If using Rapid-Rise, or Quick-Rise, or Instant Yeast water temperature should be between 120° to 130℉ when you add your yeast. For Active Dry Yeast water temperature should be between 90° to 110℉. (DOUBLE CHECK YOUR YEAST TEMPERATURE). Too hot, and it may die; too cold, and it won’t activate.
- To proof or not to proof: Proofing is not required for Rapid-Rise, Quick-Rise, or Instant Yeast. Active Dry Yeast requires 5 to 10 minutes of proofing before you move on to the next step in the directions.
- Be patient with the dough: This recipe uses an enriched dough, meaning it has milk and egg, which makes it softer but slower to rise. Allow plenty of time for proofing.
- Cut evenly-sized rolls: After rolling the dough into a log pinch the edges and cut with unflavored dental floss to cut the rolls for clean, uniform slices and to prevent cracking as seen above
- Adjust roll size: Before cutting the rolls, you can adjust the width of your rolls but pulling the roll apart or pulling it together.
- Make ahead for convenience: You can refrigerate the prepared rolls overnight for a stress-free morning bake.
Storing & Reheating Old-Fashioned Cinnamon Rolls
Cinnamon rolls are best enjoyed fresh out of the oven, but they can be stored for a few days if needed. Keep them in an airtight container at room temperature for up to two days or in the refrigerator for up to a week. To reheat, pop them in the microwave for 15-20 seconds or warm them in a low oven until soft and gooey.
Essential Tools for Perfect Cinnamon Rolls
These tools make the process of making cinnamon rolls easier and more efficient, ensuring consistent and delicious results every time. Here’s why I love them:
- Kitchen Scale: Precision is key and a kitchen scale helps ensure you measure ingredients accurately.
- Thermometer: Proofing yeast at the right temperature is crucial for the dough to rise beautifully. A thermometer takes the guesswork out of water temperature, whether you’re using active dry or instant yeast.
- Dough Whisk: This tool is fantastic for mixing dough while keeping the dough light and airy.
- Bench Scraper: A versatile tool that helps cleanly lift dough from surfaces and is especially helpful while kneading the dough.
- Oil Sprayer: Greasing bowls and pans evenly is a breeze with an oil sprayer. It ensures the dough doesn’t stick during rising and makes cleanup easier.
- 9-Inch Cake Pans: Perfect for baking these cinnamon rolls. These pans distribute heat evenly, ensuring each roll bakes up soft and golden brown.
- Lasagna Pan with Lid: Great for baking these rolls in one pan. This size pan provides enough space for rolls to expand as they bake. The lid is also perfect for covering rolls (if you have any leftover).
- Offset Spatula: Spreading the cinnamon-sugar filling evenly is so much easier with an offset spatula. It ensures consistent layers, making every bite flavorful.
- Wire Cooling Racks: Cooling rolls on a wire rack prevents them from getting soggy on the bottom and allows air to circulate, keeping them fresh and delicious.

If you’d like one of my other favorite cinnamon sugar pastries, I HIGHLY recommend you check out my Cinnamon Twist Recipe! It’s another oldie but goodie!
Recipe for Old-Fashioned Cinnamon Rolls
Old-Fashioned Cinnamon Rolls from Scratch
Description
Ingredients
- 2¼ tsp. yeast, instant, rapid, quick-rise, or active dry yeast
- 1 ½ c. water, lukewarm, see directions for temperature
- 6 tbsp. butter, melted and cooled slightly, (85 g.)
- 6 tbsp. granulated sugar
- 1 tsp. salt
- 1 egg, beaten, room temperature
- 4 – 4 ½ c. all-purpose flour
Filling
- 6 tbsp. butter, softened, (85 g.)
- ¼ c. granulated sugar
- 1 tbsp. cinnamon
Frosting
- 2 oz. cream cheese, softened, (56 g.)
- 7 tbsp. butter, softened, (100 g.)
- 1 tsp. vanilla extract
- 2 tbsp. milk, or more as needed
- ¼ tsp. salt
- 1 ½ c. powdered sugar, sifted
Instructions
- Add the yeast to lukewarm water (between 120° to 130℉ for instant, rapid, or quick-rise yeast OR between 90° to 110℉ for active dry yeast). If active dry yeast, let proof for 5 to 10 minutes, or until bubbly.
- Mix the butter, sugar, salt, and egg into the yeast mixture.
- Stir in the flour one cup at a time. Knead for about 5 minutes in a stand mixer with a dough attachment, or 10 minutes, by hand. The dough should have a or until the dough has a smooth consistency and not stick to the side of the bowl or your hands.
- Place a small amount of oil in a large bowl and coat your loaf. Cover the dough with a kitchen towel and let it rise until doubled, about 1 hour.
- Once the dough has doubled in size, place it on a countertop and roll dough into an 18 inch square.
Filling
- Mix the filling ingredients together in a bowl.
- Spread the filling evenly over the rolled-out dough.
Cutting Rolls
- Starting on the long side of the rectangle, roll the dough up. Pinch the end of the dough to the roll to seal it.
- Cut the roll in half in the middle and divide each half into halves again. Cut each quarter into thirds for a total of 12 cinnamon rolls.
- Spray two 9-inch pie pans or cake pans. You may also use a lasagna pan (14X13-inches).
- Arrange the rolls in pans, with the cut sides up.
- Cover the pan and let the rolls rise for 45 minutes to an 1 hour or until doubled.
- If you are baking the rolls at a later time, cover them with plastic wrap and refrigerate them fgor up to 2 days.
- When ready to bake, preheat the oven to 350°F.
- Uncover and bake them for 25 to 30 minutes, or until golden brown.
Frosting
- While the rolls are baking, mix together the cream cheese and butter in a small bowl. Mix until smooth.
- Add the vanilla, salt, and powdered sugar. Mix for several minutes for a light and fluffy frosting.
- If needed for consistency, add a little bit of milk or just enough to get your frosting spreadable
- Once the rolls are finished baking, remove them from the oven and spread the frosting over the warm rolls.
Nutrition
As an Amazon Associate, I earn from qualifying purchases at no extra cost to you. Thank you for your support!

These are the best cinnamon rolls I’ve ever made.
Oh I’m so happy to hear that Debra! We love them too!