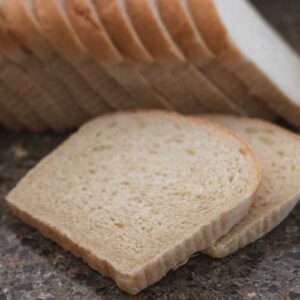
There’s nothing quite like the smell of fresh bread baking in your kitchen. If you’ve ever wanted a reliable sandwich bread recipe that yields a soft, sturdy crumb and a mild, buttery flavor, this post is for you! Below, you’ll find a 1-pound loaf recipe (ideal for an 8½ x 4½-inch pan), as well as a larger 1½-pound loaf recipe (ideal for a 12 x 4½-inch pan). I also have a step-by-step video walkthrough to take you through the entire process.

YouTube Step-by-Step Video
If you prefer to learn visually, check out our YouTube channel for a detailed, step-by-step video of this entire sandwich bread recipe. You’ll see how to mix, knead, shape, and bake your loaf so you can follow along in real time.
Yeast Types
Before we get to this recipe, we need to lay a good foundation starting with Yeast. This is the driving force behind the perfect bread rise. Here are the most common types:
- Active Dry Yeast: Needs to be dissolved (proofed) in warm liquid before mixing into your dough.
- Instant (or Rapid Rise) Yeast: Can be mixed directly into dry ingredients without proofing, though many bakers still like to give it a quick soak to ensure full activity.
- Fresh Yeast (Cake Yeast): Less common, but offers strong, fast activity. It must be dissolved in liquid.
Active dry yeast is a solid choice and it’s what this recipe calls for. However, feel free to substitute instant yeast if that’s what you have on hand. If using instant (also sometimes called instant yeast), you can shorten or skip the proofing step, but you’ll still want to make sure that your dough rises properly.
Temperatures for Yeast
Using a quick-read thermometer is an easy way to ensure you’re in the right zone every time.
Active Dry Yeast
Yeast thrives in warm environments. The ideal temperature range for active dry yeast is about 90°F to 110°F (32°C to 43°C). If your water/milk mixture is too cool, yeast activity slows or stalls. If it’s too hot, you risk killing the yeast.
Instant / Rapid Rise Yeast
Even though you don’t need to proof your yeast for instant or rapid rise yeast, you’ll need to your milk/water mixture to be between 120°F to 130°F (49°C to 54°C).
No-Proof Details
If you’re using instant yeast (instead of active dry), you can skip the 10-minute waiting period to dissolve and foam the yeast. Just remember you’ll need your liquids to be the proper temperature range above when you add your instant yeast.
Proofing instant yeast is a helpful way to confirm that your yeast is active and alive. If you’re new to bread baking, proofing is a good habit to maintain—especially if you aren’t sure how fresh your yeast is.
What Size Loaf Pan Should You Use?
Loaf pans come in several sizes, but two are the most common for sandwich bread:
- 8½ x 4½-inch pan: Standard size for a 1-pound loaf.
- 9 x 5-inch pan: Makes a wider slice for a 1-pound loaf and is often used for quick breads.
- 12x 4½-inch pan: For tall 1½-pound loaves
Using the correct pan size helps ensure your dough has enough room to rise fully without overflowing. If your pan is too large, your loaf may spread instead of rising tall. If it’s too small, you risk having the dough spill over the sides.

Tips for Making Perfect Homemade Sandwich Bread
- Avoid overbaking. Check for doneness by tapping the bottom or, better yet, use a meat thermometer. An internal temperature of around 190°F means your bread is ready.
- Turn up the heat for a darker crust. If you prefer a more golden-brown top, raise your oven temperature from 350°F to about 375°F for the last 5 minutes of baking. Keep a close eye on the loaf to prevent burning.
- You don’t need to score the loaf. Unlike artisan-style breads, sandwich loaves usually don’t need scoring (cutting slashes on top). The dough is soft, and the shape is guided by the pan, so slashes aren’t necessary.
- Use less yeast for a tighter crumb. You’ll notice that my recipe calls for less yeast than most bread loaves. This results in a small crumb and better flavor due to the longer rise.
- Shower cap hack. A large shower cap (designated for food use) can be a convenient cover during the second rise. It traps humidity, helping your dough rise consistently without drying out.
- Cutting for freezing. Once your loaf is completely cool, slice it before freezing. This allows you to pull out individual slices whenever you want fresh-tasting bread.

1-Pound Sandwich Bread Recipe
(8½ x 4½-inch or 9 x 5-inch Loaf Pan)
- ½ cup (120 ml) hot water
- ½ cup (120 ml) milk
- 1½ teaspoons (about half a packet) active dry yeast
- 1½ tablespoons (32 g) honey
- 3 cups (360 g) all-purpose unbleached flour
- 1½ teaspoons salt
- ¼ cup (57 g) butter, mleted and cooled
1½-Pound Sandwich Bread Recipe
(12 x 4½-inch Loaf Pan)
- ¾ cup (180 ml) water
- ¾ cup (180 ml) milk
- 2¼ teaspoons (1 packet) active dry yeast
- 2½ tablespoons (47 g) honey
- 4½ cups (540 g) all-purpose unbleached flour
- 2¼ teaspoons salt
- 6 tablespoons (85 g) butter, melted & cooled
Follow the same method as the 1-pound loaf. Proof your yeast in the warm water and milk, then combine with the dry ingredients. Knead until smooth and elastic, let rise, shape, and let rise again. The baking time may extend slightly—start checking around 30 minutes, but it could take up to 35 to 40 minutes. Use a thermometer to confirm it has reached 190°F internally.
Shaping the Dough for a Perfect Loaf
Once your dough has risen, it’s time to shape it for the loaf pan. Start by gently forming the dough into a smooth ball, tucking the edges underneath to create a seamless surface. This helps maintain structure and ensures a smooth, even rise.
Next, press down on the dough to release any trapped air pockets. You can use a rolling pin for this step, but using your hands works just as well. Flatten the dough slightly, then take the top edge and fold it down about one-third of the way. Press firmly to seal the fold. Now, take the bottom edge and fold it up so it meets where the top fold ends.

Press down again, ensuring you remove any air bubbles and that the seam adheres well. Rotate the dough so the seam runs vertically in front of you. If you notice any gaps, pinch them together to seal.

Begin rolling the dough downward, gently lifting and tucking it under itself as you go. This technique builds surface tension, which helps create a strong, even loaf with a smooth top. Tug the dough slightly as you roll to ensure a snug shape, then tuck the ends underneath for a clean finish.
Before placing the dough in your loaf pan, hold the pan next to your shaped dough to check its size. If needed, gently stretch or compress the dough to fit perfectly within the pan. Once sized correctly, transfer it into a greased loaf pan, seam-side down, making sure it sits evenly for an even rise. Now your dough is ready for its second proof!
Cutting and Freezing Sandwich Bread
If you plan to freeze your bread, let the loaf cool completely (about 1 hour). Slice the entire loaf to your desired thickness, then place slices in a freezer-safe bag or container. This way, you can grab individual slices without needing to thaw the whole loaf.
My Favorite Tools for My Sandwich Bread Recipe
Below are a few products that can make your bread-baking journey smoother. As an affiliate, I earn a small commission from qualifying purchases, at no extra cost to you.
- Kitchen Scale
- Thermometer
- Dough Whisk
- Metal Bread Loaf Pan (8 ½ x 4 ½ inches)
- Metal Bread Loaf Pan (12 x 4 ½ inches)
- Zassenhaus Bread Slicer

Last Thoughts on My Sandwich Bread Recipe
Whether you’re a beginner or a seasoned home baker, this sandwich bread recipe is a dependable option for soft, tasty loaves that are perfect for sandwiches. Remember the key tips—choose the right loaf pan, keep an eye on the dough’s rise, and use a thermometer for doneness. With a little practice, you’ll have your ideal homemade sandwich bread ready to enjoy your PB&Js and sandwiches at any time without having to go to the store. If you’d like to try another favorite bread recipe of ours, you definitely need to try my Grandma’s Old-Fashioned Oatmeal Bread! Delicious!
Until next time, happy baking!
Sandwich Bread Recipe
Description
Ingredients
- ½ c. hot water, (¾ c.)
- ½ c. milk, (¾ c.)
- 1½ tsp active dry yeast, (2 ¼ tsp.)
- 1½ Tbsp honey (32 g.), (2 ½ Tbsp or 47 g.)
- 3 c. flour, all-purpose unbleached (360 g.), (4 ½ c. or 540 g.)
- 1½ tsp salt, 2 1/4 tsp.
- ¼ c. butter, melted & cooled (57 g.), (6 Tbsp or 85 g.)
- Additional flour for kneading
Instructions
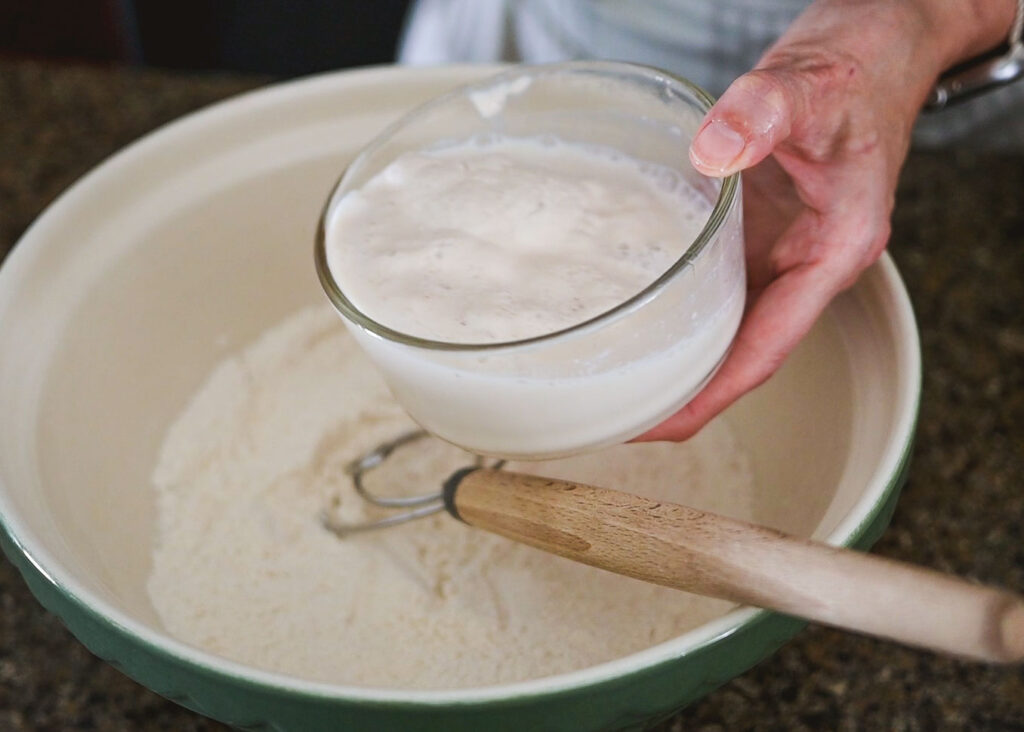
- In a small bowl or measuring cup, combine the hot water and milk. Warm to 90°F–110°F if necessary (use short bursts in the microwave if needed). Stir in the yeast and let it sit for 10 minutes until foamy.
- In a mixing bowl, stir together 1½ cups (180 g) of flour and the salt.
- Pour in the yeast mixture, 1½ tablespoons of honey, and the melted butter. Stir with a spatula or bread whisk, then gradually add the remaining flour until a rough ball of dough forms.
- Turn the dough onto a lightly floured surface (or use a stand mixer with a dough hook). Knead for about 8 minutes by hand or 4 minutes in the mixer. The dough should become smooth and elastic.
- Place the dough in a lightly greased bowl, turning it once to coat. Cover and let it rise for 1 to 2 hours, until doubled in size. When gently poked, the dough should not spring back immediately.
- Lightly flour your work surface again, then press down the dough to release any trapped air. Fold the bottom edge up to the center, fold in the left and right sides to the center, then fold the top down. Roll the dough into a snug log and place it seam-side down into your greased loaf pan. Tuck in the sides as needed so the top surface is smooth.
- Cover the loaf pan with a plastic bag or shower cap to hold in warmth and moisture. Let the dough rise for about 60 minutes, or until a finger poke slowly springs back.
- Preheat your oven to 350°F. Bake the loaf for 30 to 35 minutes, or until golden brown and the internal temperature reads 190°F. If you like a darker crust, raise the temperature to 375°F for the last 5 minutes.
- Remove the pan from the oven and let the bread rest in the pan for 10 minutes. Turn it out onto a wire rack to cool fully, at least 1 hour before slicing.
As an Amazon Associate, I earn from qualifying purchases at no extra cost to you. Thank you for your support!
