If you’ve ever admired the elegant look of tulip cupcake liners in your favorite bakery display, you’re in luck. Making your own is quick, affordable, and surprisingly simple. Not only do they add a bakery-style touch to your treats, but they’re also customizable. In today’s post, I’ll walk you through how to make your own tulip liners using parchment paper, the tools you’ll need, benefits of this method, plus extra tips to ensure success. Let’s get started!
[ez-toc]
Why Make Your Own Tulip Muffin Liners
Before diving into the how-to, let’s talk about why these liners are worth the effort. Tulip liners made from parchment paper offer several advantages:
- Cost Effective: Parchment paper is inexpensive and widely available, making this a budget-friendly alternative to store-bought liners.
- Customizable: You can adjust the size to fit any muffin tin or create larger liners for jumbo muffins and cupcakes.
- Easy Release: Prevent muffins or cupcakes from sticking to pan.
- Asthetic Appeal: The tulip shape adds a professional, bakery-style look that’s perfect for gifts, parties, or selling baked goods.
- Quick to Make: My easy instructions require very little time to make your own tulip liners.
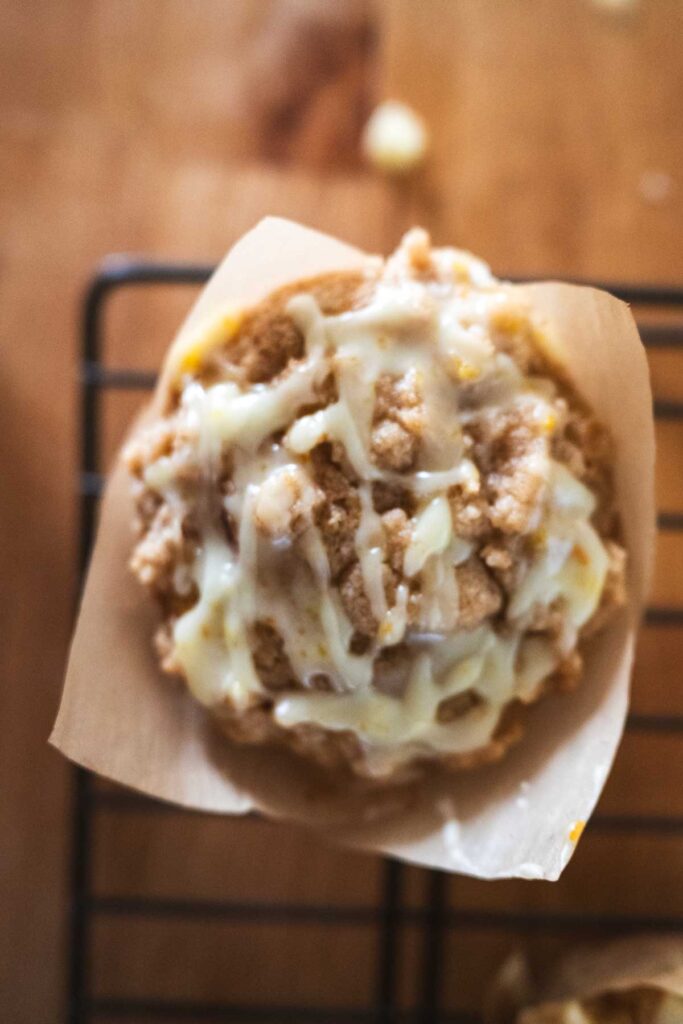
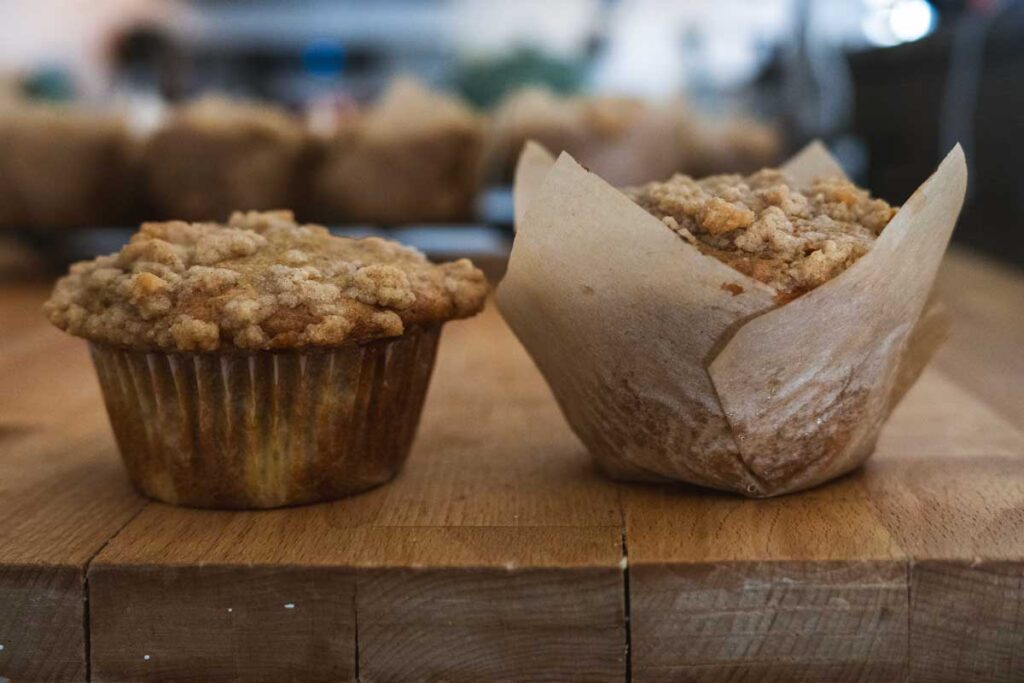
- Bigger Filling Capacity: Tulip liners increase the height of the muffin cup, allowing for fuller muffins or cupcakes without needing a jumbo tin (see comparison below with my rhubarb muffins before they were iced.)
Tools & Materials Needed
Below are the simple tools (affiliate links) you need to make your own tulip muffin liners.
- Unbleached parchment paper – use high-quality, food-safe parchment paper.
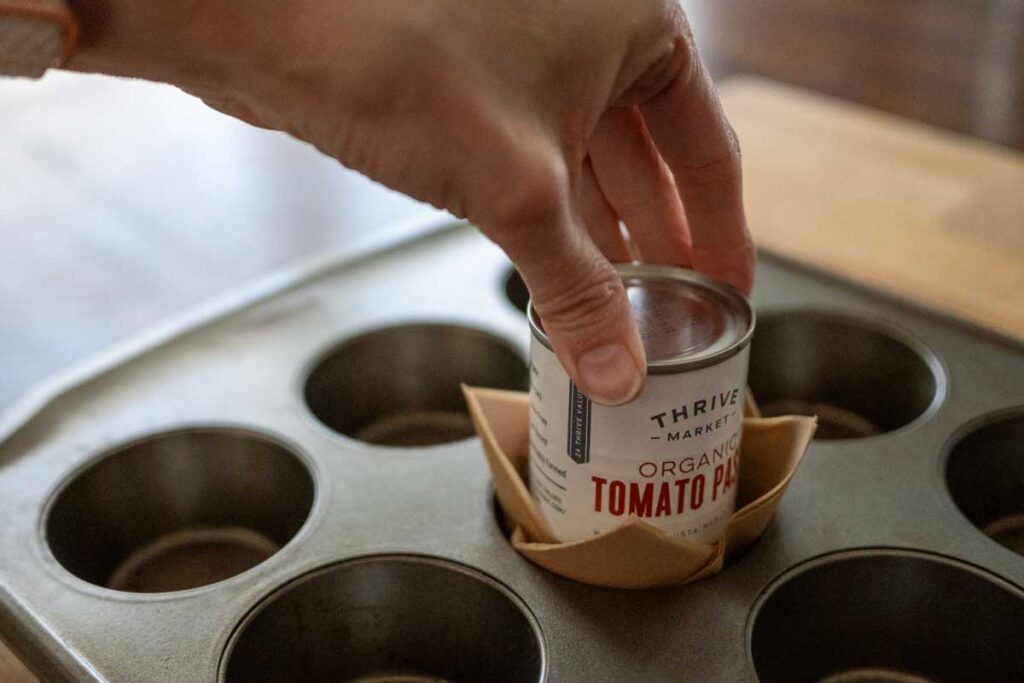
- Muffin tin or cupcake pan – to shape liners. A standard muffin tin works best, but you can also use a small can (like a 6-ounce tomato past can) as a mold.
- Kitchen Sheers – for cutting parchment paper. (Alternatively, a guillotine paper cutter or paper cutter can speed up the process if you’re cutting many liners.)
- Ruler (if not using cutter) – for measuring and marking precise squares
- Optional: Pencil or Marker – for marking measurements on the parchment, though this isn’t always necessary.
Step-by-Step Instructions to Make Tulip Cupcake Liners
Follow these easy steps to make your own bakery-style tulip muffin liners from parchment paper:
Cut the Parchment Paper
Start by cutting 5-inch squares of parchment paper. For a standard muffin tin, this size works perfectly, but you can adjust if your tin is larger or smaller.
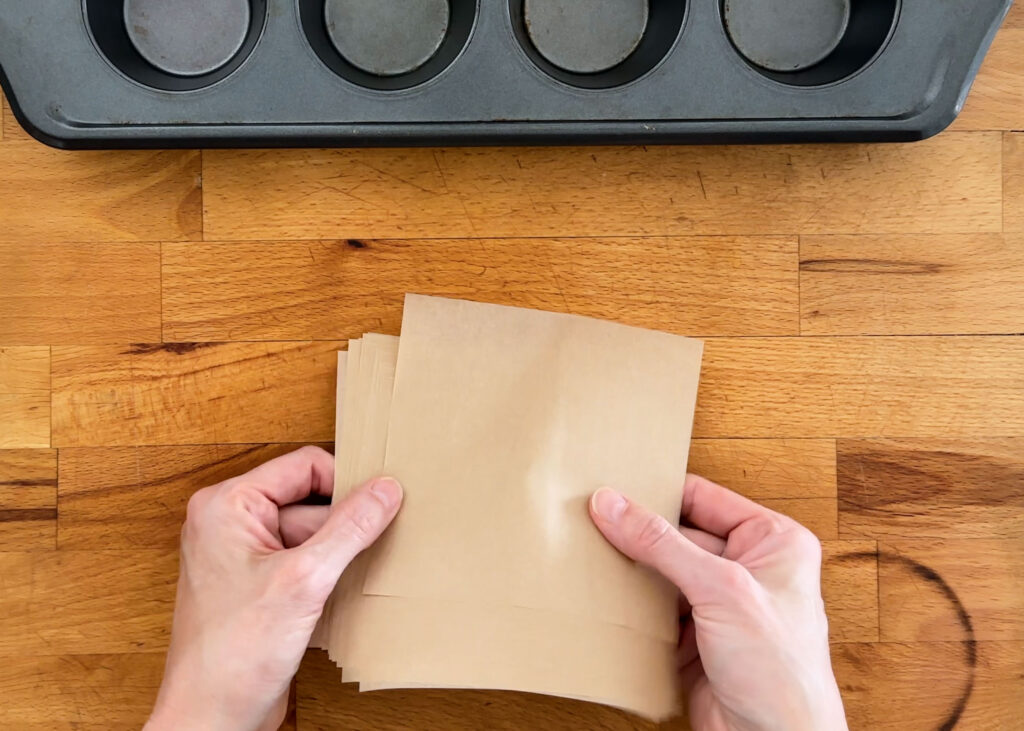
Stack 4 to 6 squares on top of each other to cut multiple liners at once. This saves time and ensures consistency.
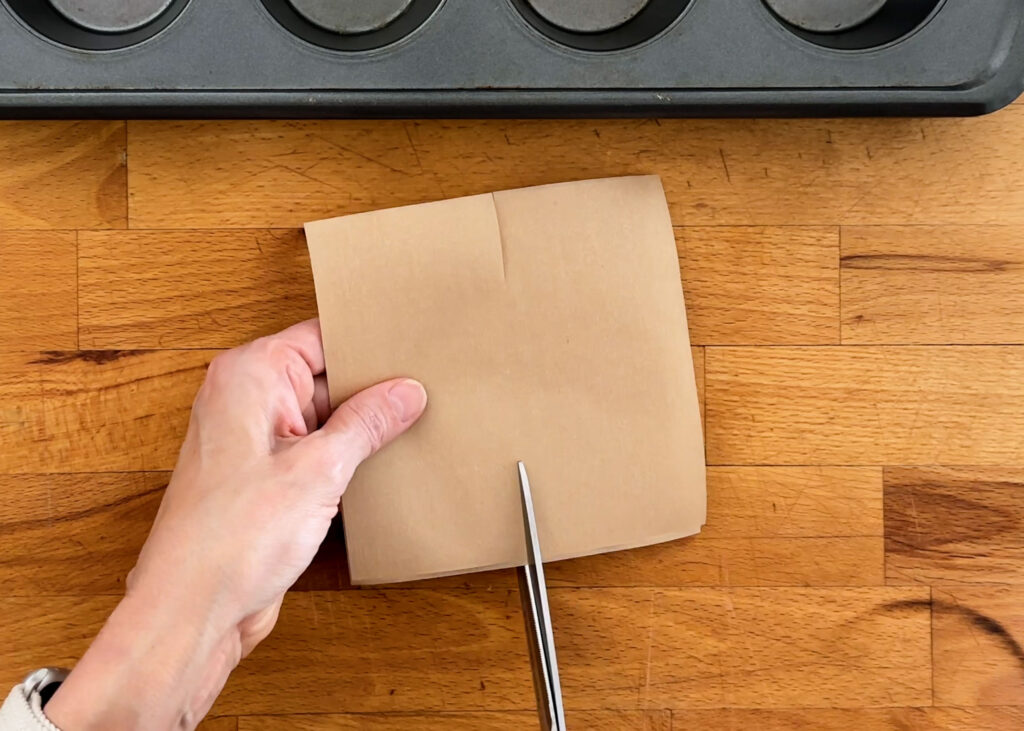
Using your ruler and scissors (or guillotine cutter), make a 1 1/4-inch slit at the center of each side of the squares. Be careful not to cut too far—if the slits are too long, the liners might slip off the muffins after baking, but they’ll still work if this happens. If your cuts are too short, this process will still work but you may have a little more folding and pressing the paper down during shaping.
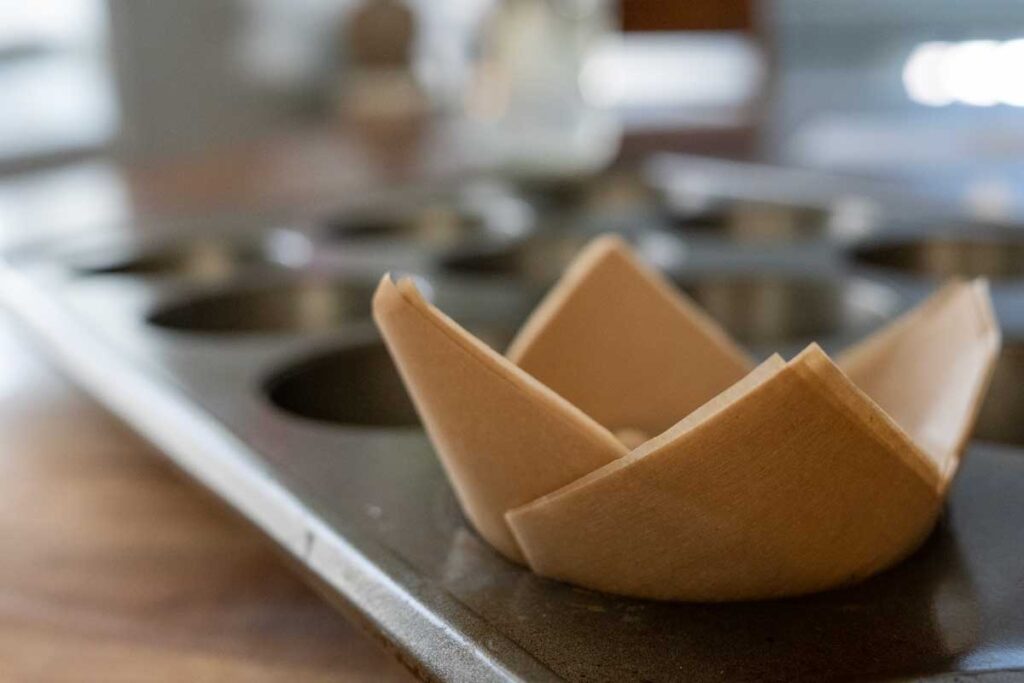
Step 2: Shape the Liners
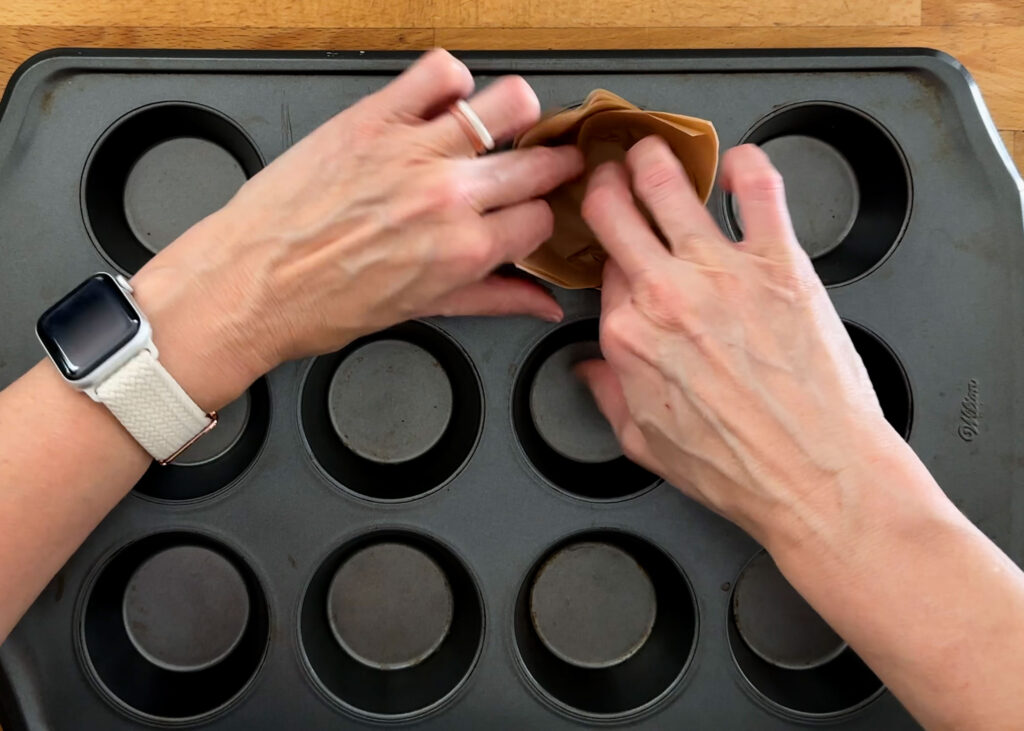
Take two opposite corners of a parchment square and press them into a muffin tin cup or over a small jar, like a 6-ounce tomato paste can.
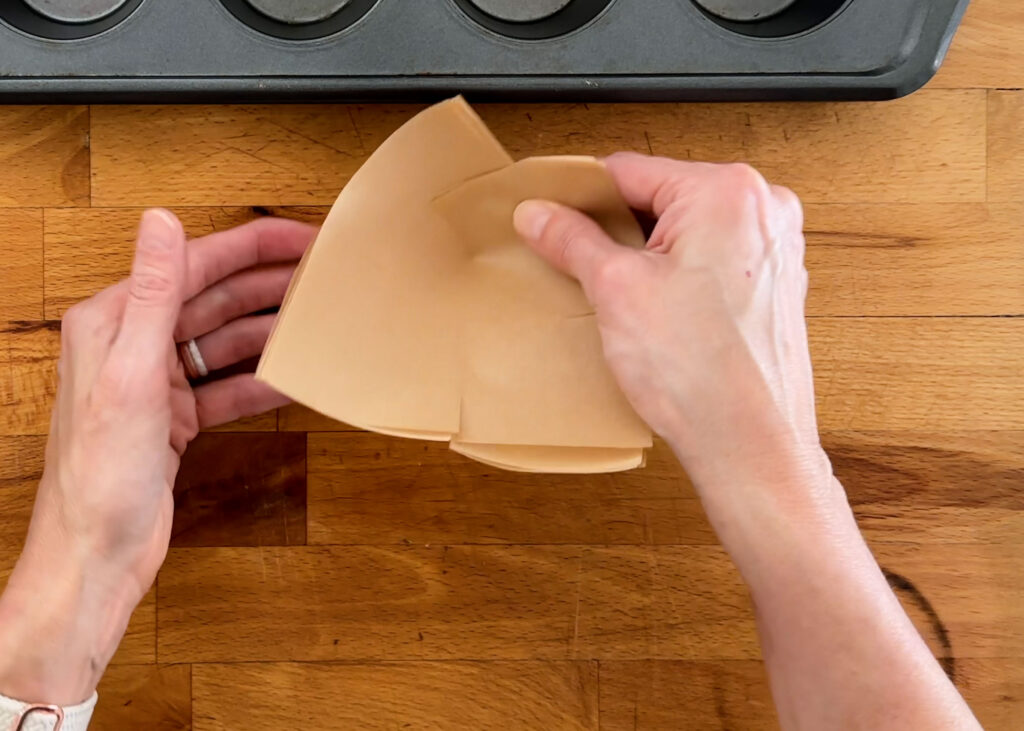
Use your fingers to press down and form a crease around the edges of the muffin tin or jar. This creates the tulip shape.
Repeat with the remaining corners, ensuring that the overlapped sections face the same direction for a neat appearance.
Press firmly at the bottom to create a strong seam, which will help the liner hold its shape during baking. You may also use your tomato paste can to press down and twist firmly to reinforce the seams.
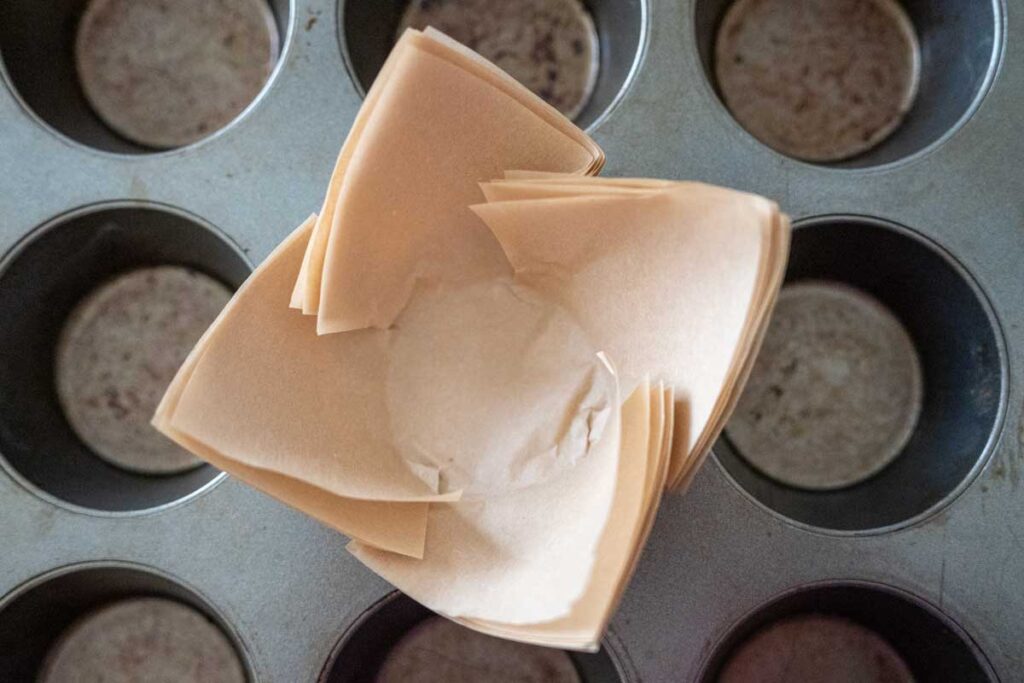
Step 3: Shape in Batches
For best results, shape your liners in batches rather than individually. Shaping them together in the muffin tin helps them hold their form better and saves time. Once shaped, leave them in the tin until you’re ready to fill them with batter.
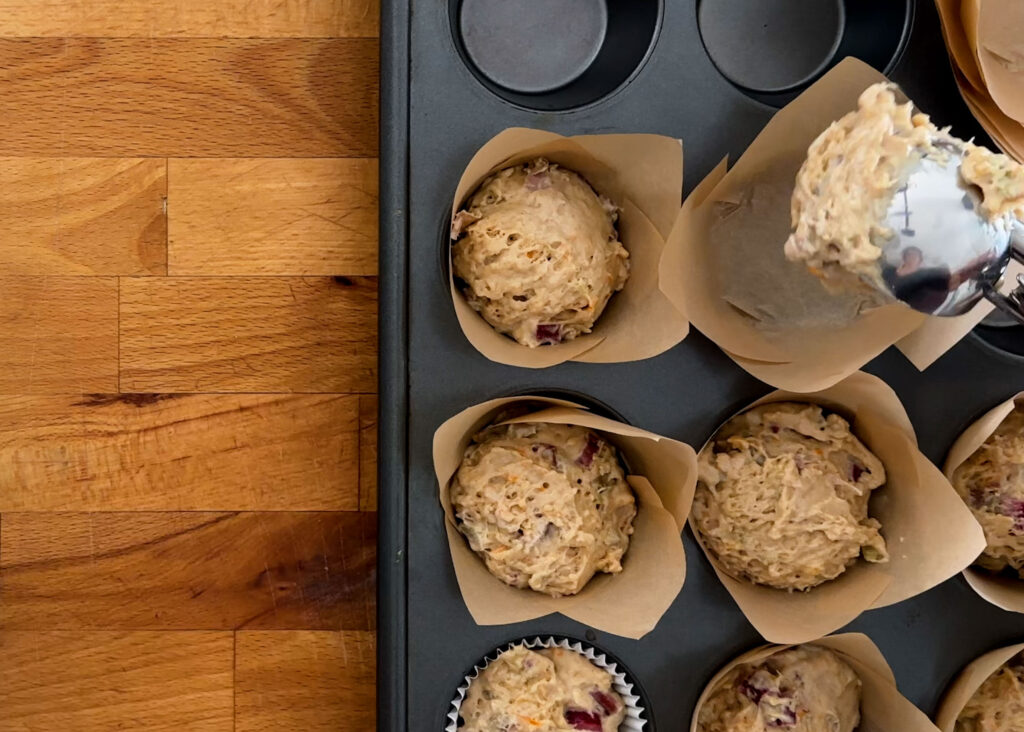
Step 4: Fill and Bake
Fill your tulip liners with muffin or cupcake batter as you normally would. The liners allow you to add a little extra batter without worrying about overflow, giving you taller, more impressive baked goods. Bake according to your recipe, and enjoy how easy they are to remove—your muffins or cupcakes will slide right out without sticking to the pan.
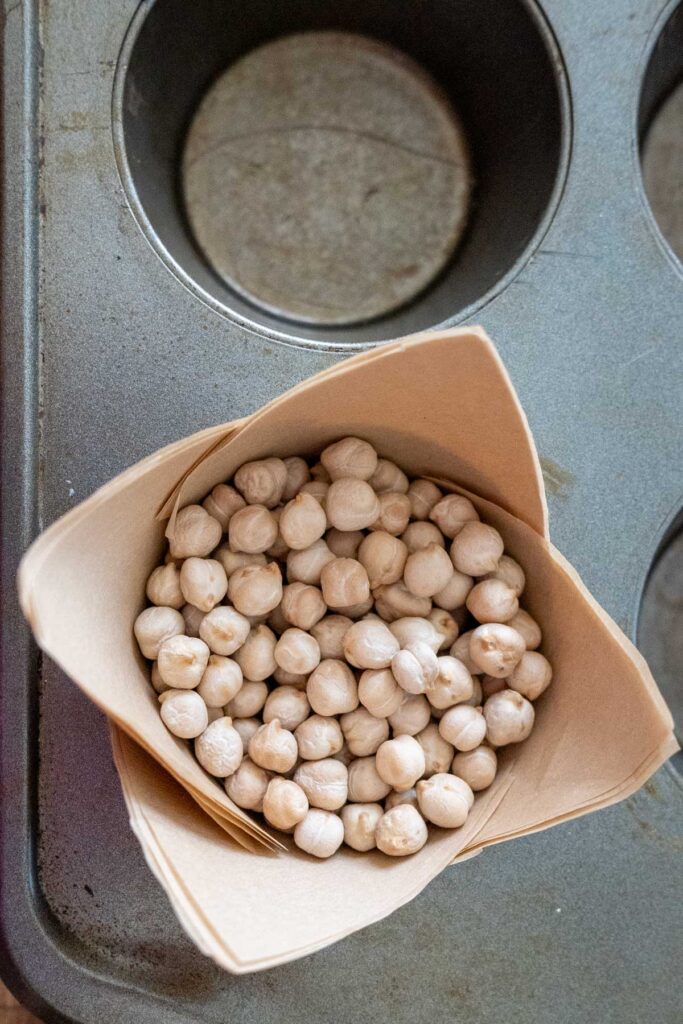
I used dried beans to weigh down my liners and demonstrate how they press down, but here is a view of my rhubarb muffins with the batter.
Tips for Success
Practice Makes Perfect: Your first few liners might not look perfect, but with practice, you’ll get the hang of creating consistent shapes.
Batch Shaping: As I mentioned, shaping liners in batches ensures they hold their form better. Avoid shaping more than 6 of them at a time if possible.
Adjust for Size: If you’re using a jumbo muffin tin or want smaller liners, simply adjust the size of your parchment squares and slits accordingly.
Storage: Store cut squares of parchment paper in a dry place until ready to use.
Additional Uses & Ideas
Tulip liners aren’t just for muffins and cupcakes. Get creative with these versatile liners:
- Use them for individual servings of cobblers, crumbles, cheesecakes or even savory snacks like mini quiches.
- Pair them with decorative baking cups for a layered look that’s perfect for special occasions.
- Gift your homemade liners to fellow bakers or include them in a baking gift basket.
Cutting Squares in Bulk
To save time, especially if you’re baking in large batches, you can precut parchment paper squares. A guillotine paper cutter allows you to stack and cut multiple sheets at once, giving you neatly uniform squares. This method not only speeds up the cutting process but also ensures consistent sizes, which is great for professional-looking results.
Video Demonstration
You can see a quick demonstration of me filling shaping and filling my liners in my Iced Orange Rhubarb Muffins video. The muffins are delicious but if you just want to see me make these liners, fast forward to 4:30 on the video:
Final Thoughts on Tulip Cupcake Liners
Making your own tulip muffin liners from parchment paper is a simple, cost-effective way to up your baking game. Whether you’re a home baker looking to impress or a small business owner saving on supplies, this DIY method is a game-changer. With just a few tools and minutes of your time, you can create professional-looking liners that make your muffins and cupcakes stand out.
Give this tutorial a try, and let me know how it goes! If you have any tips or variations, feel free to share them in the comments below. Happy baking!
As an Amazon Associate, I earn from qualifying purchases at no extra cost to you. Thank you for your support!

1 thought on “How to Make Tulip Cupcake Liners from Parchment Paper”