I don’t know about you, but my kids refuse to use a flat sheet. I’ve tried off and on since they were about 2, but the flat sheet always ended up wedged to the foot end of the bed. So we only use a fitted sheet for their beds.
Kids will be kids. It’s always nice to have an extra sheet or 3. Today I’m going to share with you how I sew my own fitted sheets from a flat (or a piece of fabric).
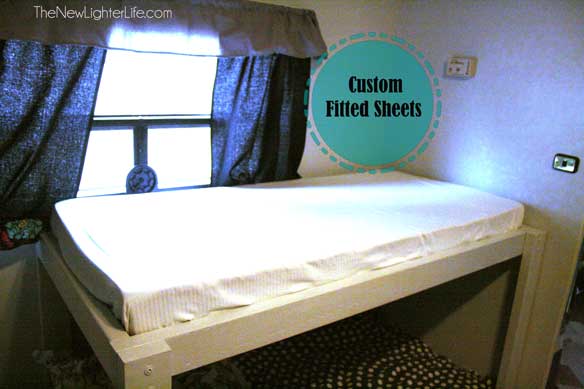
This really came in handy when we made the custom bunks for the Winnie. Since all 4 beds were odd sizes, I needed to custom fit all the sheets or deal with tucking lots of extra fabric under. I hate tucking and readjusting sheets. A mama’s got enough to do in my humble opinion.
Back to my fitted sheets…
My big kid’s mattress tops measure 27″ X 57″. The mattress thickness is 4 inches. You need to know all these measurements specifically for your own bed to fit the sheets properly. I don’t want to get hate mail because you followed my measurements. That and I doubt anyone has the same size bunks that we do. We like to be different.
But given my bed size example, here is how you figure out the size of your fitted sheet.
Width of Sheet
27 (width of the mattress)
8 (thickness of the mattress multiplied by 2)
+ 4 (for hem and overhang )
39 inches
Length of Sheet
57 (length of mattress)
8 (thickness of mattress multiplied by 2)
+ 4 (for hem and overhang)
69 inches
So you’ll want to take fabric or cut your sheets to the measurement that you find you need for your particular bed.
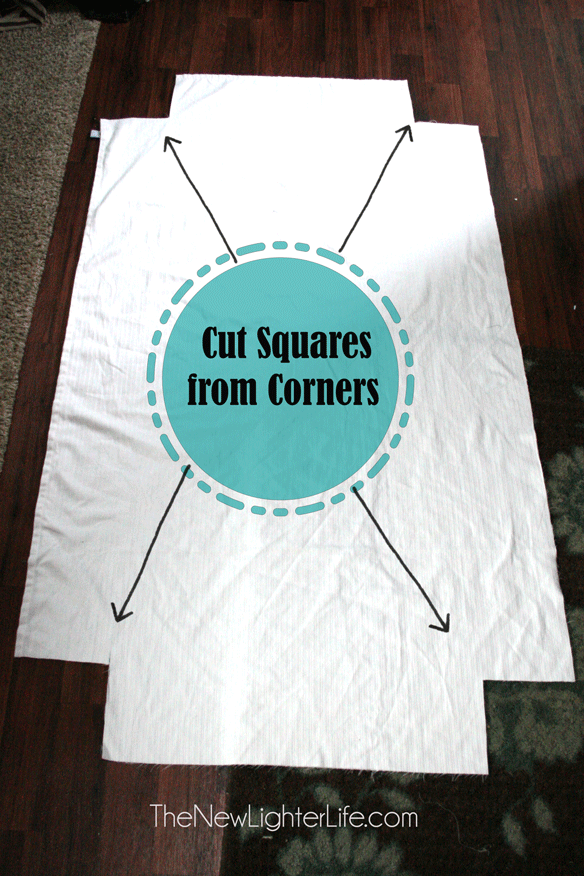
Cut Out Corners
Next you need to cut out notches so you can make your corners. As I said, I have a 4 inch thick mattress and I have allowed for 2 extra inches on each side for the hem and under tuck (if that’s a word). So I cut out a 6 inch square from each of the 4 corners of the piece of fabric.
Time to Hem
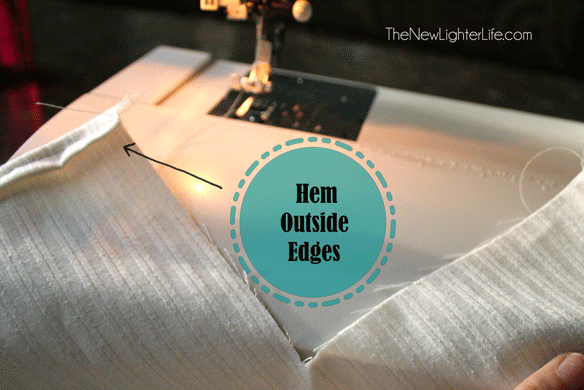
Now is the easiest time to hem your sheet. I tend to sew like a madwoman and go as fast as my machine will allow. I don’t want to have to fuss with any corners which is why I recommend sewing the corners together AFTER you have hemmed the edges.
I fold over my hem 1/4″ and then another 1/4″ and sew along the edge. I loathe pinning and have a dislike for the iron so I just do this turning under by hand as I go along with the sewing machine. It doesn’t need to be perfect.
Sew the Corners
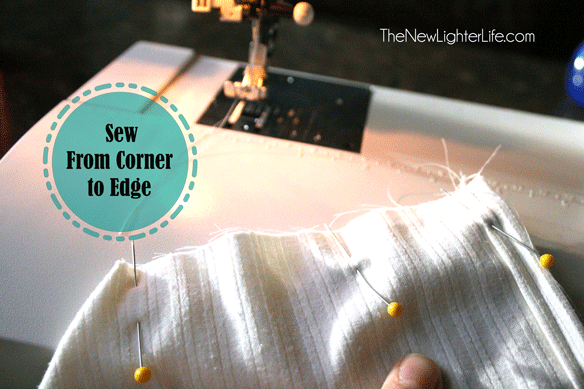
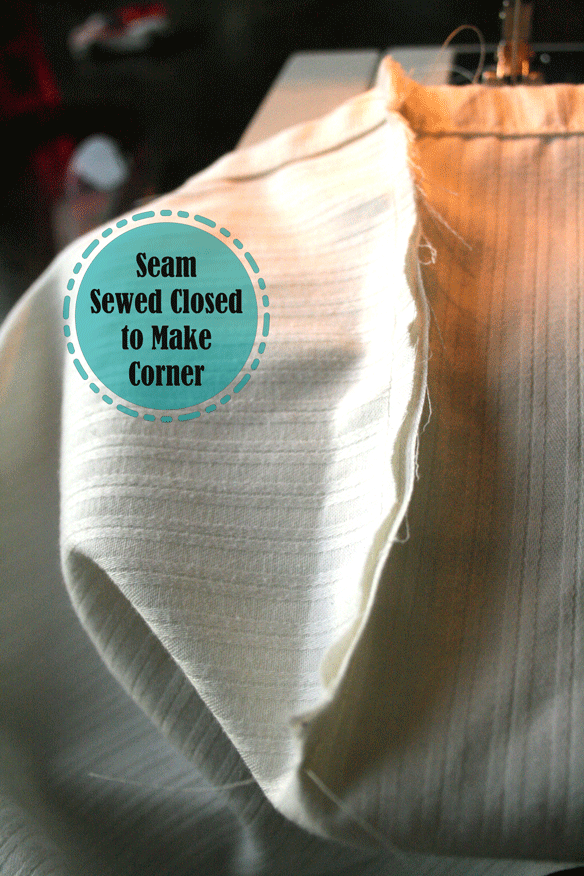
Corners need to be sewed together next. Simply line those cut out corners that are missing the 6″ squares and sew a 1/4″ seam from the point down to the edge. Now you have a nifty corner for your sheet.
Attaching Elastic
In order to get the sheet to fit around your mattress, you need to attach elastic to the edge.
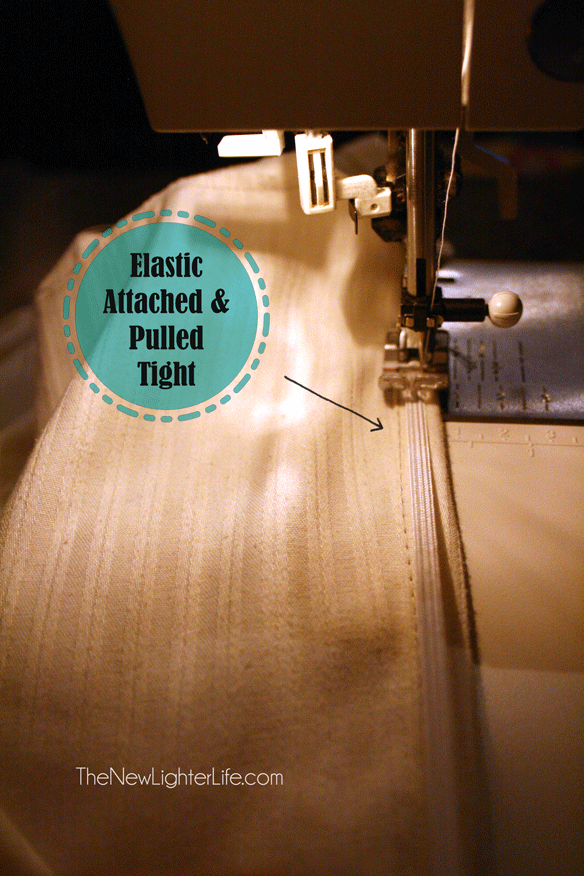
On the top of the sheet, I start on the left side about 8 or 9 inches from my corner seam and zig sag stitch a 1/4″ piece of elastic to the edge. Once I’ve got the elastic attached with a couple of stitches at the beginning, I pull that elastic VERY tight as I let the machine pull the hem of the sheet through. You just want the elastic pulled tight so it will scrunch the fabric and give you fitted corners.
I do the top of the sheet as one big strip and finish about 8 or 9 inches on the other side of the right corner.
And that is it. So easy and it makes making beds a breeze.
I’d estimate that one sheet takes less than 10 minutes to sew custom fitted sheets from start to finish. Worth the time in my book!





I have a question. I have a king flat that i want to make into a queen fitted. Any idea how much elastic i would need? Yard? Feet? Inches? Want to be sure i have enough elastic. Thanks for any replies 🙂
So I’m late responding but I’d suggest 2 yards of elastic.
Sorry but I don’t understand on which edges you sewed the elastic. Was it just the four corners? Or was it all the way around? The way I read it you started top left below the corner and finished top right before the corner, therefor skipping two corners. If that’s correct, why?
Just the 4 corners. You don’t sew all the way around (really you could but it would be a waste of elastic).
Thank you so much for the excellent tutorial. We are expecting our first grandchild this summer and our kids purchased a custom mattress to go in an antique cradle that has been in our family for 150 years. I made a fitted sheet for the new mattress and it came out perfectly. Now off to purchase some fun fabric, maybe a retro print. Wonderful tutorial!
Thank you Paula! Congratulations!
For our king size bed I bought two sets of sheets at once. I used one fitted sheet to cover the box springs. The other, for the bed. We had two flat sheets and two sets of pillow cases to rotate. When the fitted sheet began to wear out, it went below, to cover the box spring while the “new” fitted sheet went to the bed. Now, the second fitted sheet wore out. I just made a new fitted sheet using one of the flat sheets. thanks to your good instructions! We now are good for a few more years of these sheets which I want to keep because they match the decor of our bedroom.
Great ideas Martha! I’m glad you found the instructions helpful. (and I’m a big fan of frugality) 🙂
I have spend 3 hours searching for a formula to make a fitted sheet for mattresses with different depth sizes. My nephews’ mattresses are 4 inches & my niece’s is 5 inches. I finally found your site when I was about to give up. I am going to guard this information with my life & make several copies to keep in my sewing room, a chest drawer, a binder & in my computer desk. Thank you so much. I will recommend your site to others.
Thank you so much Maggie! I’m glad the instructions worked for you!
I loved making your fitted sheets, I made two: one for toddler bed and one for day bed mattress. I did both with my serger sewing machine, including the elastic.I had to piece my fabric for the day bed mattress since my fabric measured only 40″ wide. The seams ended up on the side of the mattress,so that ended up fine. Only changes I made were; I used 3/8″ elastic instead of 1/4″. Also started my elastic 9″ before corner like you did but then continued elastic all across the width of top and bottom of mattress. This helped to make fitted sheet fit tighter. Your measurements were perfect! I really enjoyed doing the whole project with the serger!!!
So glad they worked for you Susan!
As a new sewer, AND a new Rver, I need to make a couple fitted sheets for our bed. Why buy, when you can make.
That said, I was confused (at first ) when you gave the 8″ measurement “X2”, but finally my slow operating mind caught on to the idea that it was 2X 4. duh me..
Thanks for the tip. happy man here. Plus I think my wife is gonna like it also.
Thanks again,
Jack
So glad it helped Jack!!! And way to go!!
I am a beginner in sewing and I find your instructions easier to understand, and follow (unlike some posts I have checked out). thanks a bunch! 🙂
Yay!!! So glad PJ!
I have 10 inch tall queen mattress, and cal king flat sheet, and I had to cut off the side of the sheet and sew it on the end to make it tuck in enough. First one I didn’t, and that one keeps slipping out at the end. Your instructions are great, however I decided to pin, because mattress corners are rounded, not straight as in the box, so I fee I get better fit this way, but I am sure it is okay like you did too.
Glad you found a way that works for you Daiva. I’m definitely a lazier seamstress. LOL!
Instead of stitching the elastic to the sheet, Can i not make a running slot through the entire edge of the sheet and then insert a elastic through the slot and tie both the edges together with tightening as much as i want
This way I can adjust the tightness of the elastic
Yes, that will work quite well Neerja! Best wishes!