
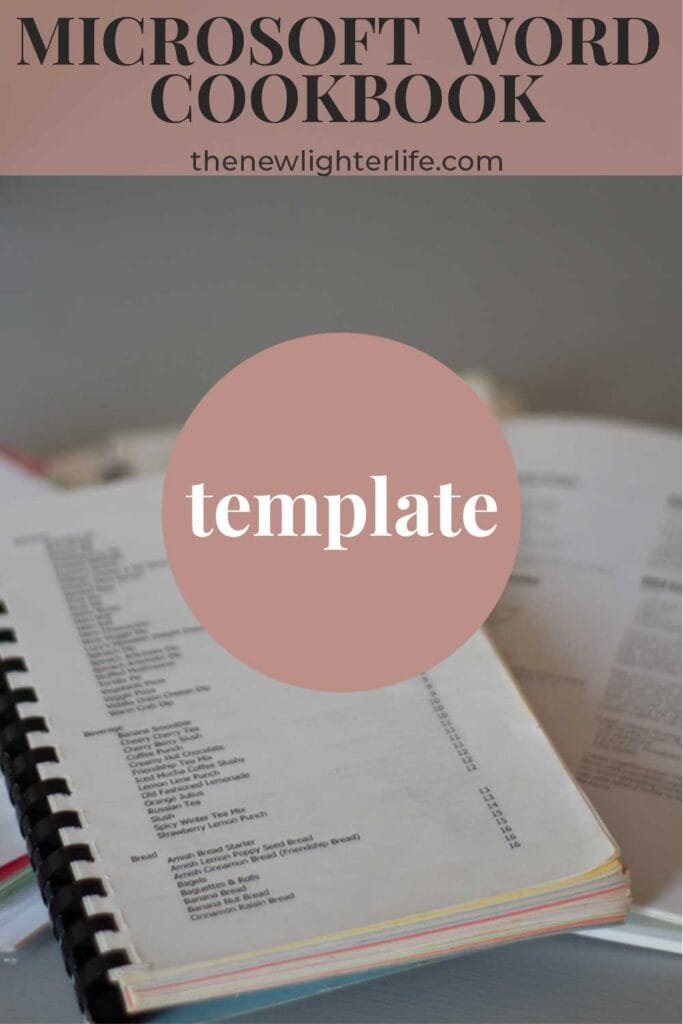
For many families, delicious home-cooked food IS family. If you’ve collected cherished family recipes throughout the years creating your own custom cookbook is the perfect solution to pass on those family recipes. A family cookbook is a collection of favorite recipes that you have mastered over the years. It is a perfect gift and a way to share those top-secret family recipes and catalog some meaningful moments and family history. In this blog post, I will guide you through the process of designing a Microsoft Word cookbook template so you can easily share your favorite recipes.
**UPDATE** I’ve made some updates to the template by adding images and making Heading 1 and Heading 2 less cumbersome. I encourage you to check out the posts linked below before you get too far into making your cookbook. The video in this post is foundational to using styles, which you will need for your cookbook regardless of your design. **END OF UPDATE**

Cookbook Recipe Series
In case you missed it, I have published a series of blog posts over the past year or so that explore all aspects of creating a cookbook from cover to back:
- The 4 Affordable Binding Options for Your Cookbook
- Three FREE Recipe Book Covers Covers
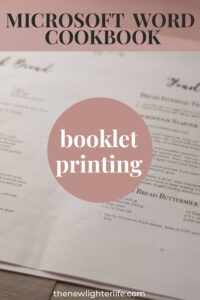
- Printer Settings to Print Cookbook as a Booklet
- Categories for Cookbooks
- Updates to the Table of Contents with Fields
- Creating a Cookbook Index
- Adding Images to Your Cookbook Template
- FREE Cookbook Category Divider Pages & Cover
A Perfect Solution for Recipe Collectors
I come from a LONG line of recipe collectors. Through the years, my family has unashamedly asked for recipes from friends and family members. Because of this, we’ve amassed tons of favorite recipes.
Growing up, I watched my mom type recipe books up on the library typewriter and created her own cookbook for the whole family.
Each recipe book was her labor of love to us. Her cookbooks also included funny stories of life on the farm. I’m sure family and friends were thrilled to get those cookbooks my mom made way back then.
Today, I treasure the family memories and recipes she shared in her recipe books.
As I got older, I started helping her compile recipes into digital cookbooks for printing. In total, I’ve worked on 5 different cookbooks for family and our church. I’ve learned a trick or two about the best way to work in MS Word to create a cohesive recipe book with a table of contents that is neatly organized.

The Drawback to Professional Cookbook Printing
Before I show you how to make your own, let me address that there are cookbook publishing companies that will do all the styling for you. But handing over the reins to a professional has 3 major downsides.
- The number one downside is cost. While a publisher will do the legwork to compile, format, print, and bind your recipe book, they often charge per recipe and revision. Often your price per cookbook is significantly higher depending on the number of cookbooks.
- Loss of control of the creative process. If you are sending scanned copies of your recipes, there are bound be to mistakes. Revisions will cost you.
- One shot and it’s done. Using a publisher prevents you from adding recipes to your cookbook. Once you submit the cookbook to be printed, you’d have to start the process over at the beginning if you wanted to add to your cookbook.
I recognize there are benefits to using a professional such as being able to easily select preformatted design templates, layouts, covers, kitchen helps and tips pages, and dividers. Follow along with me in further posts and I’ll delve into those topics.
Understanding the Basics of Cookbook Design
Before we dig into designing a cookbook template, let’s go over the basics of cookbook design.
A cookbook should be visually appealing, easy to read, and easy to navigate. The design of your cookbook should reflect your style and personality and showcase your recipes and your creativity.
A cookbook with consistent fonts, colors, and layout is easier and more enjoyable to follow.
Tips for Successful Recipe Book Design
Here are some tips for successful cookbook design:
- Photos: If you choose to include photos within your recipe, you’ll want to use high-quality pictures that showcase the end result. Your photo should be clear, bright, and appetizing.
- Choose the right fonts: The font you choose should be easy to read and reflect your culinary style. Avoid using too many fonts as it can make the book look cluttered. You can easily google font pairings for some quick ideas.
- Use color wisely: Use color to highlight important sections of the book. Use colors that complement each other and make the book look visually appealing. Be mindful of printing and ink costs for printing in black & white versus color.
- Keep it simple: Avoid using too many design elements as it can make the book look cluttered. Keep it simple and let your recipes speak for themselves.
- Make it personal: Include a note section or introduction to capture family details around a recipe. Or maybe Dad really loved to make a recipe while camping, write those down to preserve your loved ones’ memory.
- Decide the final recipe book print size. For my video below, I demonstrate a final print size of 5.5″ x 8 1/2″. How you create your template will be determined by your desired recipe book size. I have found it’s easiest to do this upfront.
Benefits of Using Styles to Make Your Cookbook Template
By using styles in Word, you are able to achieve that consistency. The style you create will be applied throughout the entire cookbook.
I have provided you with a cookbook template that you can use to get started.
In the video below, I demonstrate how to easily create a cookbook template with a table of contents that is easy to navigate. Let’s get started on creating your very own cookbook!
How to Make Cookbook Templates
Setting up the Layout & Margins
The first step in designing a cookbook template is setting up the page layout and margins. Open Microsoft Word and create a new document. Go to the “Page Layout” tab and select “Margins.” Based on the two most common size cookbooks, I suggest you set your margins as follows:
- Standard Size (8.5″ x 11″) – Just be sure your left margin has enough room for binding. (I recommend Left: 1.25″)
- Booklet Printing (5.5″ x 8.5″) – Top: 0.58″ Bottom: 0.5″, Left: 1.25″, Right: 1.25″
The margin size should be large enough to allow for binding but not too large that it takes up too much space.
Once you have set up the page layout and margins, you can start adding sections to your cookbook template.
Basic Overview of Working with Styles
I highly recommend you watch the video below where I demonstrate working with styles. (you can fast forward to 2:33 minutes if you want to skip my rambling).
Most cookbooks are organized by major categories, (i.e. Bread, Breakfast, Appetizers, etc.). You may also want to include subcategories, (i.e. Yeast Bread, Quick Bread, etc.).
When you create your recipe sections, you will mark your sections with the Styles Heading 1 (main category) or Heading 2 (for the subcategory).
To Add a Recipe Section (Major Category)
- Create a new page and type the major category names.
- Highlight each category and select “Heading 1” in the styles pane.
- You can use a different font or color for the title to make it stand out.
- Whatever portion of the template you are editing, click the specific style’s far-right triangle and select “Update to Match Style.”
You’ll continue this general process as you format your recipe title, notes, ingredients, instructions, etc.
Formatting Your Recipe Templates for Readability & Visual Appeal
Recipe design is important for readability and visual appeal. Use number bullets for instructions and tabbed ingredient lists.
I cannot stress enough, the value of using the styles pane which will help you make sure your text, images, ingredients, etc. are all aligned and have the same font size and weight.
For the free template and the video, the three fonts I used are Bodoni 72 Small Caps, Catandra Script, and Century Gothic.
If you do not have those fonts, it’s not a game-changer. Just know that when you open the document, you must update your template to the fonts you wish to use.
Adding Headers, Footers, and Page Numbers
Headers, footers, and page numbers are important in a cookbook template. Headers and footers can include the name of your cookbook and your name. Page numbers make it easy to navigate through the book.
To add headers and footers, go to the “Insert” tab and select “Header” or “Footer.” Choose the design you prefer and add the text you want to include. To add page numbers, go to the “Insert” tab and select “Page Number.” Choose the design you prefer and place the page number where you want it to appear.
You may also customize your header and footer so experiment away with the style you prefer.
Creating a Table of Contents
A table of contents makes it easy to navigate through your cookbook. Since you have used your “Heading 1” and “Heading 2”, you’re able to create a table of contents very easily.
To insert your TOC into your recipe book template:
- Click the “References” tab.
- Select “Table of Contents.”
- Choose the design you prefer and the level of headings you want to include.
The table of contents will update automatically as you add or remove sections from your cookbook.
To update your table of contents after additions to your cookbook, you’ll just need to right-click in the inserted table and click and select “Update Field.”

Conclusion on Making Your Own Cookbook
In conclusion, designing a cookbook template using Microsoft Word is easy and fun. Follow along in my video below to create a visually appealing and easy-to-read cookbook that preserves your family’s cherished recipes. Just remember to choose the right fonts, colors, and recipe format, add headers, footers, and page numbers and include a table of contents.
With these tips, you can create a cookbook that will impress your family, friends, and maybe even publishers. Happy recipe preserving!


Thank you for a very informative video about creating a cookbook. I have been trying to create my own cookbook FOREVER and have never been satisfied. I am giving this a go, and hope to settle this fight for good.
I do have a question. I am working on a Windows PC, when I use the table of contents, clicking on a recipe name will not take me to that page. Is this an Apple feature or is something not formatting correctly?
Thank you,
Julie
Hi Julie! I hope you are happy with the results of making your own cookbook template.
To answer your question…in my experience, tables on my Windows PC are also clickable. Are you able to hold the Ctrl key and click to go to the recipe? If that does not work, the only other thing I can think of is to see if you can change some of your options or settings in how Microsoft Word is set up on your computer.
Note: The table will not be clickable or hyperlinked if you are viewing your cookbook on your phone. I emailed my cookbook to myself and tried opening it on my iphone and it will not work on there.
Hello – Your template is beautiful and I cannot wait to use it when converting all my mother’s hand written and clipped recipes into her own binder. The problem is I am unable to download the cookbook template because I cannot add the Chrome extension for some reason. Is there another way to download the template?
Hi Mimi! I’m finally getting to responding to comments and see you can’t download the template. Please check your email inbox for the document. (it may be in your spam as well)
Blessings!
Where can I download the template. I can’t find the link anywhere.
Hi Lydia,
You can find the template here,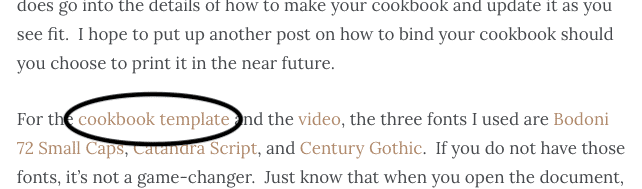
Blessings!
I watched your videos and love how you set everything up at the beginning. I want to make my cookbook in a 5 X 7 size. Can you tell me how to do that in Word?
Hi Cindy,
The simplest way I can think of to do this is to adjust your margins and trim your paper once you print. I’ve not done this with my cookbooks so you may have to adjust your print settings. In case you haven’t seen how to print in a booklet format, you can find details on doing that here, h
You may want to start with a new document that is formatted with wider margins and then build your template. If you’ve already started entering your recipes in the template I provided that has wider margins, you can try adjusting your document margins. Before you do that, be sure to adjust your ingredient list tab stop. If you have 2 columns you may want to go to one column or adjust tabbing. Any other indents based on style will also need to be adjusted before you update margins
In tinkering around with settings, I think the following will work for your 5 X 7-inch cookbook.
MARGINS
Top: 2″
Bottom: 2″
Left: 2″
Right: 1.75″
Gutter: 0″
HEADER/FOOTER
2.15″ from top (Header) and from bottom (Footer)
I hope this helps! Blessings!
Thank you so much for sharing your template and for the helpful video–I learned a lot about setting styles.
Do you create an index for your cookbooks? I’d like to create one, so if you have tips, please share!
Like the previous commenter, I, too, have started and abandoned this task several times, but I hope to follow it through this time. My children are getting old enough that I’d like to have a shareable print and electronic recipe collection for them as they leave the nest.
Hi Meredith! So glad it was helpful! It is a huge undertaking to catalog recipes, especially if you’ve collected winners over many years. I know for certain, they will be so thankful for your recipes when they venture off on their own. 🙂
I must confess, I had not thought about adding an index. I’m so glad you as thought because I think that would be very helpful. I have this addition on my to-do list and I hope to get a post and update to the template up on the blog sooner rather than later.
In the meantime, you may want to check out this link which explains the process very well, https://support.microsoft.com/en-us/office/create-and-update-an-index-cc502c71-a605-41fd-9a02-cda9d14bf073
I have 4 Granddaughters that I want to create recipe’s for this Christmas. But, I’m going to assume that unless they have Word on their laptops they will not be able to pull these up to work from direct from the screen?
My apologies for the extremely late response to your questions Rhoda as we are well past Christmas now! What an incredibly thoughtful gift for your granddaughters!!
Your granddaughters could still pull up your cookbook on their laptops without Microsoft Word if you save it as a PDF.
I hope this helps you next time!
Hi Julie, I subscribed but never received a confirmation email with the cookbook template download.
Am I missing something here?
Grace Bowman
My apologies for the lag in responding to your question.
If you click on “cookbook template” (circled in black) in the post, it will automatically download your template. You may have to allow downloads or pause any popup blocker.
Hi there! I just came across your how-to video on Youtube. Did you add any pictures to your cookbook? I am wanting to create a family cookbook, however pictures would be a huge part of it. I wanted to know if pictures would work in the template you designed.
Hi Lisa,
I’ve been playing around with my template quite a bit and hoping to find an easy way to add photos. After all my time messing with the template, the good news is that you CAN insert a picture. However, the bad news is it will take some tinkering in the template current version.
If you’re up for it, here is what you can do. Click the “Insert” tab and click on “Pictures”. Once you insert your photo, you’ll need to right-click the photo and select to adjust layout. Depending on how you want your photo to be included, you would adjust the position and text wrapping tabs. You can also crop the image so it is the correct size you need for your cookbook.
In my version shown, I updated the Recipe Title (Heading 3 in the template Style) so the title would be centered. My image position (from adjusting the layout) is set to allow overlap and move with text. Text Wrapping is tight. I did this so I can shift my image to the left or right of the page. Now whenever I add a new photo, I copy and paste the image that is formated correctly and those characteristics will be applied to all future images. All I need to do is update the photo that is being pulled in for the recipe.
NOTE: The grey/green box was inserted in the header section of the document so it will be on every page (but this was strictly for aesthetics).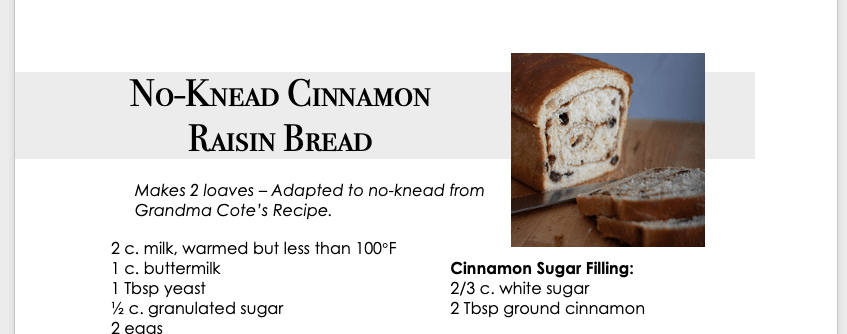
Now if you’d made it all this way, I think there may be an easier way to insert photos into the cookbook but it would require tables. I’ll keep messing around and may put up a new post about the options for getting photos in there. I hope this helps in the meantime!